Egg and Cheese Stuffed Baked Potato Skins

1 Comment


All Photos © Christine Elise McCarthy 2013

To see images of my past posts & get links to the recipes – look on my Pinterest board – HERE.

images (1)download (1)

~

All my posts now have a VERY customizable PRINT & PDF option.  Create a PDF & save the recipe to your computer or print it out.  It offers a “remove images” option & you can delete any part of the post you do not need before printing.  The button is below by the Twitter & Facebook links.

~

Image

This recipe is really just a guide.  You could put any little combo of omelette ingredients you prefer in these.  I made one with 2 whole eggs & one with scrambled eggs & Velveeta (These potatoes were huge.  For smaller potatoes – just use one egg).  I overcooked the whole egg one & it came out like this – basically in an “over hard” or hard boiled state.

Image

Some people like their yolks cooked through.  For that – these were in the oven for about 25 minutes.  Reduce it to 15-18 minutes or so & you should get cooked whites & a runnier yolk.

Again – anything you might like in an omelette could be diced & added to these.  Hollandaise might be nice, too!

Egg and Cheese Stuffed Baked Potato Skins

Ingredients I used

Potatoes

Olive oil

Eggs

Velveeta

Grated cheddar & mozzarella mix

Parsley

Tomato

S&P

Image

Image

Image

DIRECTIONS

Heat the oven to 400 degrees.

Wash the potatoes & rub them with olive oil.  Pierce the deeply all over with a fork or knife.  Coat all over with salt.  Place them directly on the rack with a pan beneath to catch anything that might fall.   Depending on how big they are – they should be done in 45-60 minutes.

Image

Image

Image

Lower the temperature of the oven to 350 degrees.  Scoop out the interior of the potato.  Use the pan from the oven & create little support bowls out of foil to stabilize the potato boats.

Image

Image

Image

Place the boats on the foil supports.  Fill with whatever ingredients you are using.

Image

Image

Image

Image

Image

Image

Bake at 350 for 15-18 minutes for a softer yolk or up to 25 minutes for the egg to be cooked through.

Garnish as you will & swill these guys down – holding them in your hand like a hot dog – with a lesser champagne made tastier with the slightest addition of OJ.  Finish the champagne.  Nap.

Image

Image

Image

Balsamic Portobello Mushroom “Cheese Steak” Sub Sandwich (Vegetarian or Vegan)

3 Comments


All Photos © Christine Elise McCarthy 2013

To see images of my past posts & get links to the recipes – look on my Pinterest board – HERE.

images (1)download (1)

~

All my posts now have a VERY customizable PRINT & PDF option.  Create a PDF & save the recipe to your computer or print it out.  It offers a “remove images” option & you can delete any part of the post you do not need before printing.  The button is below by the Twitter & Facebook links.

~

Image


vromans front

vromans back

These are pretty easy & even more decadent & delicious!  You could make it with real skirt steak or something or, if you are vegan, use a vegan cheese.

It is Christmas week & my badass boyfriend, Miles, is in town.  I have chilled champagne & a warm man under my roof.  I plan to enjoy them both as much as possible so I will just post this as a recipe.  Enjoy!

Image

Image

Balsamic Portobello Mushroom “Cheese Steak” Sub Sandwich (Vegetarian or Vegan)

Makes two subs

INGREDIENTS

2 hoagie rolls (softer is better than crusty)

1 green bell pepper (or other color) – sliced

1/2 onion – sliced

4 portobello mushrooms – chopped

3 garlic cloves – minced

Provolone cheese or Velveeta or Cheese Whiz or vegan alternative

olive oil

balsamic vinegar

Image

Image

Image

Image

Image

DIRECTIONS

Heat the oven to 250 degrees.

Heat a tablespoon or so of olive oil in a saute pan over medium heat.  Saute the onions & peppers until soft – maybe 5-10 minutes.  Add garlic and incorporate.  Drizzle with a tablespoon (or more to taste) of balsamic vinegar & separate into two portions in the pan.

Image

Image

Image

Image

Image

Top with whatever cheese you are using & heat, covered, for a few minutes or until the cheese gets melted.  I used a slice of provolone on each of these.

Image

Image

Cut your rolls taking care not to cut all the way through them.  Add the mushrooms & cheese & top with more cheese.  I used Velveeta on one & provolone on the other.

Image

Image

Image

Image

Now wrap them VERY tightly in aluminum foil.  Squeeze these bad boys to about half their original diameter.  Heat them for about 15-20 minutes.

If you make them in advance & want to reheat them – do that at 350 degrees for about 25-30 minutes.

Unwrap them, get a beer & get your fucking eat on all veggie Philly-style!

Image

Image

Image

Easy, Lite & Creamy Vegan Cauliflower Hummus Dip

1 Comment

All Photos © Christine Elise McCarthy 2013

To see images of my past posts & get links to the recipes – look on my Pinterest board – HERE.

images (1)download (1)

~

All my posts now have a VERY customizable PRINT & PDF option.  Create a PDF & save the recipe to your computer or print it out.  It offers a “remove images” option & you can delete any part of the post you do not need before printing.  The button is below by the Twitter & Facebook links.

~

Image

Image

It’s Christmas!!!!  Make yourselves a cocktail & whip together this easy & low calorie dip!  It has a very Indian food flavor profile so expect that more than a traditional hummus.

I know you have lots going on today & I do, too, so I will get right to the point.  HAPPY CHRISTMAS!

Image

Creamy Vegan Cauliflower Hummus Dip

1 head cauliflower – steamed or boiled until tender

2 TBS tahini

2 TBS olive oil plus extra for drizzling

4 garlic cloves

juice of 1 lemon

1 tsp sriracha (or other hot sauce) – optional

1/4 tsp each of: salt, pepper, onion powder, garlic powder, cumin & paprika

Crackers, chips, pita or veggies for dipping

Image

DIRECTIONS

Blend everything together in a food processor or blender.  You might need a bit of water or more olive oil to get it really creamy.  Taste it & adjust the spices & sriracha if you think it needs more of some of them.  Put it in a serving bowl & drizzle with a bit of olive oil & some additional paprika.

Serve!

Image

Spicy Ground Beef Taco Pasta – Vegan, Vegetarian – or Not!

4 Comments

All Photos © Christine Elise McCarthy 2013

To see images of my past posts & get links to the recipes – look on my Pinterest board – HERE.

images (1)download (1)

~

All my posts now have a VERY customizable PRINT & PDF option.  Create a PDF & save the recipe to your computer or print it out.  It offers a “remove images” option & you can delete any part of the post you do not need before printing.  The button is below by the Twitter & Facebook links.

~

vromans front

vromans back

Image

This is Hamburger Helper level easy & surprisingly yummy.  It can be made with real ground beef or a vegan variety like this from Trader Joe’s:

Image

I found this brand to be a very convincing fake ground beef.

You can make this with real cheese or vegan cheese – or no cheese at all as it really doesn’t need it.

But before I get into THAT – I want to get into THIS!

Image

I wrote a novel!  Yes, yes – I did!  It is currently in production & should become available through online outlets (like Amazon) sometime after mid-January.  Just in time for Valentine’s Day!  So all you bitter kiddies out there can read the HILARIOUS love misfortunes of the heroine – Ruby Fitzgerald.  Buy the book & curl up with it & a box of wine & get ready to read the FUNNIEST BOOK EVER WRITTEN.  Yes.  I used those words.  I am very confident that anyone who reads of the alcohol-driven, bad decision making of Ruby Fitzgerald WILL laugh – literally out loud – several times.

OK – back to food.  This is tasty & easy & excellent comfort food when you want to throw something together fast.

Image

Spicy Ground Beef Taco Pasta – Vegan, Vegetarian – or Not!

Serves 2

INGREDIENTS

1/2 lb dry pasta (but not Barilla brand – as they are homophobic)

12 oz ground beef (vegan or otherwise)

1 onion – diced

1 bell pepper (mine was orange) – diced

1 jalapeno – seeded & diced

Olive oil

1 10 oz can Rotel (or other diced tomato – or fresh tomato diced)

1 7 oz can chiles (or to taste) – chopped

1 tsp salt

1/2 tsp ground cumin

1 tsp chipotle chili powder (or cayenne)

1 TBS dry oregano

For garnish

scallions – sliced

fresh cilantro

Fresh tomato – diced

Avocado

Sliced jalapeno

Grated cheese – vegan or otherwise

Image

Image

Image

DIRECTIONS

Cook the pasta according to directions.  Drain & set aside.

If using real meat – cook it up in a skillet & set aside.

Otherwise – heat a TBS or two of olive oil in a frying pan.  Saute the onion, jalapeno, bell pepper & green chiles until soft over medium heat.  Add the Rotel & the meat (vegan beef or cooked ground beef) and the dry spices.  Heat through.

ImageImage

Image

Image

Add the pasta & stir to incorporate.  Serve with garnishes of your choice.  See?  EASY!

12-19-13 (145)

Easy & Healthy Crispy Baked Onion Rings

Leave a comment

All Photos © Christine Elise McCarthy 2013

To see images of my past posts & get links to the recipes – look on my Pinterest board – HERE.

images (1)download (1)

~

All my posts now have a VERY customizable PRINT & PDF option.  Create a PDF & save the recipe to your computer or print it out.  It offers a “remove images” option & you can delete any part of the post you do not need before printing.  The button is below by the Twitter & Facebook links.

~

Image

This is as straight forward as it gets.  They came out crispy & delicious & they use no oil.  I don’t know why anybody would bother frying them after sampling these.

Image

Easy & Healthy Crispy Baked Onion Rings

Feeds two as a side

INGREDIENTS

1 large sweet onion – sliced into thick rings & separated

1 quart buttermilk (or milk or vegan alternative)

1/2 cup Panko

1/2 cup breadcrumbs

1 cup corn flakes – crushed in a food processor or in a plastic bag using a rolling pin

1/2 tsp salt

1 TBS pepper

1 TBS dry parsley

Fresh parsley – chopped as garnish

Cooking spray

Parchment paper

Image

DIRECTIONS

Heat the oven to 450.  Be sure it reaches full temperature.

Soak the onions in the buttermilk in the refrigerator for at least an hour – or longer.

Image

Image

Mix the various crumbs, dry parsley and S&P together.

Individually coat each onion ring with the crumb mixture either by shaking in the plastic bag or, as I did, in a bowl.  Use your hands to coat them evenly.  Place them on a cooking sheet covered in parchment paper or greased.  Spray them with the cooking spray.

Bake at 450 for ten minutes or until crispy & golden.  That’s it!  Enjoy!

Image

Vegan Marinated Chicken Banh Mi Sandwich

Leave a comment

All Photos © Christine Elise McCarthy 2013

To see images of my past posts & get links to the recipes – look on my Pinterest board – HERE.

images (1)download (1)

~

All my posts now have a VERY customizable PRINT & PDF option.  Create a PDF & save the recipe to your computer or print it out.  It offers a “remove images” option & you can delete any part of the post you do not need before printing.  The button is below by the Twitter & Facebook links.

~

12-17-13 (87)

This fucker was awesome!  There are a few steps to assemble the ingredients but they are all easy.  You can make this with any sort of chicken substitute you might like.  I am obsessed with Beyond Meat strips.  They do not have an overpowering taste & can easily be manipulated & I like the texture, too.

Beyond-Meat1

Beyond101


Traditionally, banh mi have pork in them but I haven’t found a decent fake pork – unless you believe that pork is “the new white meat.”  If so – this fake chicken could masquerade as fake pork, too.

This takes a few hours of planning ahead so that you can marinate the chicken & pickle the carrots & jalapeno (and daikon – if you have it.  I did not).

If you cannot find vegan fish sauce – there are lots of pretty simple recipes for vegan fish sauce HERE.  Whatever you do, do not skip the marinade because it tastes great & the sriracha mayo is good enough to eat with a spoon.

Image

Image

Marinated Chicken Banh Mi Sandwich

Makes two sandwiches

INGREDIENTS

2 crusty rolls or some high quality baguette

8 oz faux chicken

1 avocado – cut into slices

1/2 cucumber – sliced thin

leafy lettuce

2 radishes – sliced thin

1 jalapeno – seeded & sliced thin

cilantro

Olive oil or cooking spray

For the pickled vegetables

1 carrot – cut into matchsticks

daikon – cut into matchsticks

1 jalapeno – seeded & cut into matchsticks

3 cups warm water

3 TBS sugar

2 TBS salt

4 TBS white or rice vinegar

For the marinade

1/4 cup low sodium soy sauce

6 garlic cloves (or to taste) – minced

4 shallots (or 1/2 small onion) – diced

2 TBS fish sauce (vegan version – or omit it)

1 tsp sugar

2 tsp Chinese five spice

1 TBS hoisin sauce

1 tsp sriracha (or to taste)

For the spicy mayo

1/4 cup vegan mayo

1 lime

3 TBS sriracha

Image

DIRECTIONS

Heat the oven to 350.

For the pickled vegetables

Warm the water & add the sugar, salt & vinegar & stir until the sugar & salt dissolve.  Put the matchstick veggies in a bowl or jar & cover with the warm water mix.  Store in the fridge for at least and hour or two.

12-17-13 (40)

Image

For the marinade

Blend all the marinade ingredients & add the chicken to it.  Store in the fridge for at least an hour.

Image

For the spicy mayo

Blend the mayo with the sriracha & the juice of the lime.  Store in the fridge.

Image

Image

For the Banh Mi

Prepare the cucumber, avocado, radishes & jalapeno.  Set aside.

Heat a frying or grill pan.  Treat it with cooking spray or olive oil & cook up the marinated chicken.  Set aside.

Image

Scoop the soft part of the bread out & throw it away.  Heat the bread in the warm oven for 5 minutes.

To assemble – simply spread some spicy mayo on the bread.  Then layer on some chicken.  Then pickled veggies (drained well!) & radish slices.  Add sliced cucumber & jalapeno.  Add lettuce & cilantro.  Add some avocado.  Smash it together.  Shove it in your face – and feel free to dip it in the extra spicy mayo.

See?  What’d I tell you?

Image

Image

Image

Image

Image

Image

Image

Image

Spicy Vegetarian Buffalo Chicken Pasta

Leave a comment

All Photos © Christine Elise McCarthy 2013

To see images of my past posts & get links to the recipes – look on my Pinterest board – HERE.

images (1)download (1)

~

All my posts now have a VERY customizable PRINT & PDF option.  Create a PDF & save the recipe to your computer or print it out.  It offers a “remove images” option & you can delete any part of the post you do not need before printing.  The button is below by the Twitter & Facebook links.

~

Image

I made this for myself the night I made by badass boyfriend, Miles, this Easy Spicy Southern Chicken Spaghetti.

Image

You could easily leave out the faux chicken or sub it out with some cooked real chicken.  This is really just all about the Velveeta & the Buffalo sauce.  Easy, naughty & delicious!

This casserole fell victim to the same oven mutiny that the Chicken Spaghetti did so my first effort had a VERY crispy top & the inside was more dry than I’d hoped.  I fixed it by simply adding more melted Velveeta heated with some milk, tossed it all together, topped with a bit more cheese & panko & then just heated that through until the panko browned.

Below are my two efforts – the original & the redesigned leftovers.

Image

Image

Spicy Vegetarian Buffalo Chicken Pasta

INGREDIENTS

1/2 lb dry pasta – cooked

8 oz vegan chicken (or cooked real chicken)

1 TBS butter

1 TBS flour

3/4 cup milk (plus extra for reheating leftovers)

8 oz Velveeta (plus extra for reheating leftovers)

1 cup grated cheese (I used a mozzarella/cheddar mix)

1/3 cup Frank’s Buffalo sauce (or Frank’s Hot Sauce or other hot sauce) – plus extra as garnish

S&P

3/4 cup Panko or other bread crumbs

Crumbled blue cheese or Gorgonzola as garnish (optional) or a dollop per serving of blue cheese dressing

Scallions and/or cilantro and/or parsley as garnish (optional)

Image

Image

Image

Image

DIRECTIONS

Cook the pasta & real chicken (if you are using real chicken).  Set aside.

Heat the oven to 375 degrees.

Melt the butter in a stock pan and heat over medium heat until bubbly.  Whisk in the flour.  Whisk constantly until the roux begins to brown – maybe 1-2 minutes.  Slowly whisk in the milk – allowing it to thicken.  Add the Velveeta, hot sauce & real/faux chicken.  Mix.  Add the pasta.  Add S&P to taste.

Image

12-11-13 (66)

Image

Prepare a casserole pan with cooking spray or butter.  Place the pasta mix & top with grated cheese & bread crumbs.  Bake for 20-25 minutes or until the cheese is melted & bubbling at the edges & the bread crumbs are beginning to brown.

Serve this bad boy up topped with crumbled blue cheese of some kind or with a bit of blue cheese dressing & some cilantro/scallions & drizzle with even more hot sauce.  Eat until your pants feel tight.  When you are done – head out to the store & by some cheap wine & the largest bag of Doritos available.

Image

Consume those until you have visible chemical burns in your mouth from the toxic Doritos.  Keep drinking through the pain.  Watch The Voice.  Complain out loud to sleeping dogs about how LAME this season is.  Post a few tipsy Facebook comments along those same lines.

Image

Indulge in some ZZZquil.  Fall asleep.

Wake up.  IMPORTANT PART: skip the gym.

Go the donut shop.  Do some of this to yourself.

ImageImage

Before the sugar high wears off – do this to yourself.

Image

Go home eating this shit in the car.  Wipe your hands on your pants.

Weigh yourself & curse the heavens for not fulfilling your weight loss goals.

Image

Easy Spicy Southern Chicken Spaghetti

191 Comments

All Photos © Christine Elise McCarthy 2013

To see images of my past posts & get links to the recipes – look on my Pinterest board – HERE.

images (1)download (1)

~

All my posts now have a VERY customizable PRINT & PDF option.  Create a PDF & save the recipe to your computer or print it out.  It offers a “remove images” option & you can delete any part of the post you do not need before printing.  The button is below by the Twitter & Facebook links.

~

LARGE BathingandthesinglegirlOrangeV52

My debut novel is out!  Check it out!  I think it is HILARIOUS!  I hope you will, too!

www.BathingBook.com

Wanna watch the ten minute comedy that spawned the book – HERE you go!

9507098

~

Image

I am from Boston.  I had never heard of chicken spaghetti.  My badass boyfriend, Miles, is from Little Rock and, apparently, grew up on it.  It can be a tricky business to attempt to recreate a dish you have never tasted yourself.  And Miles is a finicky eater & likes his stuff the way he likes it.  I repeatedly asked him to describe chicken spaghetti to me but, not a cook himself, he seemed at a loss.  I asked him to get the recipe from his grandmother – but he neglected to & now she is gone – her chicken spaghetti secrets gone along with her.

Still – I persisted.  I badgered him & I researched and, ultimately, it seemed to me that chicken spaghetti was basically a version of Miles’ own “World Famous Cheese Dip” – with chicken & spaghetti added.  I made it the other day & Miles declared it the best he’d ever had!  So – I present it to you now.

One thing, though.  My oven staged a mutiny & refused to stay at the suggested 350 degrees.  It kept mysteriously dropping to under 200.  At that temp, the cheese would never get all melted & bubbly.  The result was that it sat in the oven for twice the 45 minutes I initially planned.  The result was a VERY crunchy top:

Image

I like a crunchy top but the interior was also more dry than I had intended.  Miles ate it happily but the next day, when I reheated some for him, I tossed it in a little newly melted additional Velveeta heated with a bit of milk.  It worked wonders & I recommend this step in reheating yours.  The two photos at the very top show the results directly from the oven & the other shows the reheated portion with extra cheesy sauce.  Also – know this is a VERY easy dish to prepare.  It could be made without the chicken or with some vegan substitute.  If you do this – use a vegetarian soup, too.  It is really all about the cheese & the spice!

And – as a quick aside – look what I got in the mail today!!!  I love me some Pee Wee!

MERRY CHRISTMAS!

Image

Image

Image

Easy Spicy Southern Chicken Spaghetti

Serves 6-8

INGREDIENTS

1 lb pasta – cooked

1 lb chicken tenders

2 TBS butter

12-16 oz Velveeta (plus extra if you want to add more when you reheat it – see above notes – or if you like a wetter dish use the full 16oz.  Go less for a mac-n-cheese texture – more for an Alfredo kinda thing.)

1 cup milk

1 10 oz can Rotel (tomatoes & chilies)

1 10 oz can cream of chicken soup (or cream of mushroom or cream of celery)

1/2 tsp cumin

2 TBS sriracha or other hot sauce

1 cup Panko or other bread crumbs

1 cup grated cheese (I used a cheddar & mozzarella mix)

S&P to taste

Parsley and/or crushed red pepper as garnish

Image

ImageImageImage

DIRECTIONS

Cook & drain the pasta.

Spray a grill or frying pan with cooking spray & cook the chicken tenders & then cut them up.

ImageImageImage

Melt the butter in a deep stock pot sprayed with cooking spray, too.  The cooking spray seemed to make the inevitable browned/burned bits of cheese easier to clean off later.  Add the Velveeta, Rotel, soup, milk, hot sauce & cumin & melt it all together over med-high heat.  Add the chicken.  Toss it with the pasta.  I added about 1 TBS of black pepper here.  You add S&P to taste.

Spray a casserole dish with cooking spray & put the chicken spaghetti in it.  Top with grated cheese & bread crumbs.

Cook at 350 for about 30 minutes or until the cheese is bubbling & the bread crumbs brown a bit.

Image

Image

Image

Image

Image

Image

Garnish with parsley or crushed red pepper or more hot sauce.  Eat it up & promise to join a gym after the new year.  Until then – fuck it!  Melt some more Velveeta in a pan with a bit of milk.  Reheat the leftover chicken spaghetti & toss it with the additional melted cheese.  Shove it your face.  Have some Fireball whiskey, too.  Why not?  You are gonna join the fucking gym in January – so FTW!  And while you get likkered up & gain 40 pounds of Velveeta-induced poundage – look at my recipe for Spicy Extra Crispy Southern Fried Chicken

Image

or my Spicy Southern Fried Cauliflower and Delta Dipping Sauce with Smashed Baked Potatoes and White Gravy and Buffalo Mac & Cheese

Image

and decide to make that shit, too!

ImageImageImage

Vegetarian Chicken & Broccoli Carbonara with Roasted Tomatoes

1 Comment


All Photos © Christine Elise McCarthy 2013

To see images of my past posts & get links to the recipes – look on my Pinterest board – HERE.

images (1)download (1)

~

All my posts now have a VERY customizable PRINT & PDF option.  Create a PDF & save the recipe to your computer or print it out.  It offers a “remove images” option & you can delete any part of the post you do not need before printing.  The button is below by the Twitter & Facebook links.

~

Image

OK – these might not be the prettiest photos of food you have ever seen & I apologize but this dish was still delicious.

I also apologize for being rather slack about posting at all but I have been consumed by putting the final touches on my debut novel, Bathing & the Single Girl.  I expect to have it out early next year.  It is a comic, mockumemoir.  It is raunchy & hilarious & I hope you all read it!

Anyway – I made this dish with the leftover parsley pappardelle & roasted tomatoes from my Homemade Parsley Pappardelle with Roasted Tomatoes & Creamy Chanterelle Mushrooms from a few days ago.

Image

You can use any kind of pasta you like for the dish but I think I would recommend spaghetti.  If roasting tomatoes sounds like a pain in the arse – blow that off.  The dish will be okay without them.

Also – I tried this new brand of vegan chicken.

Image

They make more of an effort to make this stuff look like grilled chicken but I like the cheaper version from Trader Joe’s better.

Image

That Trader Joe’s version makes THE BEST Vegan Orange Chicken ever!

Image

You could make this dish with real chicken, too.  Or – if you are a fan of smoked salmon – try my Smoked Salmon Spaghetti Carbonara!

Image

Image

Vegetarian Chicken & Broccoli Carbonara with Roasted Tomatoes

Serves 2

INGREDIENTS

For the roasted tomatoes

10-20 grape or cherry tomatoes – halved

olive oil

4 garlic cloves – chopped

A few fresh rosemary sprigs – stems removed & chopped

S&P

For the Carbonara

1/2 lb pasta

6-8 oz vegan (or other) chicken

2 (or more) cups of small broccoli florets

olive oil

4 cloves garlic – minced

2 eggs

1/2 cup grated Parmesan

Crushed red pepper (optional)

S&P to taste

Parsley as garnish

Extra Parmesan for garnish

ImageImage

DIRECTIONS

For the roasted tomatoes

Toss the halved tomatoes with the diced garlic, rosemary, 1-2 TBS olive oil and S&P.  Roast on parchment or otherwise lined cooking sheet at about 350-40 for 20-25 minutes.  Set aside.

For the carbonara

Whisk the eggs with the Parmesan.  Add about 1 tsp black pepper.  Set aside.

ImageImage

Heat 2 TBS olive oil in a large saute pan.  Saute the chicken (or faux chicken) until it begins to brown.  If using real chicken – cook it through.  Set aside.

Add another TBS olive oil to the pan & saute the broccoli and about 1 tsp (or to taste) or crushed red pepper.  When it is tender – add the garlic & cook for another minute.  Add the chicken & the roasted tomatoes (if using) & set aside on very low heat.

Cook the pasta, drain it & immediately toss it with the raw egg & cheese mixture.

ImageImage

Add the egg/pasta to the chicken & broccoli & heat it all through.

Serve with S&P to taste & lots of Parmesan & chopped parsley.

Image

Chocolate, Cheesecake, Pumpkin & Pecan Layered Pie with a Shortening-free Pie Crust

1 Comment

All Photos © Christine Elise McCarthy 2013

To see images of my past posts & get links to the recipes – look on my Pinterest board – HERE.

images (1)download (1)

~

All my posts now have a VERY customizable PRINT & PDF option.  Create a PDF & save the recipe to your computer or print it out.  It offers a “remove images” option & you can delete any part of the post you do not need before printing.  The button is below by the Twitter & Facebook links.

~

Image

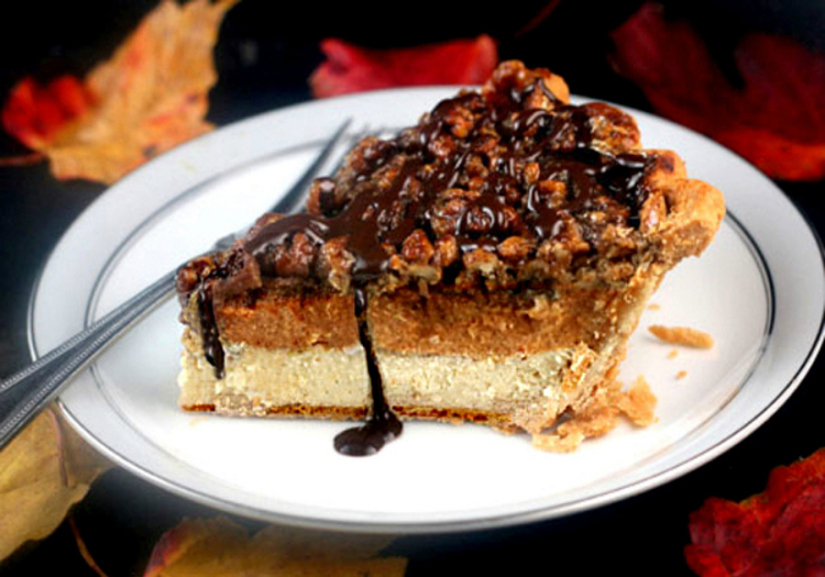
(Photo of the slice of pie above is from Parsley, Sage & Sweet)

I am not much of a baker.  I almost never eat sweets & I live alone so – making a pie or a cake just means 1) I get fatter and 2) lots of whatever I made gets thrown away.  The exceptions to this rule are birthdays & holidays.

Last Christmas, I made a Chocolate Cinnamon Cannoli Tart but if you click that link there you will find out how that tart met a violent & untimely end.

ImageImage

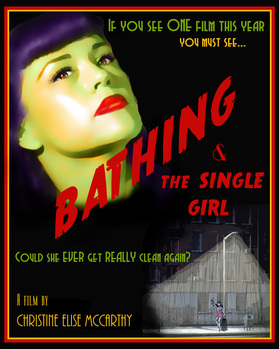
This year, I worked all day on this barely tweaked adaptation of Parsley, Sage & Sweet‘s multi-layered pie & was petrified it would meet a similar fate or that I would drop it getting out of the car or tripping on steps.  I am happy to report that the pie made it all the way to the dessert table but before that happened – this happened:

ImageImage

That is to say, we ate a LOT of food & consumed even more wine so that, by the time we were cutting into the pie, I was holding one eye closed to keep from seeing two of them.  Two pies, that is.  I was pie-eyed when it was pie time and, thus, took exactly zero photos of the pie once it got sliced up.  So, I have no lush portraits of the interior of this baby but I can tell you – it was delicious.

I can also tell you it took a long time to make but that was due to a number of factors.  1) I made the crust from scratch.  You need not do that.  You could use a ready made crust.  2) I roasted my Halloween pumpkin & made the pumpkin pie layer with fresh pumpkin puree.  This is a very easy step to skip.  Just use some unsweetened, canned pumpkin.  Easier still, use canned pumpkin pie mix.  3) each layer needs to chill, even freeze, before the next layer can be added or it will all blend together.  It will all get blended in your mouth when you eat it so taste is not the concern.  But, if the layers blend, it won’t look like what Parsley, Sage & Sweet achieved up there.

You can easily eliminate any of the layers without any great loss to the overall deliciousness of this pie – so – give it a try – why don’t you!

Image

Shortening-free Pie Crust

INGREDIENTS

1 1/4 cups flour

1/4 tsp salt

1/3 cup VERY COLD butter

4-6 TBS VERY COLD water

DIRECTIONS

In a large bowl, mix the flour & salt.  Slice the butter up & work it into the flour.  I did this in my food processor by pulsing it until it was all crumbly.  Little chunks of butter in the dough are okay.  Add the water a tablespoon at a time until the dough just comes together.  Don’t add so much that it gets sticky or gooey.  Wrap in plastic wrap & chill while you prepare the pie layers.

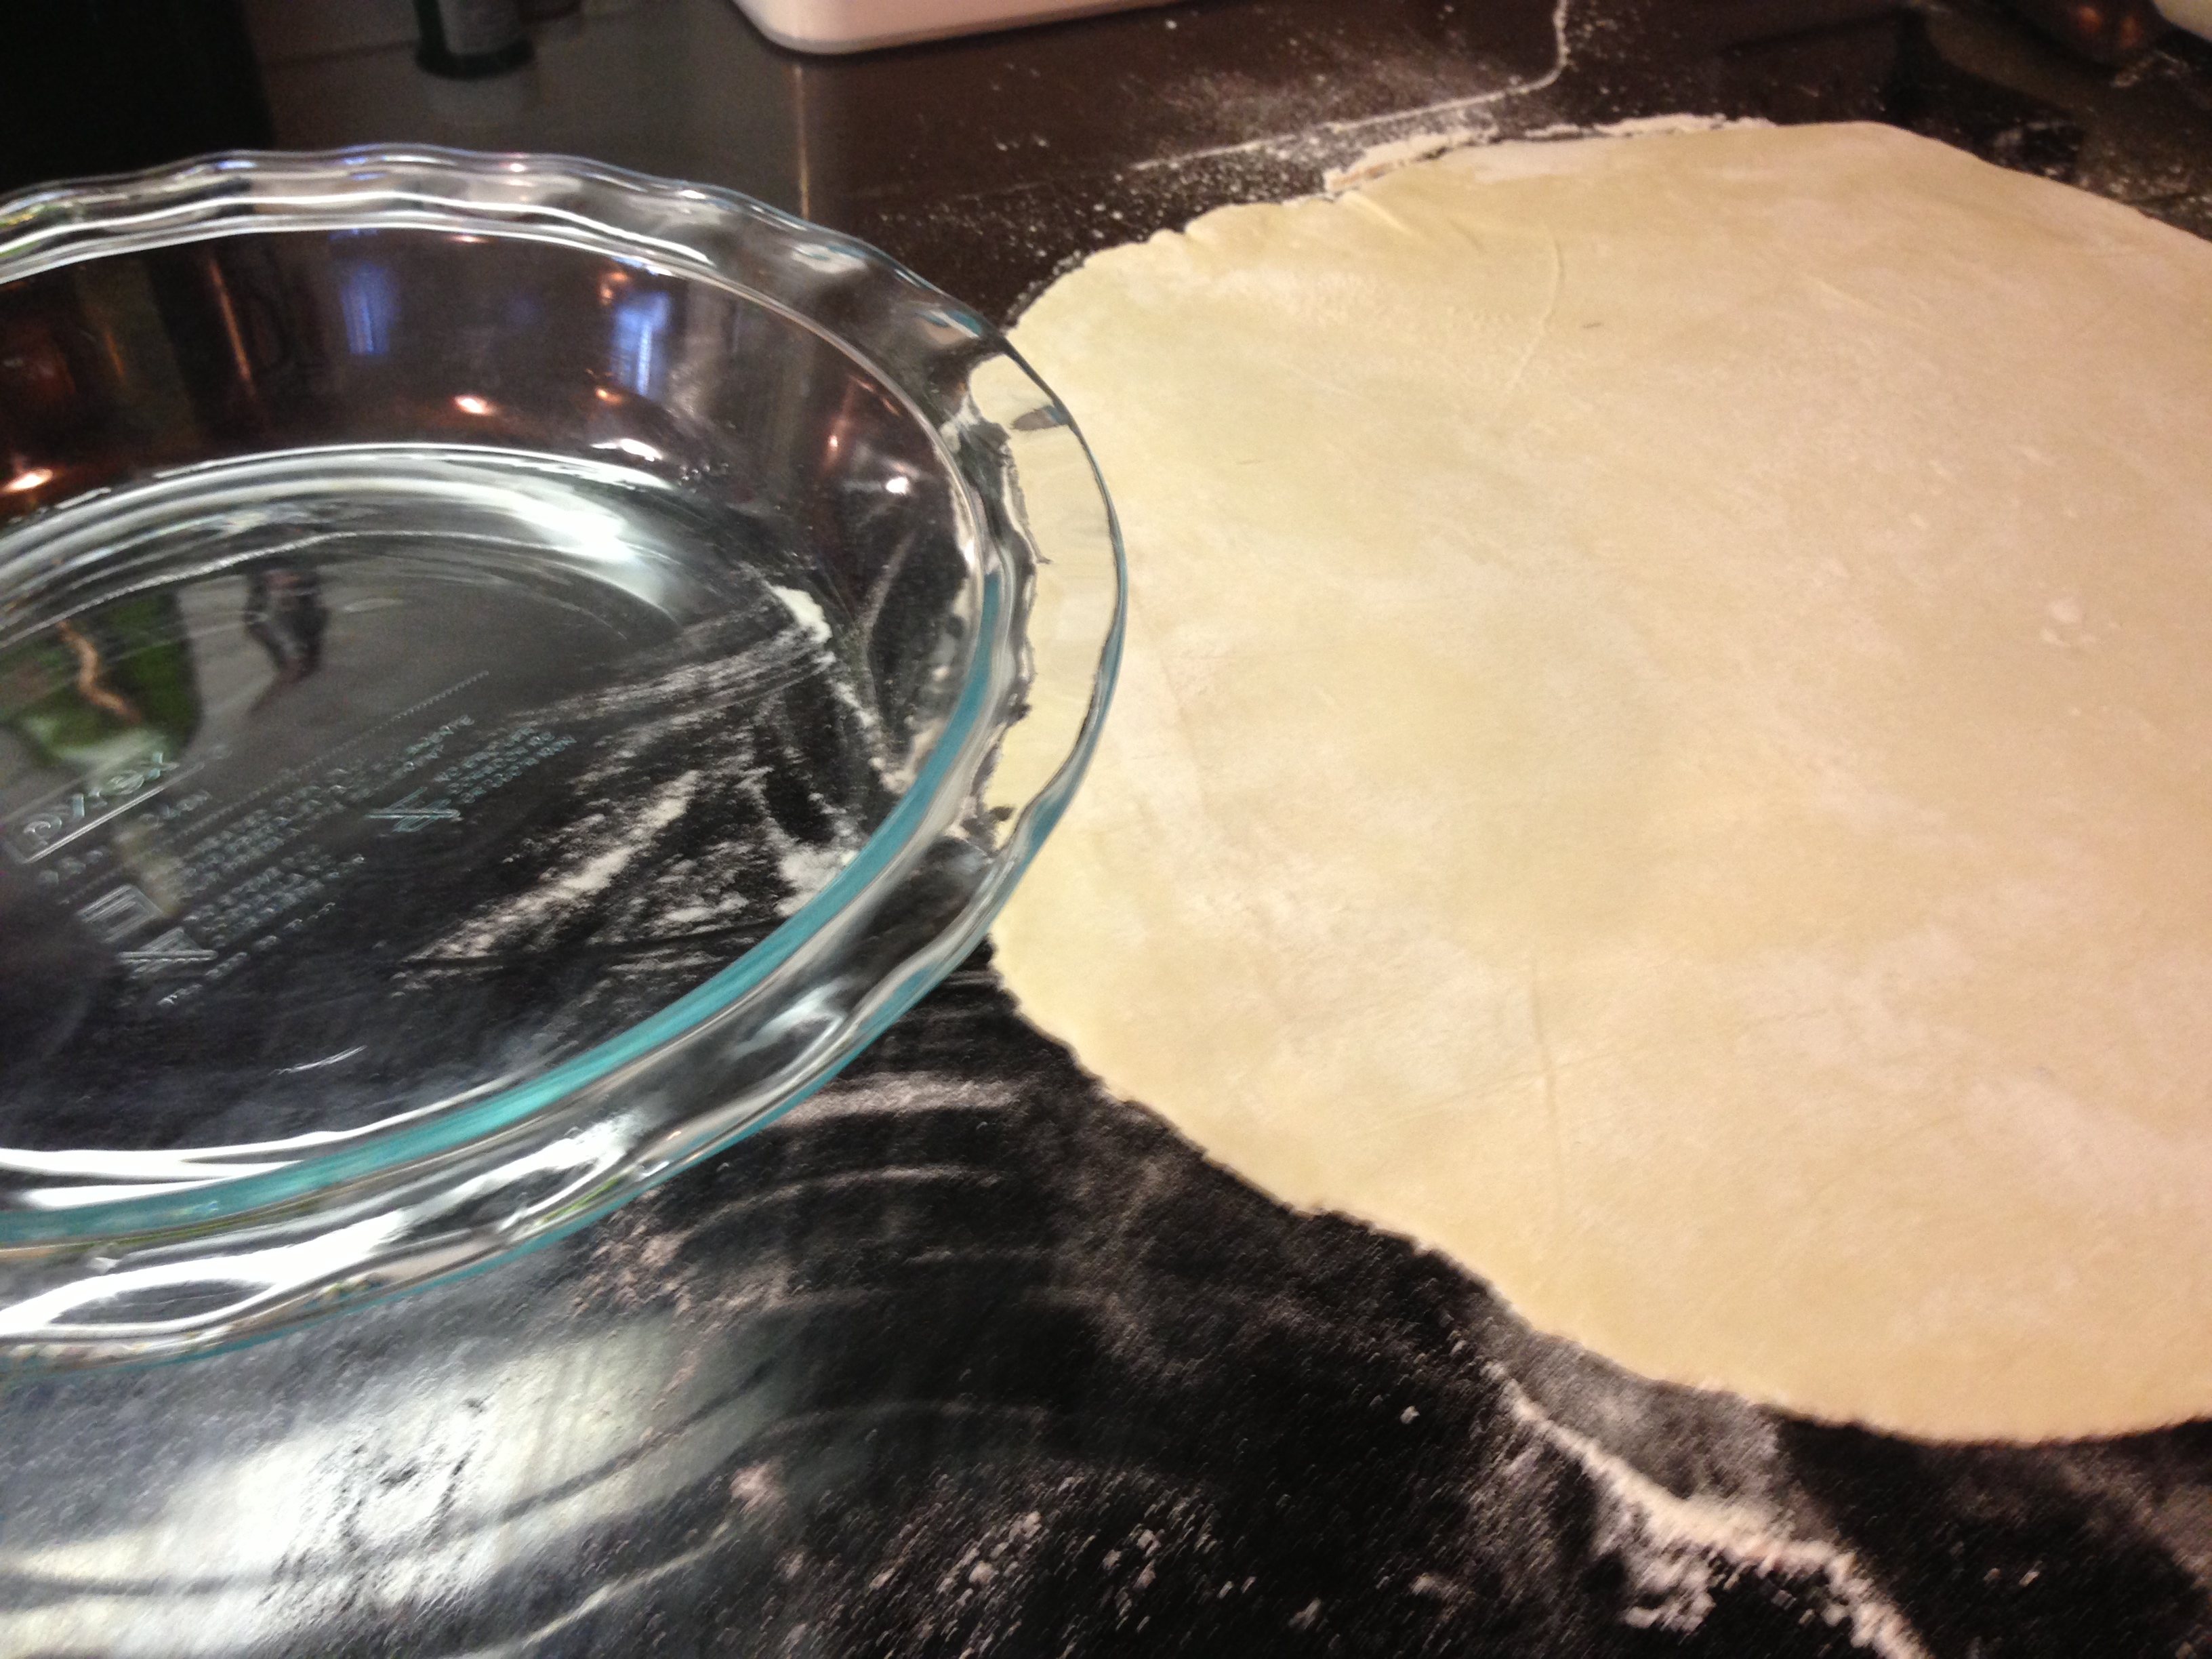
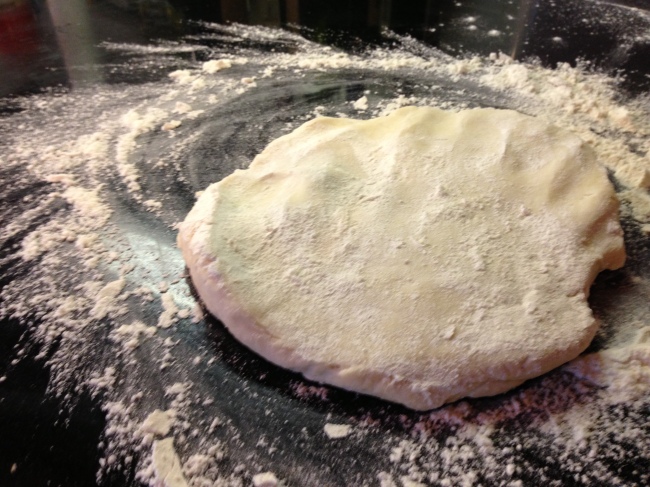
When you are ready to assemble the pie, roll the dough out on a heavily floured surface.  Flour the top of the crust if it begins to stick to your rolling pin.  Roll it out a few inches larger than your DEEP pie dish.  Carefully fold the crust in half twice so it looks like a pie wedge.  Put it in your pie dish & unfold.  Trim the edges if you like & crimp the rim with your fingers.  Put this in the freezer & heat your oven to 400 degrees.  From Parsley, Sage & Sweets:

When oven temperature is at 400 F, remove the pie shell from the freezer and line the pie crust with a large sheet of lightly buttered aluminum foil, buttered side down, covering the edge of the crust so that it doesn’t get too brown. Fill the lined crust with pie weights, dried beans, or raw rice. Bake the pie crust for 15 minutes. Remove the weights and foil. Prick the bottom of the crust well with a fork and bake the crust for another 7 minutes, or until the edges are just beginning to turn golden, but the crust is not fully baked. Cool the pie crust on a wire rack while you make the filling. Reduce the oven temperature to 350 degrees F.

ImageImageImageImage

Chocolate, Cheesecake, Pumpkin & Pecan Layered Pie

Chocolate Layer

1 cup dark chocolate chips

1/4 cup heavy cream

Cheesecake Layer
8 oz cream cheese, softened
1/4 cup sugar
1 teaspoon pure vanilla extract
1 egg

Pumpkin Pie Layer
1 2/3 cups unsweetened fresh or canned pumpkin puree (If using fresh – simply cut up & seed a pumpkin.  Roast at 350 for about 45 minutes or until the pumpkin is tender to a fork.  Puree with just as much water as you need to get it blended smooth.)
1 cup heavy cream (you can use evaporated milk, if you prefer)
1/2 cup firmly packed brown sugar
1/4 cup granulated sugar
1 tablespoon all-purpose flour
1 teaspoon vanilla extract
1/2 teaspoon salt
1 teaspoon ground cinnamon
1/2 teaspoon ground ginger
1/4 teaspoon ground nutmeg
1/4 teaspoon ground allspice
2 eggs, lightly beaten

Pecan Pie Topping
1 cup mix of whole and coarsely chopped pecans
1/4 cup granulated sugar
1/4 cup firmly packed dark brown sugar
1/3 cup light or dark corn syrup
1 teaspoon vanilla extract
2 eggs beaten
1/2 teaspoon salt
2 tablespoons melted butter

DIRECTIONS

Prepare the crust or use a pre-made one.  My crust was a tad under-cooked – as you see in these photos but it cooked up fine when all was said & done.

If making fresh pumpkin puree – follow directions HERE.  Set aside.

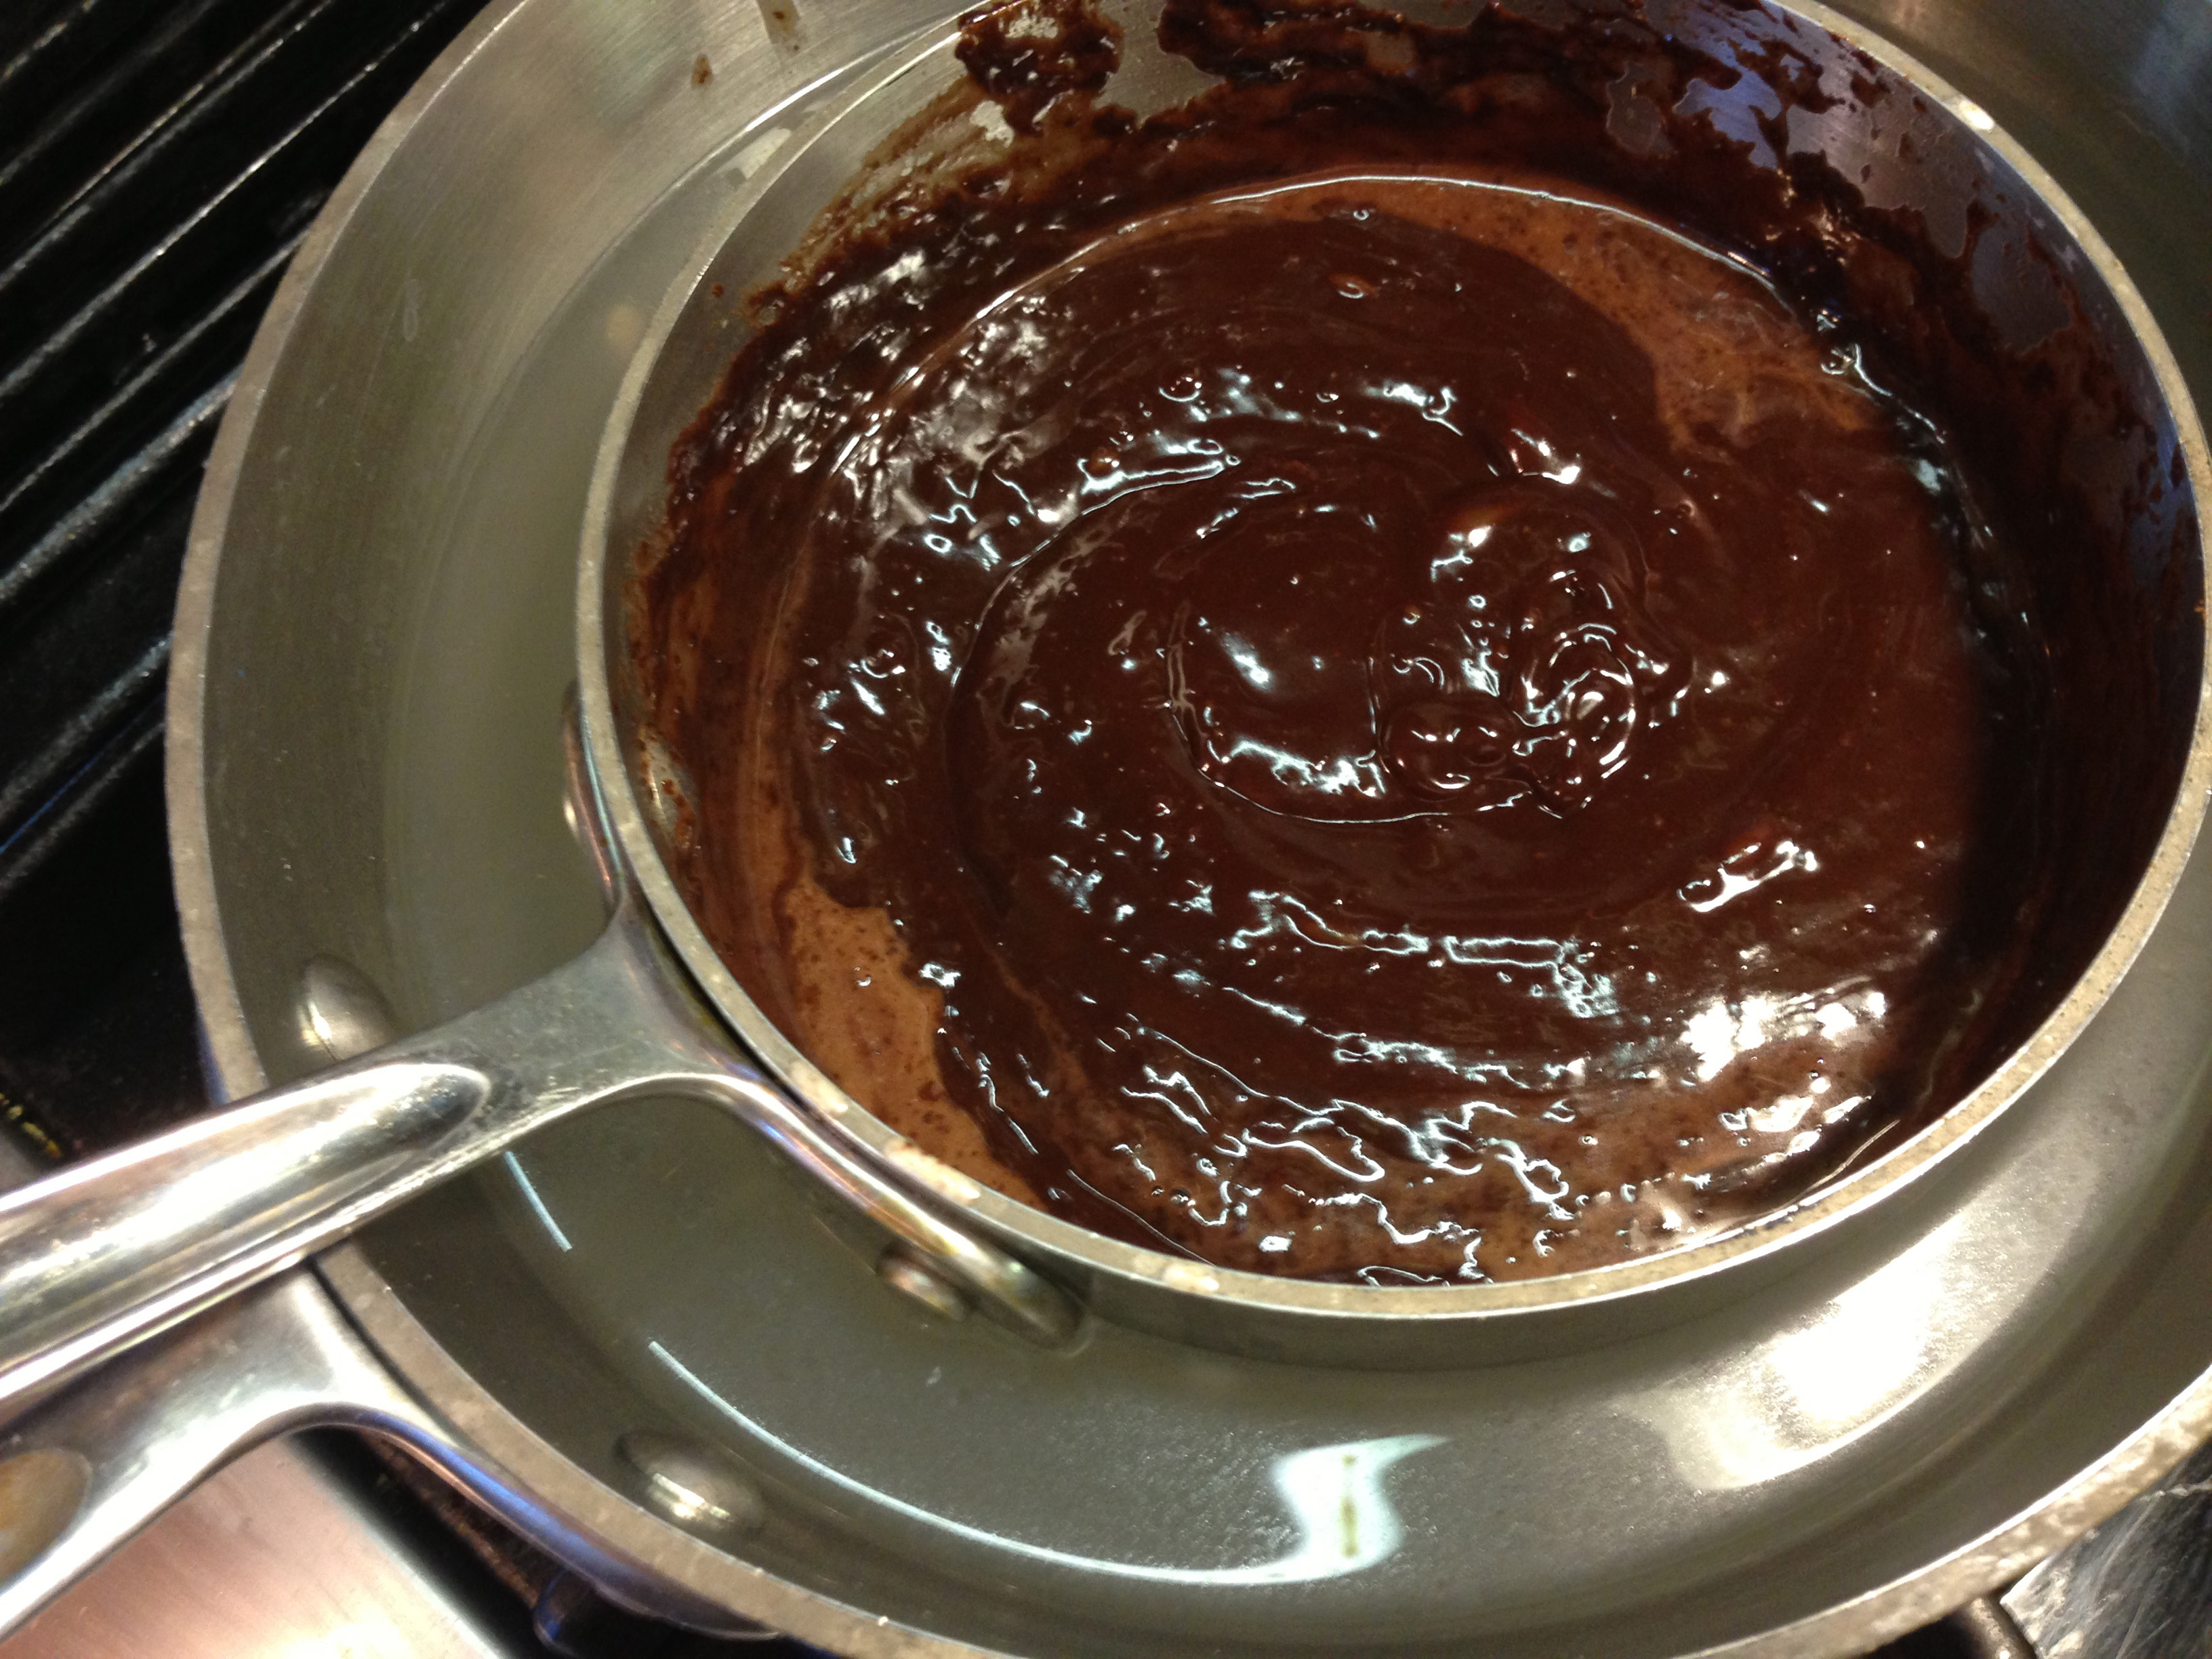
Melt the chocolate & heavy cream in a double boiler (or a smaller pan set in a larger pan with boiling water in it).  When blended & smooth – pour this into the par baked pie crust.  Put this in the freezer for about 20 minutes.

ImageImage

Preheat oven to 350 degrees F.  In a medium bowl, beat cream cheese until smooth. Beat in 1/4 cup sugar, then add vanilla and 1 egg. Beat mixture until smooth.

Next, pour the cream cheese mixture on top of the chilled chocolate layer, spread evenly, then freeze for about 15 -20 minutes.

Image

In the mean time, in a large bowl, combine pumpkin puree, heavy cream, the 2 lightly beaten eggs, vanilla extract, sugar, flour, brown sugar, cinnamon, nutmeg, ginger, allspice and salt. Mix thoroughly until uniform.

Remove the pie shell with cream cheese from the freezer and pour the pumpkin mixture on top of it. Freeze for 15 to 20 minutes.

Image

Combine the eggs, sugars, melted butter, corn syrup, vanilla extract and salt in a bowl.  Stir in pecans.  Remove pie from freezer and carefully spoon the pecan layer over the pumpkin layer.

Image

Place pie on the middle rack of your preheated oven.  Cover edges of crust with aluminum foil or a pie crust shield if browning too quickly, but you will eventually have to cover it  to prevent excess browning some time toward the end.  Keep checking every 20 minutes.

Bake in 350 degree F oven for about 60 to 75 minutes.  It really depends on your oven.  The the pecan pie topping should be dark and bubbling a bit.

And – once you’ve done all this work – be sure to get some good photographs of the results before succumbing to your alcoholic desires!  You will want to remember this baby!

Image

Homemade Parsley Pappardelle with Roasted Tomatoes & Creamy Chanterelle Mushrooms

2 Comments


All Photos © Christine Elise McCarthy 2013

To see images of my past posts & get links to the recipes – look on my Pinterest board – HERE.

images (1)download (1)

~

All my posts now have a VERY customizable PRINT & PDF option.  Create a PDF & save the recipe to your computer or print it out.  It offers a “remove images” option & you can delete any part of the post you do not need before printing.  The button is below by the Twitter & Facebook links.

~

11-28-13 (143)

I make homemade pasta a lot.  Pappardelle might be one of the easiest ones.  I have posted various shapes & flavors of homemade pasta in the past – the most basic being fettucini.  The recipe is HERE.  That recipe uses a manual pasta roller but you could roll it out with a rolling pin – if you were feeling super motivated.  Homemade pasta really is different than dry, packaged pasta and I recommend making the modest investment in one of THESE GUYS – the stainless steel jobbies – they can usually be had for about $30.  Otherwise, maybe buy fresh pasta or just use a boxed one.

To make this pappardelle, I added a handful of chopped parsley to the dough and rolled it out with a manual roller.  I then cut it free-form with a knife – resulting in all kinds of thicknesses. I like the artisan/rustic feel that is the result of the lack of uniformity.

ImageImageImage

Roasting tomatoes is a great way to add to their shelf life.  If they are starting to get shriveled up on the counter – chop them & roast them with some garlic & you get several more days out of them.  Use them in pasta or on pizza or even as a garnish on soups or spread on sandwiches.  Yum.

I used chanterelle mushrooms because Costco had them but, really, any mushroom would work in this recipe.

Image

Homemade Parsley Pappardelle with Roasted Tomatoes & Creamy Chanterelle Mushrooms

INGREDIENTS

Pasta for two as described above or any pasta of your choice.

For the roasted tomatoes

10-20 grape or cherry tomatoes – halved

olive oil

4 garlic – chopped

A few fresh rosemary sprigs – stems removed & chopped

S&P

For the creamy chanterelle mushrooms

1 lb mushrooms – sliced

1/2 onion – diced

olive oil

5 garlic cloves – diced

1/3 cup heavy cream

1/3 cup sherry or dry white wine or Marsala

1/2 tsp crushed red pepper – or to taste

1 TBS lemon juice

S&P

Parmesan as garnish

Parsley as garnish

Image

DIRECTIONS

For the roasted tomatoes

Toss the halved tomatoes with the diced garlic, rosemary, 1-2 TBS olive oil and S&P.  Roast on parchment or otherwise lined cooking sheet at about 350-40 for 20-25 minutes.  Set aside.

ImageImage

For the creamy chanterelle mushrooms

Heat 1-2 TBS olive oil in a large saute pan.  Cook the onions until soft – maybe 5 minutes.  Add the garlic & stir for another minute.  Put them in a bowl.

In the same pan, heat another TBS olive oil over high heat & sear the mushrooms adding a pinch of salt & the crushed red pepper.  When they seem browned a bit, deglaze the pan with the sherry or wine.  Cook at high for a minute or two.  Add the lemon juice & stir it in for a minute.  Add the onion & garlic and the heavy cream and 1 tsp black pepper.  Heat over medium until the sauce is thick & creamy – which should happen fast.  Simmer on low (add water if it gets too thick) while you cook the pasta.

ImageImageImageImage

Cook the pasta & drain.

Image

Put a bit of pasta on each plate.  Top with the mushrooms & some roasted tomato & garnish with lots of freshly grated Parmesan & some parsley.  Enjoy!

ImageImageImageImage