DDD #137 – Vegan Chicken & Eggplant Casserole

Leave a comment


All Photos © Christine Elise McCarthy 2019

To see images of my past posts & get links to the recipes – look on my Pinterest board – HERE.

~

All my posts now have a VERY customizable PRINT & PDF option.  Create a PDF & save the recipe to your computer or print it out.  It offers a “remove images” option & you can delete any part of the post you do not need before printing.  The button is below by the Twitter & Facebook links.

~


Click the image above to watch the video.

Vegan Chicken & Eggplant Casserole

Feeds 4-6

INGREDIENTS

8 vegan chicken patties (like Boca or Quorn)

1 large eggplant – sliced 1/4-1/2 inch slices & sprayed with cooking spray

24 ounce or more pasta sauce (I used Rao’s Spicy Arrabbiata) (my recipe for homemade is HERE)

12-16 ounces vegan mozzarella (at least half of it grated)

Basil for garnish

DIRECTIONS

Make sauce – if you are using homemade.

Heat the oven to 350 degrees.

Grill the eggplant slices on both sides on a grill or in a grill pan.

Assembly instruction is not really important – as long as you have about 1/2 the sauce & 1/4 of the grated mozzarella left to top the casserole.

Layer 1/4 of the sauce in a casserole pan.  Layer 4 chicken patties, all the eggplant & then about 1/2 the cheese.  Top with another 1/4 of the sauce & the remaining 4 chicken patties.  Top with the rest of the sauce & as much grated mozzarella as you like.

Bake for 30-45 minutes or until it is heated through & the cheese is melted.

Serve garnished with fresh chopped basil.


DDD #117 – Vegan Eggplant Parmesan Casserole with Cauliflower Rice & Sausage

1 Comment

Screen Shot 2018-09-11 at 1.36.18 PM.png

All Photos © Christine Elise McCarthy 2018

To see images of my past posts & get links to the recipes – look on my Pinterest board – HERE.

images (1)download (1)

All my posts now have a VERY customizable PRINT & PDF option.  Create a PDF & save the recipe to your computer or print it out.  It offers a “remove images” option & you can delete any part of the post you do not need before printing.  The button is below by the Twitter & Facebook links.

9-22-16-68

9-22-16-89

BathingandthesinglegirlCover

vromans back

eggplant-parm-rice-casserole-%25283%2529

Photo from The Iron You.

Click the image above to watch the video.

The photo just above is from the wonderful blog – The Iron You.  It is their Eggplant Parm Rice Casserole and it is that recipe that inspired mine here.  There are a few subtle changes but the primary difference is that I used cauliflower rice rather than real rice and I made it vegan.  That way – this dish is very light & nearly guiltless.  Is is very easy to make & comes together in less than 45-60 minutes – 30 of which are in the oven.  It is a surprisingly tasty recipe & chock full of fresh vegetables.

9-22-16-85

9-22-16-63

Eggplant Parmesan Casserole with Cauliflower Rice (Vegetarian or Vegan)

Serves 8

INGREDIENTS

1 large head of cauliflower

2 eggplants – cut into 1/4 inch slices

Olive oil

1 cup basil – chopped

2 large shallots (or 1/2 small onion) – diced

2 cups cherry tomatoes – quartered (reserve a few extra to garnish)

2-3 cups vegan mozzarella – according to your preference (I used 3 cups)

1-2 cups grated vegan Parmesan – according to your preference

S&P

1 TBS oregano

1 TBS crushed red pepper (optional)

1 cup vegetable stock

1 1/2 cups of your favorite pasta sauce

3 (or more) vegan sausages – cooked

Parsley or basil – chopped as garnish

9-22-16-40

9-22-16-42

9-22-16-45

DIRECTIONS

If you have a grill or grill pan, spray some olive oil on the eggplant (or toss them in a light coating of olive oil or dressing) & grill on each side until a bit charred & soft.  Set aside.

If you do not have a grill or grill pan – follow Iron You’s oven method directions:  Preheat oven to 400°F  and place a rack in the middle. Line two baking sheets with parchment paper and grease them with vegetable oil. Set aside.
Fill a large bowl with cold water, add 1 teaspoon of salt and stir until it dissolves completely.
Add eggplant slices and let them sit for at least 20 minutes to draw out the bitterness.  Fish the eggplant slices out of the water, pat them dry, and arrange them on a single layer on prepared baking sheets. Bake in the oven for about 15 minutes, or until the slices turn deep brown on top.
Remove the slices from the baking sheets and carefully transfer them on a plate to cool.

9-22-16-46

9-22-16-47

Reduce oven temperature to 350 degrees.

Cook sausages & chop.

Cut the florets from the cauliflower & either grate them on a box grater or using the grater of your food processor (the FAR neater way to go).  Set aside.

Toss the tomatoes with basil, a pinch or S&P & the oregano & crushed red pepper & set aside.

9-22-16-41

9-22-16-43

Heat a TBS or so of olive oil in a large frying pan (large enough to hold all the cauliflower rice) & saute the shallots or onion until soft.  Add the cauliflower rice & the stock.  Over high heat – saute until the cauliflower is soft & the bulk of the stock has evaporated.  Stir in the tomato & basil mix and the sauce.

9-22-16-49

9-22-16-50

9-22-16-51

9-22-16-52

Grease a casserole pan (I used cooking spray) and layer 1/3 of the rice on the bottom.  Top with half the eggplant and 1/3 of the cheese and 1/2 the sausage.  Add another 1/3 of the rice, remaining eggplant and 1/3 of the cheese & the remaining sausage.  Top with a final layer of rice & cheese.

Bake for 20-30 minutes or until the cheese is melted & the casserole is heated through.

Let sit for 10 minutes & then serve with parsley or basil & maybe extra diced tomato.

9-22-16-53

9-22-16-54

9-22-16-55

9-22-16-56

9-22-16-57

9-22-16-61

9-22-16-72

9-22-16-88

9-22-16-92

Deconstructed Vegan Shepherd’s Pie or Broccoli & Mashed Potato Casserole

Leave a comment


All Photos © Christine Elise McCarthy 2016

To see images of my past posts & get links to the recipes – look on my Pinterest board – HERE.

images (1)download (1)

All my posts now have a VERY customizable PRINT & PDF option.  Create a PDF & save the recipe to your computer or print it out.  It offers a “remove images” option & you can delete any part of the post you do not need before printing.  The button is below by the Twitter & Facebook links.

12-23a-16-88

12-23a-16-86

bathingandthesinglegirlcover

vromans-back

12-23-16-38

This dish takes a few steps but all are easy.   I adapted this recipe from One Green Planet’s MASHED POTATO CASSEROLE WITH BROCCOLI AND A CAULIFLOWER GRAVY.  I already had gravy in the freezer – leftover from my effort at poutine – seen just below.  It was a leek & sage brown gravy & the recipe is HERE.  When I end up with more of something than I need for a recipe – I often freeze the extra in Ziplock bags that I store flat – so they take up very little space in my freezer – as seen just below the poutine here.  Just squeeze the air out & place it on top of a frozen pizza or some other flat item (a cookie sheet) until it freezes.  It thawed quickly in the bag when placed under hot running water.  You can use this gravy recipe or your own favorite one or the easiest one ever – HERE.

dsc_7652

12-23a-16-41

12-23a-16-45

12-23a-16-49

I wanted to use one of the vegan cheeses I recently bought from Soledad Goat Sanctuary…seen just above.  It is creamy & has a tang sort of like sour cream & I thought it would add a nice layer of flavor & some richness to the potato level.  You can use any soft cheese you like (cream cheese or whatever) or eliminate that ingredient with no real negative impact on this dish.

The nice thing about this dish is that it combines potato, broccoli & gravy in one decadent dish & it is easy to transport to a family or friend’s house as your vegan contribution to an otherwise potentially non-vegan meal.  Meat eaters will love it & vegans could really get away with eating only this & not feeling too ripped off.

I used fresh broccoli but frozen will do – if you prefer it.

12-23-16-14

12-23a-16-82

Deconstructed Vegan Shepherd’s Pie or Broccoli & Mashed Potato Casserole

INGREDIENTS

2 large heads of broccoli – cut into florets

10 small red potatoes – cut into large chunks (I left skins on)

1 (14 oz) can of white beans – drained & rinsed

2 cups gravy of choice (two recipes are linked above)

4 oz soft vegan cheese (optional) OR 2-4 TBS vegan butter (or both if you are feeling decadent!)

2 garlic cloves

1 cup non-dairy milk (I used unsweetened almond milk)

1/4 cup parsley

1 large rosemary sprig – leaves removed

small handful of fresh oregano

few sprigs of fresh thyme

2 TBS olive oil

S&P

12-23a-16-46

12-23a-16-49

12-23a-16-50

DIRECTIONS

Heat the oven to 350 degrees F.

Make your gravy.  Set aside.

Prepare the broccoli (try very hard not to overcook it).   Steam or boil it for 2-3 minutes & drain it under cold water   When cool enough to handle – chop it pretty small.  (I take the steamed stalks & blend them into wet food for my dogs.)  Chop the thyme & oregano & toss with the broccoli & 1 or 2 TBS olive oil.  Season with S&P.  Set aside.

12-23a-16-51

Puree the beans and 1/2 cup almond milk in a high power (or regular) blender until smooth.  (I REALLY love my Magic Bullet that I recently bought at Bed Bath & Beyond for $30 & I recommend them.)  Add the rosemary & parsley & puree them into the bean mixture.  Set aside.

12-23a-16-53

12-23a-16-54

12-23a-16-55

12-23a-16-58

12-23a-16-59

Boil the potatoes and the garlic cloves until the potatoes are very soft.  Drain.  Return to the pan.  Add the bean puree, soft cheese or butter (or both) & blend with a hand mixer or immersion blender.  Add as much additional milk as you need to make them thick but creamy.  Season with S&P.

12-23a-16-60

12-23a-16-62

I sprayed my casserole pan with cooking spray but that probably is not necessary.

Spread the potatoes on the bottom.  Top with as much gravy as you like (I used about 2 cups – which was A LOT (though not too much for ME) – so add as much as feels right to you) & then the broccoli.

12-23a-16-63

12-23a-16-64

12-23a-16-65

Bake, uncovered, for 25 minutes.  Let it rest a few minutes & serve!

If you have extra gravy, either put it on the table or freeze it.

12-23-16-2

12-23-16-9

12-23a-16-79

Vegan Butternut Squash & Black Bean Enchilada Casserole with Homemade Red Enchilada Sauce

Leave a comment


All Photos © Christine Elise McCarthy 2016

To see images of my past posts & get links to the recipes – look on my Pinterest board – HERE.

images (1)download (1)

12-4a-16-67

12-4a-16-92

bathingandthesinglegirlcover

vromans-back

12-4-16-20

12-4-16-26

So – I am several days into eating only food I already have in the house.  I have WAY too many frozen leftovers & dry pastas & beans etc taking up space & yet I keep going to the store to buy more food. It is ridiculous & wasteful.  Today’s recipe was inspired by a huge butternut squash I had & some other veggies rapidly reaching the end of their shelf life.  I used jarred salsa because I had one open but made the enchilada sauce because I did not already have some in a jar or can.  You can choose to go all jarred or all homemade – your call.

I also roasted a whole butternut squash.  You might want to buy some already cubed & roast those – or just boil them.  This can be as labor-intensive or as simple as you care to make it.

The real star of this dish is this newer vegan cheese I found.  It tastes great & does a fair job at melting – so – I recommend trying it if you see it or can find it online.  It is from Parmela Creamery and you can definitely buy it – and loads of other vegan cheeses – from them.

12-4-16-2

Oh – as an aside – TJ Maxx is a great source for kitchen items.  They always have loads of olive oil marked way down.  I stock up every time I go there.

12-4a-16-39

12-4a-16-40

12-4-16-27

12-4-16-33

Vegan Butternut Squash & Black Bean Enchilada Casserole with Homemade Red Enchilada Sauce

Serves 6 well

INGREDIENTS

2 cups red enchilada sauce (my recipe HERE) or your favorite brand or recipe

16 oz salsa – homemade or your favorite brand

olive oil

1 small butternut squash

1/2 medium red (or any other kind) onion – diced

1-3 jalapenos (optional) – seeded & diced

3 tomatoes – diced

2 carrots – diced

1 cup corn

1 12 oz can black beans – drained

1-4 garlic cloves – minced

1/4 cup cilantro – chopped

1 tsp ground cumin

1 tsp chili powder

15-20 taco-sized corn tortillas

Up to 1 lb grated vegan cheeses of your choice ( I used both cheddar & mozzarella)

S&P to taste

GARNISH: cilantro, sliced scallions, avocado slices, additional salsa or hot sauce

12-4-16-1

12-4a-16-38

DIRECTIONS

Heat the oven to 375.

I roasted my butternut squash unpeeled & halved.  It was a sorta messy business doing it this way.  In the future, I will peel & cube it first.  Whatever you decide – roast it naked for 20-40 minutes, turning at least once, until it is soft.  If you cooked it like I did – let it cool in the sink & peel & cube it once it is cool enough to handle.  OR – you could peel, cube & boil it until the cubes are soft.  I had a large squash – so I put some extra mashed up into my dogs’ dinner.  They loved it!

Meanwhile, heat 1-2 TBS olive oil in a large saute pan & add the chopped carrots & onions.  When they start to soften, add the tomatoes, jalapenos, corn & black beans.  Add the spices & cilantro.  Heat through.  Add the garlic & saute 1 minute.  Stir in the cubed squash.  Season with S&P & set aside.

12-4a-16-41

12-4a-16-42

12-4a-16-43

12-4a-16-44

12-4a-16-46

12-4a-16-48

12-4a-16-71

12-4a-16-72

Now – assemble the casserole.  Grease a casserole pan (I used cooking spray).  Put the salsa on the bottom.  The rest can be pretty random – as long as you end with 1/3 of the enchilada sauce & 1/3 of the cheese.

12-4a-16-50

12-4a-16-51

12-4a-16-52

12-4a-16-53

12-4a-16-54

Layer some corn tortillas & top with 1/3 of the veggie mixture, 1/3 of the cheese & 1/3 of the enchilada sauce.

12-4a-16-55

12-4a-16-56

12-4a-16-57

Add another 1/3 of the veggie mixture.  Layer with  1/3 of the cheese, more tortillas, the final 1/3 of the veggie & 1/3 of the enchilada sauce.

12-4a-16-58

12-4a-16-59

12-4a-16-60

12-4a-16-61

12-4a-16-62

Add another layer of tortillas & the rest of the enchilada sauce & cheese.

12-4a-16-63

12-4a-16-64

12-4a-16-65

I used the casserole glass lid to cover it.  You can do this or use foil.

Bake at 375 for about 25 minutes, remove cover & bake another 10 minutes or so.  Let rest for ten minutes before serving.

Garnish with cilantro or scallions & maybe salsa, hot sauce or a few slices of fresh avocado.  Enjoy!

12-4a-16-75

12-4a-16-86

12-4a-16-90

Eggplant Parmesan Casserole with Cauliflower Rice (Vegetarian or Vegan)

2 Comments


All Photos © Christine Elise McCarthy 2016

To see images of my past posts & get links to the recipes – look on my Pinterest board – HERE.

images (1)download (1)

All my posts now have a VERY customizable PRINT & PDF option.  Create a PDF & save the recipe to your computer or print it out.  It offers a “remove images” option & you can delete any part of the post you do not need before printing.  The button is below by the Twitter & Facebook links.

9-22-16-68

9-22-16-89

BathingandthesinglegirlCover

vromans back

eggplant-parm-rice-casserole-%25283%2529

Photo from The Iron You.

The photo just above is from the wonderful blog – The Iron You.  It is their Eggplant Parm Rice Casserole and it is that recipe that inspired mine here.  There are a few subtle changes but the primary difference is that I used cauliflower rice rather than real rice.  That way – this dish is very light & nearly guiltless.  Is is very easy to make & comes together in less than 45-60 minutes – 30 of which are in the oven.  It is a surprisingly tasty recipe & chock full of fresh vegetables.  Use vegan cheeses, if you prefer.  There are enough flavors at play here that I think this dish would work very well vegan-style.

9-22-16-85

9-22-16-63

Eggplant Parmesan Casserole with Cauliflower Rice (Vegetarian or Vegan)

Serves 8

INGREDIENTS

1 large head of cauliflower

2 eggplants – cut into 1/4 inch slices

Olive oil

1 cup basil – chopped

2 large shallots (or one small onion) – diced

2 cups cherry tomatoes – quartered

2-3 cups grated mozzarella (or vegan alternative) – according to your preference (I used 3 cups)

1-2 cups grated Parmesan (or vegan alternative) – according to your preference (I used 2 cups real Parmesan – I would have used less of a vegan Parm)

S&P

1 TBS oregano

1 TBS crushed red pepper (optional)

1 cup vegetable stock

Parsley or basil – chopped as garnish

9-22-16-40

9-22-16-42

9-22-16-45

DIRECTIONS

If you have a grill or grill pan, spray some olive oil on the eggplant (or toss them in a light coating of olive oil or dressing) & grill on each side until a bit charred & soft.  Set aside.

If you do not have a grill or grill pan – follow Iron You’s oven method directions:  Preheat oven to 400°F  and place a rack in the middle. Line two baking sheets with parchment paper and grease them with vegetable oil. Set aside.
Fill a large bowl with cold water, add 1 teaspoon of salt and stir until it dissolves completely.
Add eggplant slices and let them sit for at least 20 minutes to draw out the bitterness.  Fish the eggplant slices out of the water, pat them dry, and arrange them on a single layer on prepared baking sheets. Bake in the oven for about 15 minutes, or until the slices turn deep brown on top.
Remove the slices from the baking sheets and carefully transfer them on a plate to cool.

9-22-16-46

9-22-16-47

Reduce oven temperature to 350 degrees.

Cut the florets from the cauliflower & either grate them on a box grater or using the grater of your food processor (the FAR neater way to go).  Set aside.

Toss the tomatoes with basil, a pinch or S&P & the oregano & set aside.

9-22-16-41

9-22-16-43

Heat a TBS or so of olive oil in a large frying pan (large enough to hold all the cauliflower rice) & saute the shallots or onion until soft.  Add crushed red pepper (if using) and the cauliflower rice & the stock.  Over high heat – saute until the cauliflower is soft & the bulk of the stock has evaporated.  Stir in the tomato & basil mix.

9-22-16-49

9-22-16-50

9-22-16-51

9-22-16-52

Grease a casserole pan (I used cooking spray) and layer 1/3 of the rice on the bottom.  Top with half the eggplant and 1/3 of the cheese.  Add another 1/3 of the rice, remaining eggplant and 1/3 of the cheese.  Top with a final layer of rice & cheese.

Bake for 20-30 minutes or until the cheese is melted & bubbly or browned.

Let sit for 10 minutes & then serve with parsley or basil.

9-22-16-53

9-22-16-54

9-22-16-55

9-22-16-56

9-22-16-57

9-22-16-61

9-22-16-72

9-22-16-88

9-22-16-92

Fennel, Swiss Chard, Spinach, Kale & White Bean Gratin (Vegan or Not)

Leave a comment


All Photos © Christine Elise McCarthy 2016

To see images of my past posts & get links to the recipes – look on my Pinterest board – HERE.

images (1)download (1)

All my posts now have a VERY customizable PRINT & PDF option.  Create a PDF & save the recipe to your computer or just print it out.  It offers a “remove images” option & you can delete any part of the post you do not need before printing.  The button is below by the Twitter & Facebook links.

4-16-16 (141)

4-16-16 (107)

BathingandthesinglegirlCover

vromans back

4-16-16 (117)

4-16a-16 (5)

I get Farm Fresh To You deliveries every other week.  You are allowed to customize the deliveries but, sometimes, I forget and the result is that I end up with an infinity of leafy greens.  This week: two kinds of lettuce, Swiss chard & kale.  And fennel.  And more.  But thatsalotta greens!  Plus, I already had fennel from the last delivery & about 5 pounds of spinach.  So – I decided to make something that would use as many of the greens as possible – this dish.  The greens you use can vary but you need a lot of whatever you select because they reduce dramatically.

I used real Parmesan in this (because I had it) but vegan Parm – or even another vegan cheese (like mozzarella or cheddar) would work.  I used almond milk but I think a thicker milk might have been better.

NOTE – Also – you might want to add some cheese to the veggie mix.  I didn’t because I was trying to keep this dish on the light side.

4-16-16 (109)

4-16-16 (115)

Fennel, Swiss Chard, Spinach, Kale & White Bean Gratin (Vegan or Not)

Serves 6

INGREDIENTS

5 TBS vegan butter

2 small bulbs fennel – chopped

1 onion (I used 1 brown & 1/2 red onion) – diced

4 or more garlic cloves (I used 4 cloves & 2 stalks of green garlic) – chopped

1 bunch Swiss chard – ribs removed & chopped

1 bunch kale – ribs removed & chopped

2-4 cups spinach

2 TBS fresh thyme

3 TBS flour

1 cup Parmesan (vegan or otherwise) – optional – for adding to the veggies – see NOTE above

1 1/2 cup vegan milk (I used almond milk but a thicker milk might be better – or half & half, if you are not vegan)

2 14 oz cans white beans – drained & rinsed

1 1/2 cups bread crumbs (I used Panko)

1 cup Parmesan (vegan or otherwise) – or other cheese (mozzarella or cheddar) for topping

4-16-16 (78)

4-16-16 (84)

4-16-16 (79)

4-16-16 (91)

4-16-16 (96)

4-16-16 (100)

4-16-16 (129)

DIRECTIONS

Heat the oven to 400 degrees.

Melt TWO of the five TBS of butter in a large stock pot.  Add the fennel and onion & saute until soft.  Add thyme & combine.  Add the garlic & stir for a minute.  Add the greens – in stages – adding more as each bit wilts.

4-16-16 (82)

4-16-16 (83)

4-16-16 (85)

4-16-16 (86)

4-16-16 (87)

4-16-16 (88)

4-16-16 (89)

4-16-16 (90)

Add the flour & milk & bring to a boil.  Reduce to low & simmer as it thickens a bit.  Add the beans & season with S&P.  If you are adding cheese to the veggies – do that now & stir to combine.

4-16-16 (92)

4-16-16 (93)

4-16-16 (94)

4-16-16 (95)

4-16-16 (97)

Meanwhile – melt the remaining 3 TBS butter & toss with the breadcrumbs and 1 cup of cheese.

Treat a 9 x 13 casserole pan with cooking spray or oil & put the veggie mix in.  Top with the breadcrumb mix.  Bake for about 30 minutes or until breadcrumbs turn golden.

Let rest 10 minutes & serve.

4-16-16 (101)

4-16-16 (102)

4-16-16 (103)

4-16-16 (106)

4-16-16 (125)

4-16-16 (134)

4-16a-16 (4)

Cauliflower, Zucchini & Chicken Green Enchilada Casserole (Vegan or Vegetarian)

Leave a comment


All Photos © Christine Elise McCarthy 2016

To see images of my past posts & get links to the recipes – look on my Pinterest board – HERE.

images (1)download (1)

All my posts now have a VERY customizable PRINT & PDF option.  Create a PDF & save the recipe to your computer or just print it out.  It offers a “remove images” option & you can delete any part of the post you do not need before printing.  The button is below by the Twitter & Facebook links.

3-2-16 (145)

3-2-16 (136)

BathingandthesinglegirlCover

vromans back

3-2-16 (128)

3-2-16 (143)

3-2-16 (147)

This is easy & delicious.  I used all vegan ingredients except for the 2 cups of cheddar that I topped this with.  You can use vegan cheddar & make this 100% vegan.  The bulk of the casserole is cauliflower & zucchini so it is lighter than your average casserole & likely a good way to get the kids to eat some veggies.

Cauliflower, Zucchini & Chicken Green Enchilada Casserole (Vegan or Vegetarian)

Serves 4 as an entree – more as a side

INGREDIENTS

9-12 oz vegan chicken (I always use Beyond Meat because it is just the best on the market) – shredded or cubed

1 head cauliflower – cut into florets

3 zucchini – cut into 1/4″ slices

1 cup (8 ounces) vegan mozzarella (or other mild, white cheese – Field Roast’s Chao is amazing)

1/2 cup (4 ounces) vegan cream cheese

1/3 cup vegan sour cream

3 large flour tortillas

3 cups green enchilada sauce (the higher the quality the better)

2 cups grated vegan cheddar (I used real cheddar but vegan is great, too) – or any other grated cheese you like (mozzarella or pepper jack – etc)

S&P

Cilantro as garnish

3-2-16 (83)

3-2-16 (84)

2-20-16 (111)

2-20-16 (110)

3-2-16 (104)

3-2-16 (118)

3-2-16 (125)

3-2-16 (130)

DIRECTIONS

Heat the oven to 375.

Boil the cauliflower until just tender.  Add the zucchini slices & submerge them for a minute & then drain the lot & set aside.

3-2-16 (87)

Warm ONE CUP (only one cup – reserve the rest) of the enchilada sauce & add the mozzarella, cream cheese & sour cream & cook – stirring – until it blends into a creamy sauce.  Season with S&P.

Stir in the veggies & the chicken.

3-2-16 (85)

3-2-16 (86)

3-2-16 (88)

3-2-16 (89)

3-2-16 (90)

Pour the mixture into a casserole pan treated with cooking spray.  Quarter one of the tortillas & place the 4 pieces in the corners & then add the other two whole – as below.

3-2-16 (91)

3-2-16 (92)

3-2-16 (93)

Add an additional ONE CUP of the enchilada sauce (reserving the final cup for later) & top with grated cheddar and bake for about 30 minutes or until it looks done to you.  Vegan cheese might not melt & brown the way the real cheddar did – so – be careful not to burn your dish – if you went 100% vegan.  Warm the remaining enchilada sauce.  When the dish is done – let it rest at least ten minutes.  Serve & top with warmed enchilada sauce & cilantro.

3-2-16 (94)

3-2-16 (96)

3-2-16 (97)

3-2-16 (108)

3-2-16 (134)

3-2-16 (138)

3-2-16 (140)

10-Ingredient Vegan Eggplant Parmesan Mac & Cheese

2 Comments


All Photos © Christine Elise McCarthy 2016

To see images of my past posts & get links to the recipes – look on my Pinterest board – HERE.

images (1)download (1)

All my posts now have a VERY customizable PRINT & PDF option.  Create a PDF & save the recipe to your computer or just print it out.  It offers a “remove images” option & you can delete any part of the post you do not need before printing.  The button is below by the Twitter & Facebook links.

1-27-16 (52)

1-27-16 (66)

BathingandthesinglegirlCover

vromans back

1-27-16 (47)

1-27-16 (54) copy

1-27-16 (70)

Honest to God – this might be the most fucking delicious vegan meal I have ever made!  Seriously!  And to think it only came together because I had a fridge full of random leftovers & ingredients that I needed to be done with.  I had a package of Tofutti American cheese, several slices of their mozzarella cheese (both of which I totally shit-talked in my vegan cheese review) & some leftover pasta.  Oh – and two Chinese eggplants.

1-27-16 (5)

1-27-16 (14)

1-27-16 (9)

1-27-16 (8)

I actually had this selection of vegan cheeses – seen above.  I opted to use the individual slices first because 1) they were getting old and 2) I thought this dish would make better use of (read: mask) their less than fabulous flavor.  Ultimately – I did use some of the other two cheeses, as well.  The result is AMAZING!  You can use whatever vegan cheeses you prefer but you are going to need about a pound of various cheeses – before all is said & done.

I used Chinese eggplant & I recommend them because they are less bitter & carry less moisture than regular eggplant.

I used nutritional yeast but a vegan Parmesan would also work.  Or use neither.

This takes a few steps but all are simple & the result is a decadent feast that nobody would ever guess was vegan – at least with this particular combination of cheeses.  I find some vegan cheeses taste more fake than others – so – the brands you use will matter – but I am certain lots of other brands would be just as yummy – especially the Field Roast Chao cheeses – my favorite of the vegan cheeses I have tried.

Whatever you do – get it together to make this – at least once.  It really is killer!

1-27-16 (43)

1-27-16 (61)

10-Ingredient Vegan Eggplant Parmesan Mac & Cheese

Feeds 4-6 depending on appetites

INGREDIENTS

4+ cups or so of cooked pasta

2 Chinese eggplant (or other variety) – sliced 1/2″ thick

1 cup bread crumbs

1/4 cup nutritional yeast (or vegan Parmesan)

1 TBS dry parsley

8 oz (or 12 individual slices) vegan American or cheddar cheese (or a mix) – PLUS SOME  EXTRA – just in case

4 oz (or 6 individual slices) vegan mozzarella – PLUS SOME  EXTRA – just in case

(Extra grated vegan cheese to top the casserole – one that melts would be prettiest)

2 – 3 cups unsweetened vegan milk

1 1/2 – 2 cups pasta sauce (I used Rao’s Arrabbiata)

Basil or parsley (or both) – chopped for garnish

Olive oil

1-27-16 (11)

1-27-16 (12)

1-27-16 (13)

DIRECTIONS

Heat the oven to 375 degrees.

Mix the bread crumbs, nutritional yeast & dry parsley in a bowl.  Put about 1/2 cup milk in another bowl.  Heat some olive oil in a frying pan.  Dunk the eggplant rounds in the milk & then through the breadcrumbs and drop into the hot oil.  They should brown pretty quickly.  Flip & brown the other side.  Put on a cooking sheet & into the oven while you repeat the process until all the eggplant is cooked.  You will likely need to wipe out the burnt breadcrumbs & add more oil with each batch.

1-27-16 (15)

1-27-16 (16)

1-27-16 (17)

1-27-16 (19)

In a stock pot, melt the American and/or cheddar cheese.   Add vegan milk in small increments until it becomes creamy.   Stir in the pasta.  At this point – I decided it needed more cheese so I added two slices of this cheese (below) and a bit more milk & cooked it until it looked wet & yummy & creamy.   I am not giving exact directions as to the cheese-milk-pasta ratio because different cheeses might have more or less moisture – and everyone has a different idea of how wet mac & cheese should be.    I would suggest going a little wet – as the pasta & eggplant will absorb it & you won’t have a dry dish.

1-27-16 (7)

1-27-16 (20)

1-27-16 (21)

Look at that up there!!!!  Doesn’t that look just ridiculous?!  It was all I could do not to just start shoving it in my face.  But I used considerable will power & continued with the recipe.

So – when you get your pasta-cheese-milk ratio to where it looks creamy but still a bit wet (so it won’t dry out in cooking) – take it off the flame.

Grease a casserole pan & layer half the eggplant on the bottom.

1-27-16 (22)

1-27-16 (23)

Add another layer of eggplant with the rest of the slices & top with pasta sauce.

In the same pan you melted the cheese in – melt the mozzarella & pour it over your casserole & pop the pan into the oven.

1-27-16 (24)

1-27-16 (25)

1-27-16 (26)

1-27-16 (27)

At this point – I took my dogs for a walk – COMPLETELY forgetting I had this in the oven.  I think it needed 30-45 minutes in the 375 oven – but it got way more than that.  Don’t burn yours.  I kinda did.   Look – not so pretty.

1-27-16 (29)

1-27-16 (6)

1-27-16 (30)

So – in an effort to make it pretty again – I grated some of that cheese above onto it & popped it back into the oven for about ten minutes.  As you can see – it did little to make it prettier (that cheese did not want to melt) – but when I scooped it onto plates – it looked & SMELLED amazing!

So – maybe do not burn yours & it will be prettier but nobody needs to see it before it hits the plate, anyway.

So – scoop some onto plates & garnish with parsley and/or basil.  I swear – this will fool people out of suspecting it is vegan.  So yummy & comforting!

Waste no time & devour it!

1-27-16 (34)

1-27-16 (57)

1-27-16 (69)

Caramelized Cauliflower & Creamy Pasta Caprese Casserole (Vegan or Not)

Leave a comment

All Photos © Christine Elise McCarthy 2015

To see images of my past posts & get links to the recipes – look on my Pinterest board – HERE.

images (1)download (1)

9-15a-15 (41)

9-15a-15 (31)

BathingandthesinglegirlCover

vromans back

Creamy-Caprese-Cauliflower-Casserole-(2)

Photo – The Iron You

So THIS recipe for the CREAMY CAPRESE CAULIFLOWER CASSEROLE (seen above) showed up in my email box & I could not resist.  Apparently, they were inspired by another of my favorite food blogs – How Sweet It Is – but I was unable to find her recipe.

I would have been happy to make this with cauliflower only but once I roasted my medium head of cauliflower florets – they shrunk to a portion too small – so I added leftover pasta from my Vegan Pasta with Sausage, Arugula & Tomatoes – seen below.

9-15-15 (52)

9-12-15 (12)

I will confess to using half real cheese & half vegan cheese in this.  I used the leftover mozzarella from my Heirloom Tomato, Fresh Mozzarella & Avocado Caprese Salad with Olive Oil Caviar – seen above – as the topping cheese (and a few shreds of real Parmesan) – but I used a lot of this cheese below – that I gave a bad review to yesterday.  I did not want to waste the tastier vegan cheeses I have & I felt this stuff seemed most likely to melt into a binding element in this casserole – and I think I was correct.

9-14-15 (7)

9-15a-15 (30)

9-15a-15 (26)

9-15a-15 (52)

This is not a complicated recipe & is likely to be a crowd pleaser – whether you make it vegan or not.

Caramelized Cauliflower & Creamy Pasta Caprese Casserole (Vegan or Not)

Feeds 6

INGREDIENTS

1 large head of cauliflower – cut into florets

2 1/2 cups tomato sauce

4 TBS tomato paste

1 cup almond (or soy) milk

1 cup grated Parmesan (or vegan alternative)

2 cups shredded or fresh mozzarella (or vegan alternative)

1 cup grape or cherry tomatoes – halved

2 large handfuls basil – shredded or chopped

Olive oil

1-3 tsp crushed red pepper

3 garlic cloves

3 cups cooked pasta (about 1/2 lb dry)

S&P

9-15a-15 (2)

9-15a-15 (4)

DIRECTIONS

Heat the oven to 425 degrees.

Toss the cauliflower with olive oil & some S&P.  Bake for 30 minutes – tossing once at the 15 minute mark.  Set aside.  Lower oven temperature to 350.

Meanwhile – heat a TBS olive oil in a stock pan on low heat.  Add the crushed red pepper & the garlic & cook one minute.  Add the tomato sauce (being careful not to get splattered) & the tomato paste.  Heat through.  Add the milk, 1/2 the mozzarella, all of the Parmesan, 1/2 the halved tomatoes and a good handful of shredded basil & combine.  Season with S&P.

9-15a-15 (5)

9-15a-15 (6)

9-15a-15 (7)

Add the cauliflower & pasta & toss well.

Put into a greased casserole pan & top with the remaining mozzarella & tomatoes.  Bake for 30 minutes.  Turn the oven to 500 degrees & cook another 5-10 minutes or until the cheese begins to turn golden.

Allow to cool for 5-10 minutes & then garnish with shredded basil.

9-15a-15 (9)

9-15a-15 (12)

9-15a-15 (14)

9-15a-15 (28) 9-15a-15 (43)

9-15a-15 (39)

9-15a-15 (51)

Southwestern Taco or Nacho Style Mac and Cheese

Leave a comment


All Photos © Christine Elise McCarthy 2014

To see images of my past posts & get links to the recipes – look on my Pinterest board – HERE.

images (1)download (1)

~

All my posts now have a VERY customizable PRINT & PDF option.  Create a PDF & save the recipe to your computer or print it out.  It offers a “remove images” option & you can delete any part of the post you do not need before printing.  The button is below by the Twitter & Facebook links.

~

9-13-14 (47)

9-13-14 (75)


Untitled

vromans back

I don’t know what is wrong with me but I have a definite pattern of opting to make comfort food on the hottest of days.  Yesterday was no exception.  One hundred degrees out?  Turn on the oven & get baking!

This dish is pretty simple & very customizable.  I used ricotta because I had some left over from my Zucchini Squash Blossom White Pizza with Goat Cheese and Ricotta and Mozzarella.

9-4-14-20

Ricotta is better suited to lasagnas though & I might not use it if I didn’t already have it around.  I also opted to roast 5 jalapenos because 1) I have a convenient stove-top grill and 2) it was another opportunity to have another heating element cranking away in my already unbearably hot kitchen.

9-13-14 (17)

9-13-14 (23)

9-13-14 (27)


Roasting peppers (or eggplant) can be done directly on the burners of your stove.  Just put them on a flame & turn until they are black everywhere.  Put them into a covered container for a few minutes so they “sweat,” and then rub the blackened skins off under cool running water.  Seed & mince the jalapenos & you are ready to go.

9-13-14 (51)

9-13-14 (78)

I also made my own taco seasoning (more than I ended up using) but you could just use a packaged kind – if you prefer.

Homemade Taco Seasoning

Blend:

1/2 tsp dry oregano

1 TBS chili powder

1 tsp ground cumin

1 tsp ground coriander

1 1/2 tsp cornstarch

1/2 tsp onion powder

1/2 tsp garlic powder

1 tsp salt

1 tsp pepper

1 tsp cayenne pepper

1/2 tsp paprika

9-13-14 (41)


This is a pretty spicy recipe so go easy on (or eliminate) the spicy parts if you prefer a milder dish.  Also – if there is an ingredient or two that you do not have or do not like – lose it.  Or – like corn in your tacos or nachos?  Add some!   Want some cooked meat in there?  Add it.  This is a very forgiving dish.

Southwestern Taco or Nacho Style Mac and Cheese

Feeds a lot – 6 easily

INGREDIENTS

8 oz dry macaroni

9 oz vegan beef crumbles (or real beef)

1/2 red onion – diced

1/2 red bell pepper – diced

1-5 roasted (or raw) jalapenos – (I roasted mine as explained above & I used all 5) – minced (optional)

1 (4 oz) can chiles (I used hot ones)

1 (15) oz can black beans – drained & rinsed

1 (10 oz) can Rotel (or diced tomatoes)

2 TBS taco seasoning (packaged or use the recipe above)

Olive oil

1-4 chipotle peppers in adobo sauce – minced (optional)

3 cups cheese (I used 1 cup ricotta & 2 cups grated cheddar/mozzarella blend but 3 cups of grated cheese is fine (maybe better) and pepper jack would be great) – or VEGAN alternative

Extra grated cheese to top the casserole (1-2 cups or so)

1 (4 oz) can sliced black olives (as garnish)

Raw jalapeno – sliced – as garnish

Cilantro – as garnish

Tomato – diced – as garnish

Avocado – as garnish

Pico de gallo or salsa as garnish

Corn chips – as garnish

9-13-14 (15)

9-13-14 (18)

9-13-14 (60)


DIRECTIONS

Heat the oven to 350 degrees.

Cook & drain the macaroni.

Make the taco seasoning – if you are not using packaged.

Roast the jalapenos – if you are using them roasted.  Mince & set aside.

Heat 2 TBS olive oil in a large saute pan.  Saute the onion, bell pepper & canned chiles & fresh jalapeno (roasted or not) and chipotle peppers and heat until the onions & peppers are softened.  Add the beef & heat through.  If using real meat – be sure it is cooked through.

Add the seasoning & the macaroni & stir around.

In a large bowl, mix the black beaks & Rotel (or diced tomato) & then add the macaroni beef mixture.  Add the cheese you are using & mix it all up well.

9-13-14 (19)

9-13-14 (20)

9-13-14 (21)

9-13-14 (24)

9-13-14 (25)


9-13-14 (29)

9-13-14 (32)

9-13-14 (34)

Grease a large casserole dish & put the mix in there.  Top with additional cheese & some sliced olives & jalapeno.  Cook for 30-45 minutes or until the cheese is all melted & bubbly & beginning to turn golden.

Garnish with your choice of olives, jalapeno, avocado, tomato and cilantro.  Corn chips might be a nice touch, too.

Crack a cold beer & get your eat on!


9-13-14 (36)

9-13-14 (42)

9-13-14 (46)

9-13-14 (69)

9-13-14 (72)


Baked Pink Pasta Casserole With Chicken & Peas (Vegan)

Leave a comment

All Photos © Christine Elise McCarthy 2013

To see images of my past posts & get links to the recipes – look on my Pinterest board – HERE.

images (1)download (1)

~

All my posts now have a VERY customizable PRINT & PDF option.  Create a PDF & save the recipe to your computer or print it out.  It offers a “remove images” option & you can delete any part of the post you do not need before printing.  The button is below by the Twitter & Facebook links.

~

Image

Another easy one & another one that can be made with or without “meat.”  Today is the last day of my badass boyfriend’s holiday stay so I will make this as brief as possible (so I can hang out with him).  So – recipe only.

Image

Baked Pink Pasta Casserole With Chicken & Peas (Vegan)

Serves 4-6

INGREDIENTS

1 lb dry pasta (I used large shells)

Olive oil

1 29 oz can tomato puree

1 10 oz can Rotel (or diced tomatoes with green chilies)

4 garlic cloves – minced

1 tsp crushed red pepper (or to taste)

1 tsp oregano

1 tsp dry basil

1 tsp each S&P

9+ oz veganchicken – thawed & shredded (optional) – I love Beyond Meat

1 cup peas (optional)

4 oz vegan cream cheese

10 basil leaves – sliced or diced

1 cup grated cheese (I used a mozzarella/cheddar mix)

Image

Image

Image

DIRECTIONS

(Full disclosure – I originally – 3 years ago – made and posted this with real cheese – hence the visual.)

Cook & drain the pasta.

Heat a TBS or so of olive oil in a sauce pan.  Add the garlic & cook for about 30 seconds.  Add the tomato puree & Rotel.  Stir & add the oregano, crushed red pepper & dry basil.  Add the S&P.  Stir to incorporate.   Stir in the cream cheese & peas (if using peas).  Take about 1 cup of sauce & set it aside.

Heat the oven to 375.  In a large bowl, mix the pasta with the larger quantity of sauce.  Add chicken – if you are using it.  Stir it all together.

Grease a casserole dish with cooking spray.  Cover the bottom of the dish with the cup of reserved sauce.  Put the pasta mix in on top of that.  Top with the grated cheese.

Bake for about 20 minutes or until the cheese on top is sift or melted & beginning to brown.  Serve it up & garnish with the chopped basil.

ENJOY!

Image

Image

Image

Image

Image

Spicy Vegetarian Buffalo Chicken Pasta

Leave a comment

All Photos © Christine Elise McCarthy 2013

To see images of my past posts & get links to the recipes – look on my Pinterest board – HERE.

images (1)download (1)

~

All my posts now have a VERY customizable PRINT & PDF option.  Create a PDF & save the recipe to your computer or print it out.  It offers a “remove images” option & you can delete any part of the post you do not need before printing.  The button is below by the Twitter & Facebook links.

~

Image

I made this for myself the night I made by badass boyfriend, Miles, this Easy Spicy Southern Chicken Spaghetti.

Image

You could easily leave out the faux chicken or sub it out with some cooked real chicken.  This is really just all about the Velveeta & the Buffalo sauce.  Easy, naughty & delicious!

This casserole fell victim to the same oven mutiny that the Chicken Spaghetti did so my first effort had a VERY crispy top & the inside was more dry than I’d hoped.  I fixed it by simply adding more melted Velveeta heated with some milk, tossed it all together, topped with a bit more cheese & panko & then just heated that through until the panko browned.

Below are my two efforts – the original & the redesigned leftovers.

Image

Image

Spicy Vegetarian Buffalo Chicken Pasta

INGREDIENTS

1/2 lb dry pasta – cooked

8 oz vegan chicken (or cooked real chicken)

1 TBS butter

1 TBS flour

3/4 cup milk (plus extra for reheating leftovers)

8 oz Velveeta (plus extra for reheating leftovers)

1 cup grated cheese (I used a mozzarella/cheddar mix)

1/3 cup Frank’s Buffalo sauce (or Frank’s Hot Sauce or other hot sauce) – plus extra as garnish

S&P

3/4 cup Panko or other bread crumbs

Crumbled blue cheese or Gorgonzola as garnish (optional) or a dollop per serving of blue cheese dressing

Scallions and/or cilantro and/or parsley as garnish (optional)

Image

Image

Image

Image

DIRECTIONS

Cook the pasta & real chicken (if you are using real chicken).  Set aside.

Heat the oven to 375 degrees.

Melt the butter in a stock pan and heat over medium heat until bubbly.  Whisk in the flour.  Whisk constantly until the roux begins to brown – maybe 1-2 minutes.  Slowly whisk in the milk – allowing it to thicken.  Add the Velveeta, hot sauce & real/faux chicken.  Mix.  Add the pasta.  Add S&P to taste.

Image

12-11-13 (66)

Image

Prepare a casserole pan with cooking spray or butter.  Place the pasta mix & top with grated cheese & bread crumbs.  Bake for 20-25 minutes or until the cheese is melted & bubbling at the edges & the bread crumbs are beginning to brown.

Serve this bad boy up topped with crumbled blue cheese of some kind or with a bit of blue cheese dressing & some cilantro/scallions & drizzle with even more hot sauce.  Eat until your pants feel tight.  When you are done – head out to the store & by some cheap wine & the largest bag of Doritos available.

Image

Consume those until you have visible chemical burns in your mouth from the toxic Doritos.  Keep drinking through the pain.  Watch The Voice.  Complain out loud to sleeping dogs about how LAME this season is.  Post a few tipsy Facebook comments along those same lines.

Image

Indulge in some ZZZquil.  Fall asleep.

Wake up.  IMPORTANT PART: skip the gym.

Go the donut shop.  Do some of this to yourself.

ImageImage

Before the sugar high wears off – do this to yourself.

Image

Go home eating this shit in the car.  Wipe your hands on your pants.

Weigh yourself & curse the heavens for not fulfilling your weight loss goals.

Image

Easy Spicy Southern Chicken Spaghetti

191 Comments

All Photos © Christine Elise McCarthy 2013

To see images of my past posts & get links to the recipes – look on my Pinterest board – HERE.

images (1)download (1)

~

All my posts now have a VERY customizable PRINT & PDF option.  Create a PDF & save the recipe to your computer or print it out.  It offers a “remove images” option & you can delete any part of the post you do not need before printing.  The button is below by the Twitter & Facebook links.

~

LARGE BathingandthesinglegirlOrangeV52

My debut novel is out!  Check it out!  I think it is HILARIOUS!  I hope you will, too!

www.BathingBook.com

Wanna watch the ten minute comedy that spawned the book – HERE you go!

9507098

~

Image

I am from Boston.  I had never heard of chicken spaghetti.  My badass boyfriend, Miles, is from Little Rock and, apparently, grew up on it.  It can be a tricky business to attempt to recreate a dish you have never tasted yourself.  And Miles is a finicky eater & likes his stuff the way he likes it.  I repeatedly asked him to describe chicken spaghetti to me but, not a cook himself, he seemed at a loss.  I asked him to get the recipe from his grandmother – but he neglected to & now she is gone – her chicken spaghetti secrets gone along with her.

Still – I persisted.  I badgered him & I researched and, ultimately, it seemed to me that chicken spaghetti was basically a version of Miles’ own “World Famous Cheese Dip” – with chicken & spaghetti added.  I made it the other day & Miles declared it the best he’d ever had!  So – I present it to you now.

One thing, though.  My oven staged a mutiny & refused to stay at the suggested 350 degrees.  It kept mysteriously dropping to under 200.  At that temp, the cheese would never get all melted & bubbly.  The result was that it sat in the oven for twice the 45 minutes I initially planned.  The result was a VERY crunchy top:

Image

I like a crunchy top but the interior was also more dry than I had intended.  Miles ate it happily but the next day, when I reheated some for him, I tossed it in a little newly melted additional Velveeta heated with a bit of milk.  It worked wonders & I recommend this step in reheating yours.  The two photos at the very top show the results directly from the oven & the other shows the reheated portion with extra cheesy sauce.  Also – know this is a VERY easy dish to prepare.  It could be made without the chicken or with some vegan substitute.  If you do this – use a vegetarian soup, too.  It is really all about the cheese & the spice!

And – as a quick aside – look what I got in the mail today!!!  I love me some Pee Wee!

MERRY CHRISTMAS!

Image

Image

Image

Easy Spicy Southern Chicken Spaghetti

Serves 6-8

INGREDIENTS

1 lb pasta – cooked

1 lb chicken tenders

2 TBS butter

12-16 oz Velveeta (plus extra if you want to add more when you reheat it – see above notes – or if you like a wetter dish use the full 16oz.  Go less for a mac-n-cheese texture – more for an Alfredo kinda thing.)

1 cup milk

1 10 oz can Rotel (tomatoes & chilies)

1 10 oz can cream of chicken soup (or cream of mushroom or cream of celery)

1/2 tsp cumin

2 TBS sriracha or other hot sauce

1 cup Panko or other bread crumbs

1 cup grated cheese (I used a cheddar & mozzarella mix)

S&P to taste

Parsley and/or crushed red pepper as garnish

Image

ImageImageImage

DIRECTIONS

Cook & drain the pasta.

Spray a grill or frying pan with cooking spray & cook the chicken tenders & then cut them up.

ImageImageImage

Melt the butter in a deep stock pot sprayed with cooking spray, too.  The cooking spray seemed to make the inevitable browned/burned bits of cheese easier to clean off later.  Add the Velveeta, Rotel, soup, milk, hot sauce & cumin & melt it all together over med-high heat.  Add the chicken.  Toss it with the pasta.  I added about 1 TBS of black pepper here.  You add S&P to taste.

Spray a casserole dish with cooking spray & put the chicken spaghetti in it.  Top with grated cheese & bread crumbs.

Cook at 350 for about 30 minutes or until the cheese is bubbling & the bread crumbs brown a bit.

Image

Image

Image

Image

Image

Image

Garnish with parsley or crushed red pepper or more hot sauce.  Eat it up & promise to join a gym after the new year.  Until then – fuck it!  Melt some more Velveeta in a pan with a bit of milk.  Reheat the leftover chicken spaghetti & toss it with the additional melted cheese.  Shove it your face.  Have some Fireball whiskey, too.  Why not?  You are gonna join the fucking gym in January – so FTW!  And while you get likkered up & gain 40 pounds of Velveeta-induced poundage – look at my recipe for Spicy Extra Crispy Southern Fried Chicken

Image

or my Spicy Southern Fried Cauliflower and Delta Dipping Sauce with Smashed Baked Potatoes and White Gravy and Buffalo Mac & Cheese

Image

and decide to make that shit, too!

ImageImageImage

Vegetarian Shepherd’s Pie with Brussels Sprouts, Carrots & Jalapeno Mashed Potatoes

1 Comment

All Photos © Christine Elise McCarthy 2013

To see images of my past posts & get links to the recipes – look on my Pinterest board – HERE.

~

All my posts now have a VERY customizable PRINT & PDF option.  Create a PDF & save the recipe to your computer or print it out.  It offers a “remove images” option & you can delete any part of the post you do not need before printing.  The button is below by the Twitter & Facebook links.

~~~~~~

This is another creation inspired by existing ingredients, my own laziness & the reality of produce & its shelf life.  That doesn’t mean it is not DELICIOUS.  Delightful.  And even – dare I say it?  Delovely!

I have expressed some frustration recently with my photography but I bought a new $17 toy (a light) & the world has opened up just a bit.  I was beginning to feel a tad sorry for myself as I cannot really compete with folks that are getting paid to blog.  I know they had to work their way there from where I am – but – it is still a bit like me trying to compete for roles with Diane Lane or Julia Roberts.  These folks have their shit together & skills, experience, equipment, financing, maybe even a team – etc.  Here I am – trying to keep my monthly grocery bill down & think of new, affordable things to make and then photograph them using my i-phone & a $4 clamp light.  And I have to photograph them alone – as in – with nobody to hold the fork just “that way” or assist me at all.  Framing a photo & trying to hit the screen (on my i-phone, remember) to focus the image where I want the focus & then adjust to hit the shutter without effecting the focus, all with my NON-dominant left hand while I try to hold the subject matter in place with my right hand – can get really frustrating, lemme tell you!   Then I have to eat the food.  All of it.  I cannot afford to waste it – as it COSTS.  And I live alone & eat 99% of my meals alone.  Then I end up eating some Goddamn lasagna for 6 days & letting the blog lag behind – while my Super King produce wilts & guilts me from the confines of the fridge.  It has begun to feel oppressive & I have been comparing myself very unkindly to the vastly superior food bloggers out there (you know who you are – THUG KITCHEN).

Then – I met Piglet.  I didn’t actually meet her.  I saw her on my friend, Nikki Dogfather’s, Facebook page.  Nikki is a full-time rescuer & she posted Piglet – immediately after she’d been pulled from the shelter – looking like this (photos stolen from Nikki):

ImageImageImageImage

She had terribly advanced mange – which is not contagious & HIGHLY curable – and the cure is not expensive.   But these victims of mange look so scary – it is a rare person that dares even investigate.  Nikki is practically a mange fetishist!  I jest, of course, but she is the go-to gal in LA if someone spots a mangy baby in a local shelter.  No case of mange will scare Nikki away!  So – after a single mange dip & twice-daily garlic water baths (and some antibiotics)  – Piglet began to recover.  I am currently fostering her while she completes her recovery.  Here she is two days ago in my house.

ImageImage

Just for some reference – here are two pugs I adopted from Nikki a few years ago.

ImageImage

That is Ella & Grisbi.  Here is how they looked a few months later.

ImageImage

See?  CRAZY transformation.  Tragically, Ella died of a bee sting at 11 months old & Grisbi died last August 16th 2012 – in his sleep – at four years, old for no known reason.  Great, big, gaping scars on my heart.  😦

So, anyway, I fell in love with Piglet ON SIGHT.  I look at lots of rescues – every day.  Facebook is rife with them.  They all give me heart twinges but Piglet was special to me.  I don’t know why.  It was like a recognized her from somewhere.  And now – I am care-taking gorgeous Piglet.  And she is a gift & an amazing example of gratitude & resilience & of living in the moment.  One can never have too many examples of THAT around.

So – a new $17 light for my photography & a new little sprite jumping around the house & a much needed PROFESSIONAL hair salon appointment on Friday (a gal can only self-Feria her color so many times in a row) – and I am feeling rather hopeful.  Plus – the greatest loss I endured last week – RIGHTED itself!  Yay!  No longer broken & sad & no longer riding the scary pot-truffle train I got on last week (read about that HERE) and nice hair right around the corner?  That’s what I’m talkin’ ’bout!

And the $17 light?  It is so great – I want to buy 5 more.  That is irrational – because I only NEED the one.  But it has improved my life SO much and for so little.  It reminds me of the time my plumber told me I needed a whole new kitchen tap set thing (and nice ones cost a lot) because the drip was not fixable.  I used a fucking ShamWow for two years behind the sink, under the tap, to catch the dripping & water STILL leaked out – warping my cabinets & damaging the finish.  Then a new plumber suggested I go buy a cheap washer (that the first plumber had declared no longer available) at a local hardware store.  “You might need to buy a whole box – but they shouldn’t cost much,” he said.  I went to my local mom & pop True Value & inquired.  Yes.  They had them.  They were a dollar seventy each.  A FUCKING DOLLAR SEVENTY!  I bought ten – even though I only needed one.  I was so fucking excited that this $1.70 thing was gonna change my life.  I had to have enough to roll around on the bed with – as if they were thousand dollar bills.  And THAT is how I feel about by $17 lamp.

Whew!

Now – onto food.   I have long made the Sunday’s at Moosewood version of veggie shepherd’s pie – and it is very good.  In fact, I am going to suggest their tofu version of “meat” in this recipe as I cannot begin to tell you (other than Super King!) where you might find the faux meat I used.   Here it is.

ImageImage

It is like weightless Grapenuts.  I am not sure if they are just re-purposing some failed attempt at a new packing material – but I took the bait.  While it says who distributes this shit, it does not say what is in it.  No ingredients list at all.  No calorie count.  Nada.  Could be the scabs from accident-prone paper dolls or the stuffing from padded toilet seats.  I don’t know.  I bought it.  I cooked it.  And I ate it.  And I am here to tell you about it so – well – there.

If you can find it, I recommend using it.  I used half that container in this decent-sized recipe so it is worth its weight in Hamburger Helper.  If you cannot – or would rather not eat mystery food – substitute any faux meat thing of your choice – whether seitan or some pre-made soy version of meat or soyrizo or the stuffing from an old padded toilet seat.  Or – EGADS!  Use ground beef!   Just know that I added over a cup of water to the 4 oz of cardboard scabs to reconstitute them into something more substantial.  So – use closer to 10-12 ounces of your fake meat selection – or more.

OR – use the Sundays at Moosewood version – which is pretty great.  It requires that you freeze tofu (I use two blocks), thaw it, squeeze it completely dry & then shred it into a crumble.

Copied & pasted from elsewhere – I present –

Sundays at Moosewood Shepherd’s Pie Filling

INGREDIENTS

  • 1 block of extra firm tofu that has been frozen, then thawed, and shredded to the appearance of ground meat
  • 1 large onion, chopped
  • 2 tablespoons of vegetable oil
  • 1/4 teaspoon of thyme
  • 1/2 teaspoon of ground coriander seeds
  • freshly ground pepper to taste
  • 3/4 cup of walnuts, toasted and chopped
  • 1 tablespoon of lemon juice
  • 2 tablespoons of soy sauce

DIRECTIONS

Sauté the chopped onion in oil with thyme, coriander, and black pepper until onions are translucent.  Add chopped walnuts and shredded tofu.  When heated through, stir in lemon juice and soy sauce.  Remove from heat.

Image

I used Brussels sprouts & carrots and, unexpectedly, a fennel bulb because – yes, you guessed it – I had them.  You could use corn or peas or any other vegetables you like.  I know this one screams out for corn because I made the mashed potatoes with roasted jalapenos – but – am I the only one that gets tired of the traditional pairings?  Like anything pumpkin has to have butter & sage on it?  Or – redheads must wear green?  Or anything with jalapeno needs corn and/or black beans?  This wasn’t a Mexican-themed shepherd’s pie.  It was a “what’s-in-my-fridge-inspired” shepherd’s pie.  You can do it, too!  Do not be intimidated.

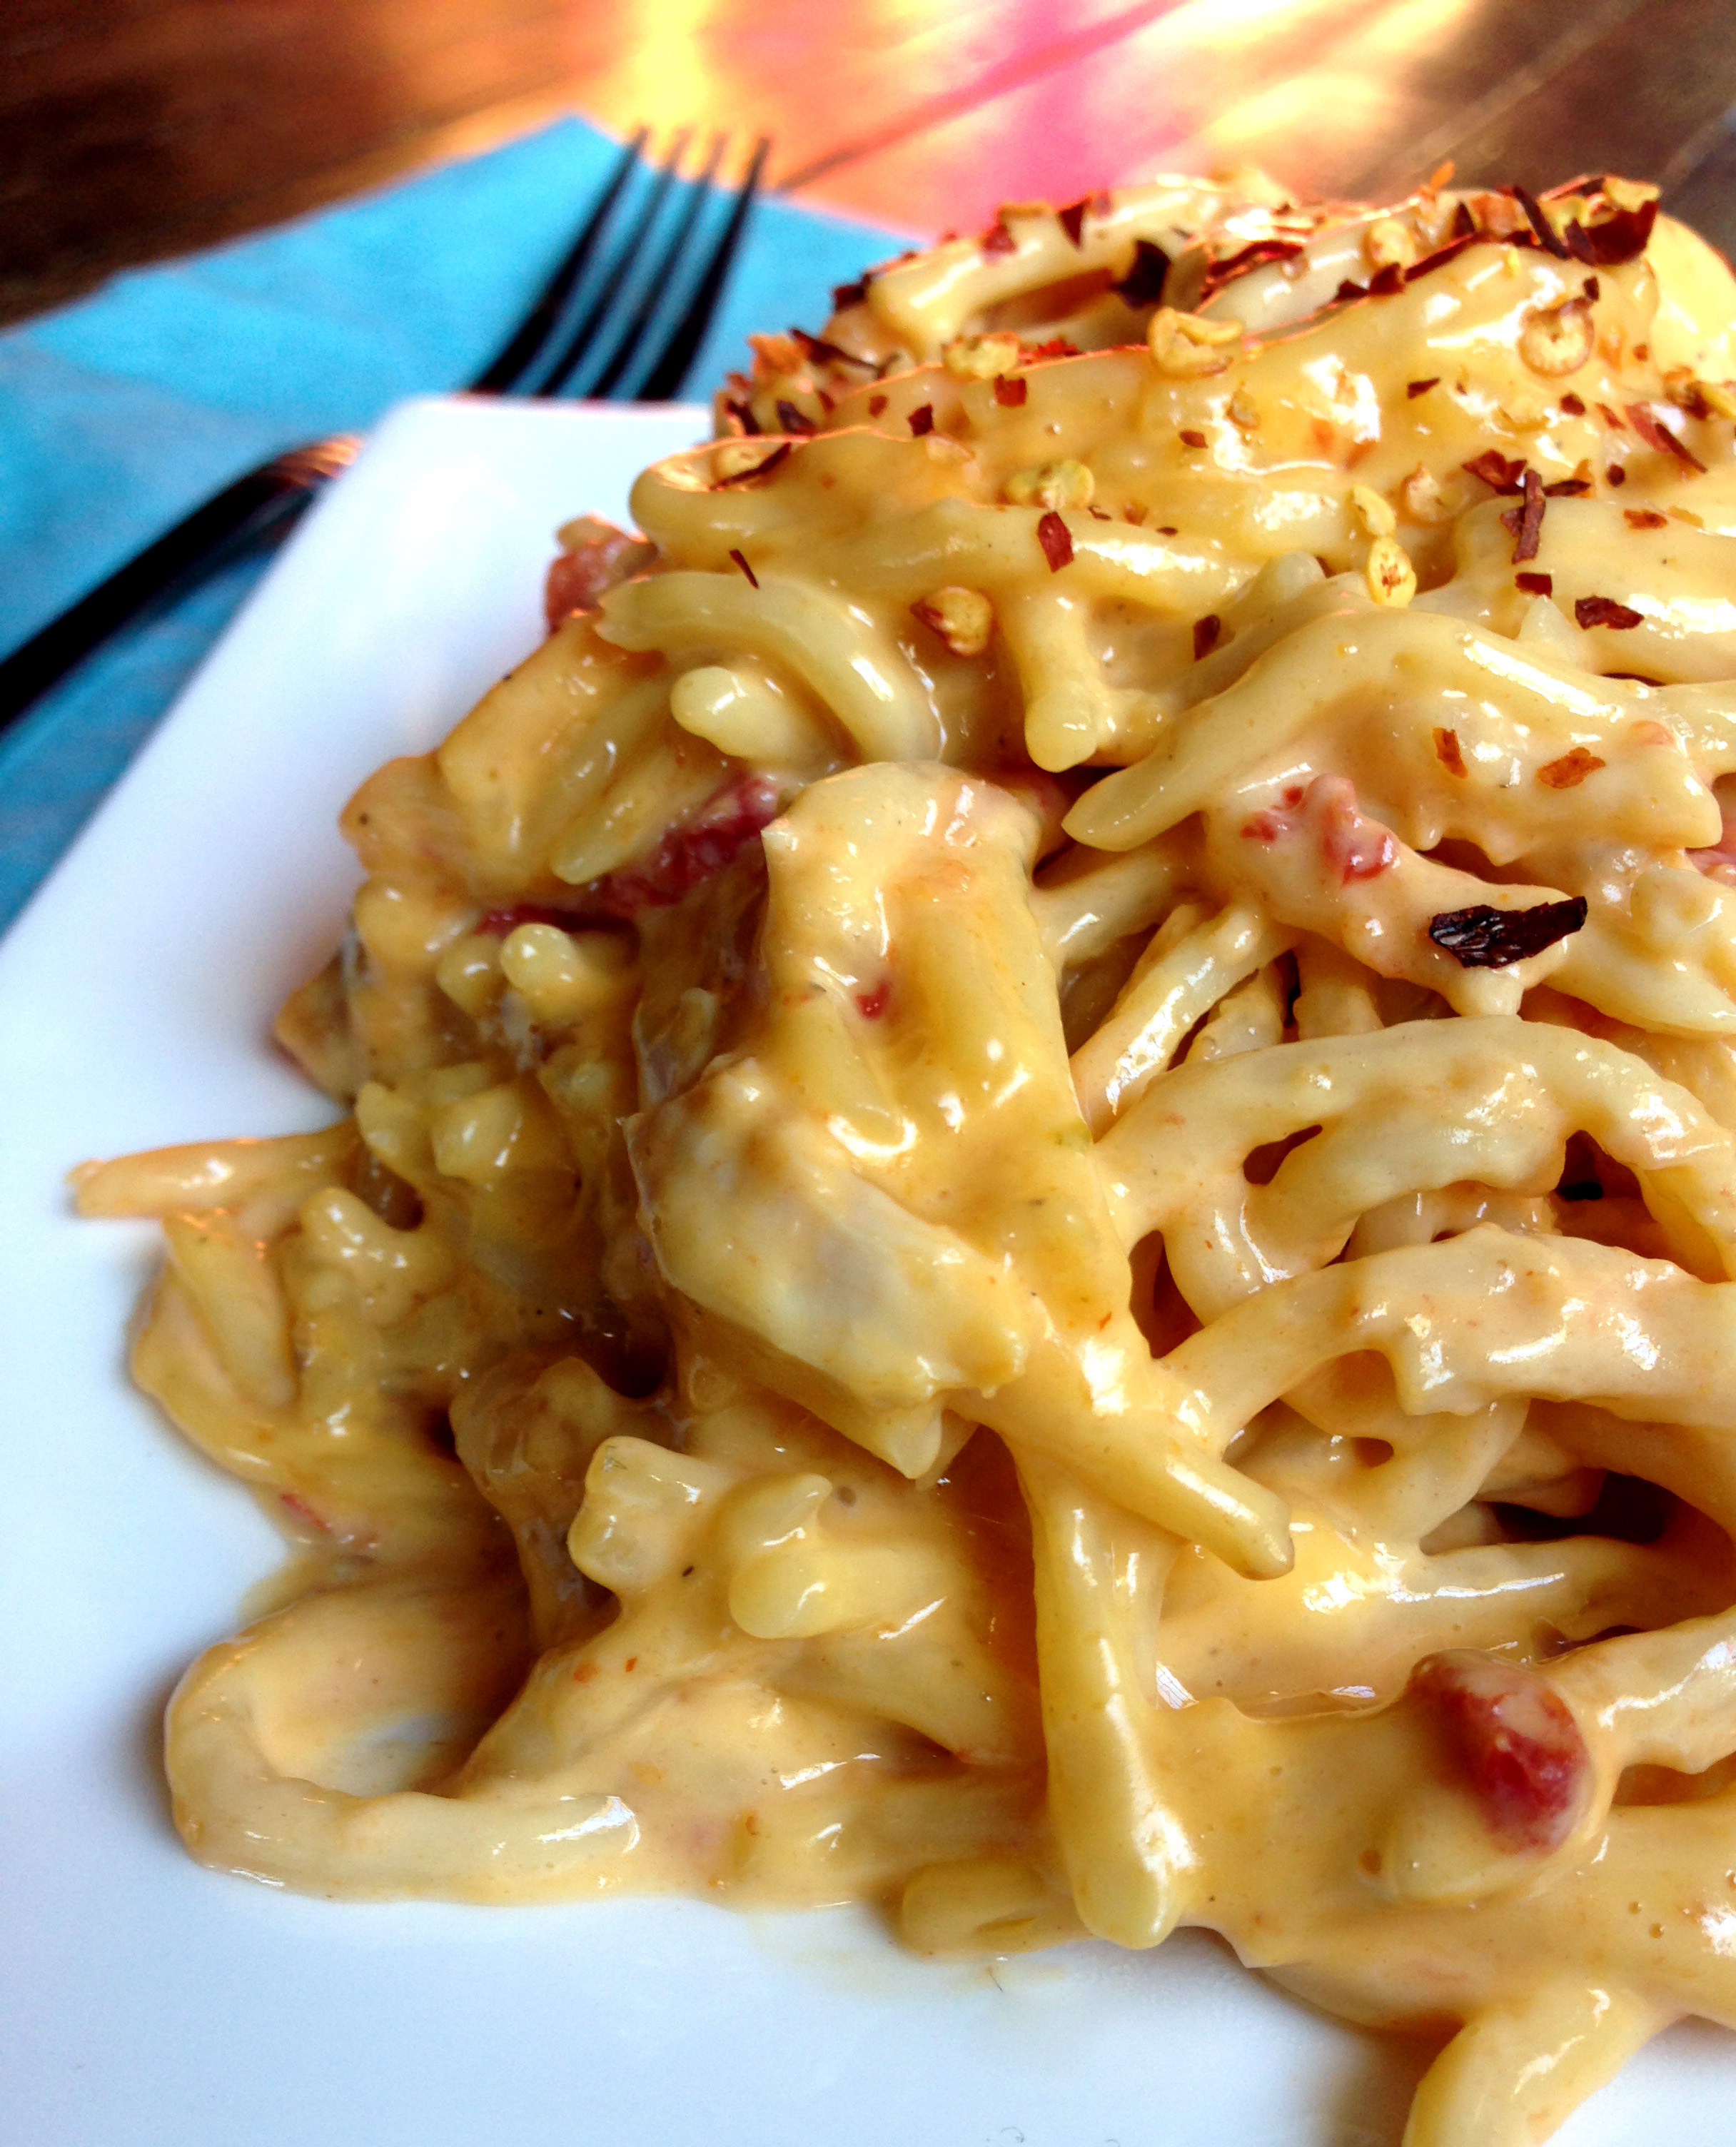
Hey!  Did you notice all my photos of this look WAY alike?  Me, too.  Shepherd’s pie can be hard to photograph because it tends to fall apart.  I got a good angle & exploited it.  Apologies for the lack of imagination.  I told you I was a hack.   🙂

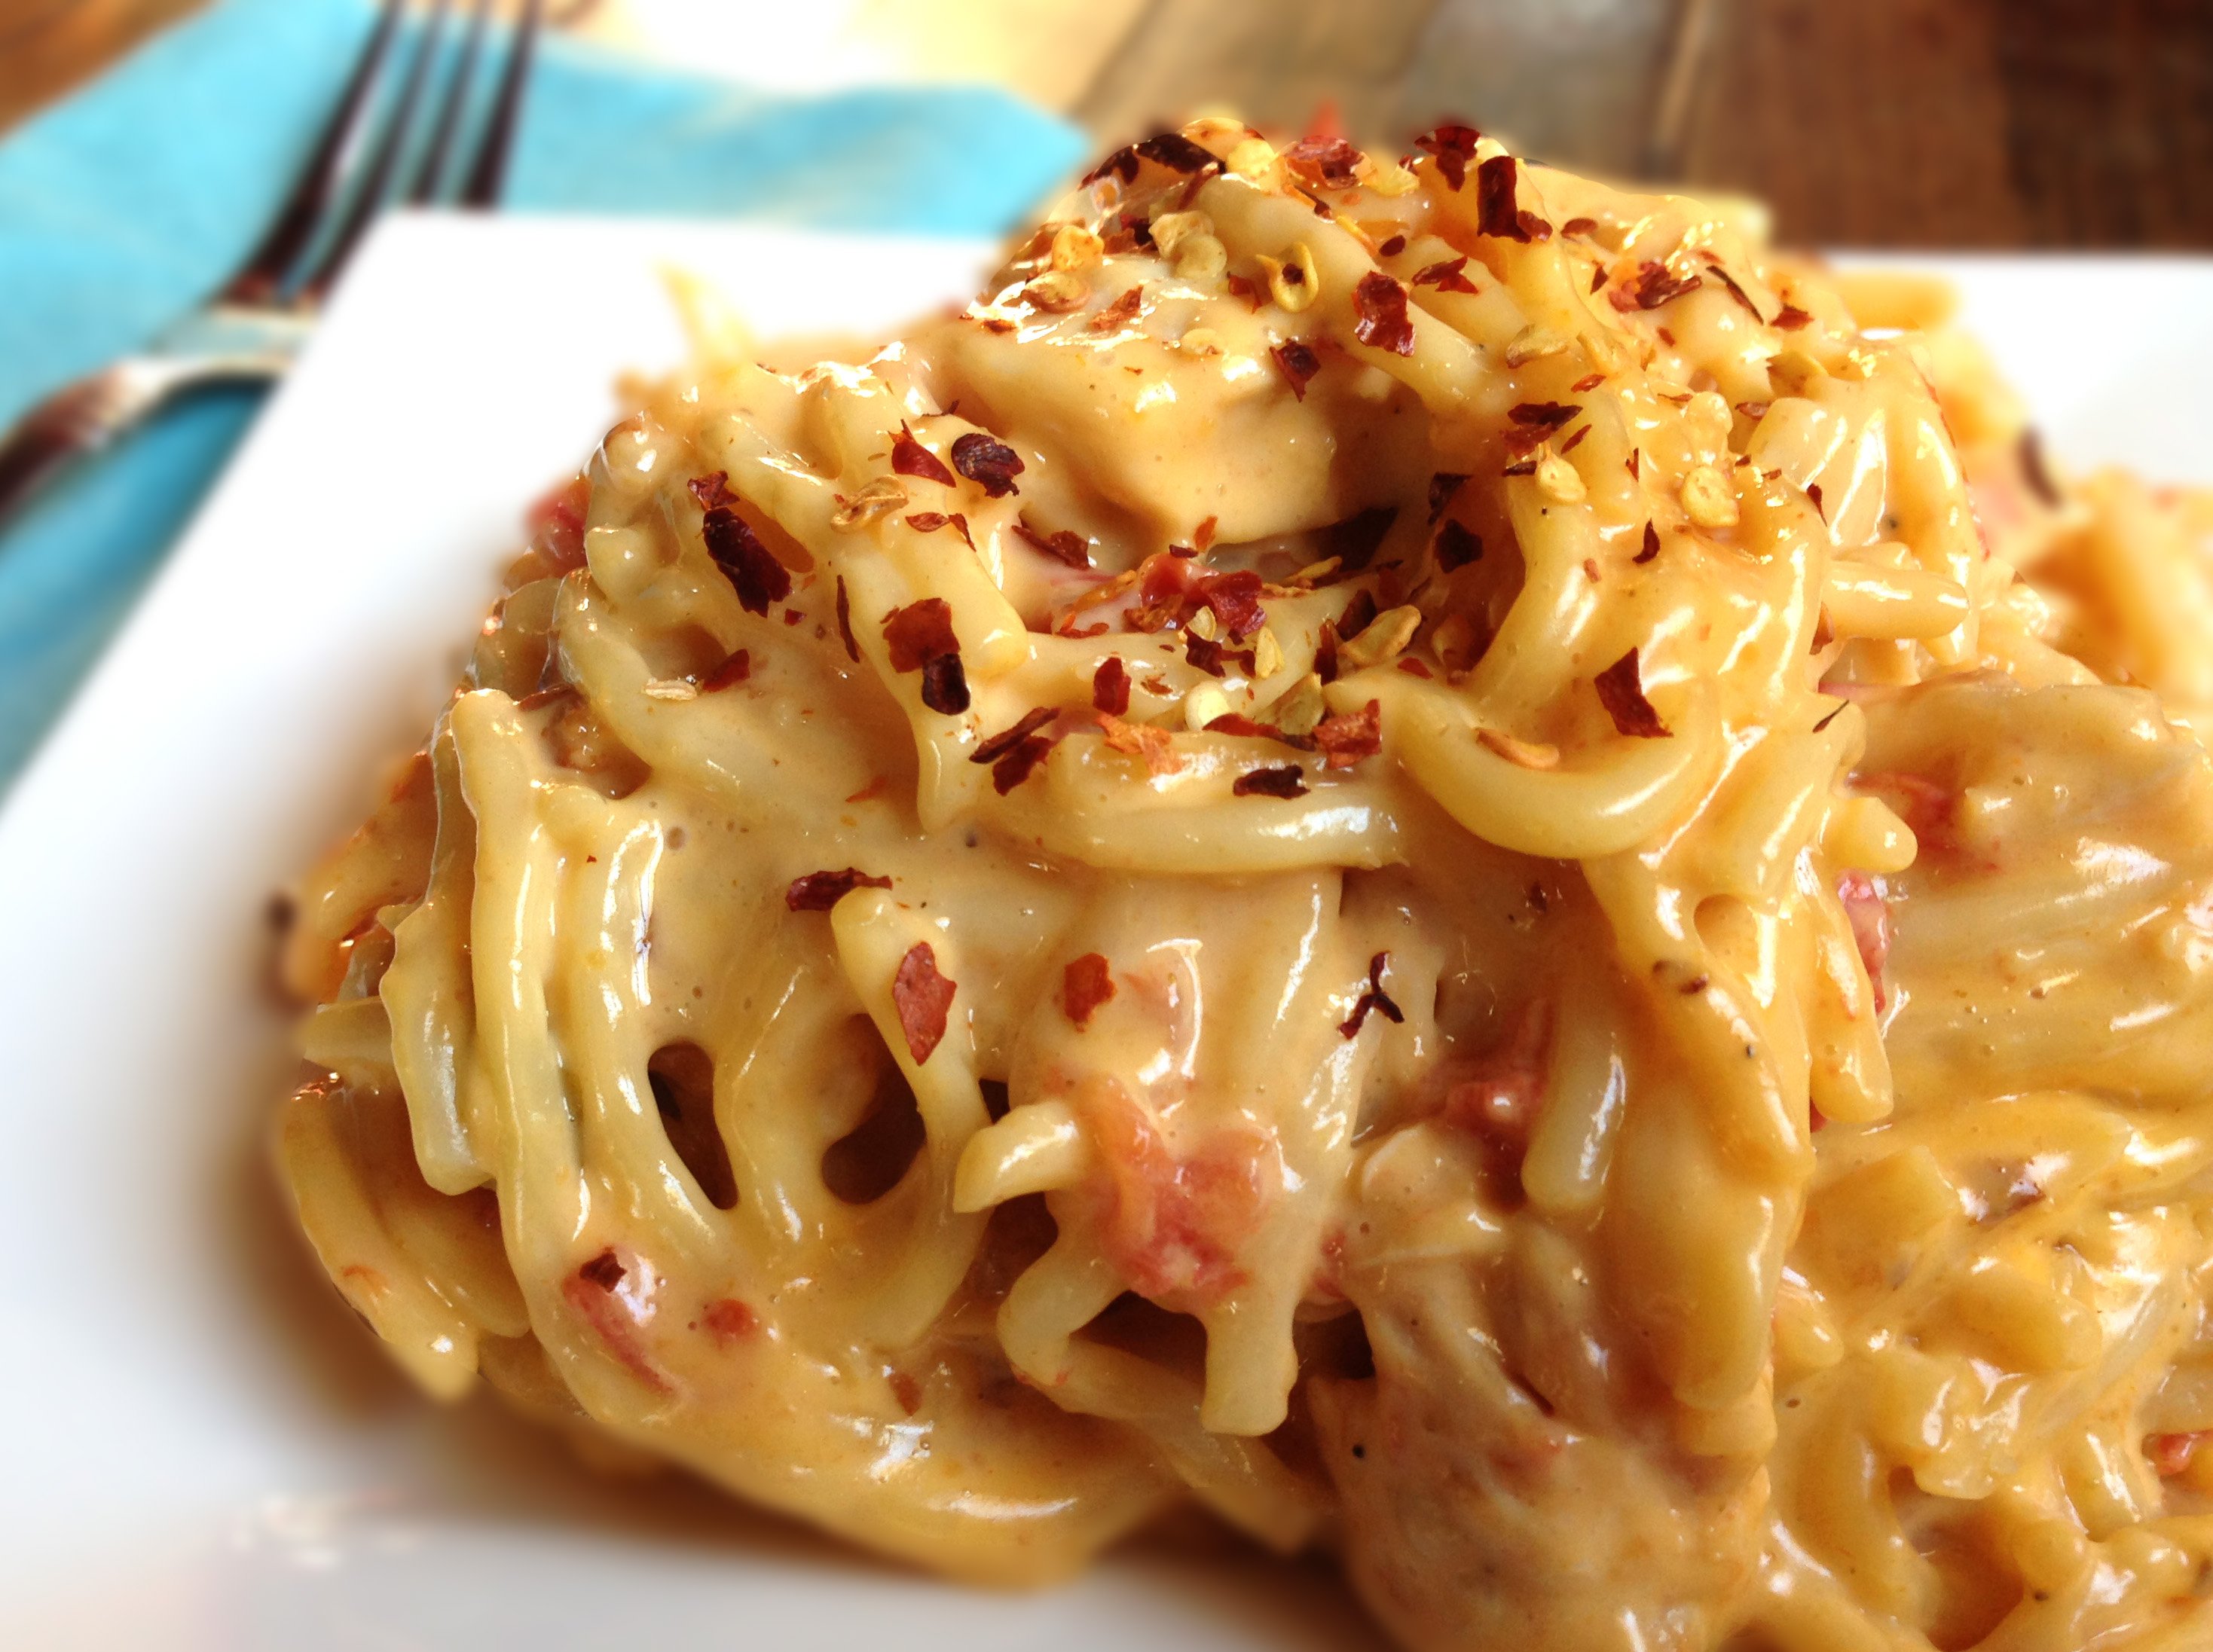
One last note – this is genuinely spicy – so keep that in mind when you decide how much jalapeno to add!  And yes – there are several steps to assemble this but all are EASY & this is worth the effort.  DO NOT BE SCARED!

Image

Vegetarian Shepherd’s Pie with Brussels Sprouts, Carrots & Jalapeno Mashed Potatoes

INGREDIENTS

For the jalapeno mashed potatoes

2 large Russet potatoes

3 jalapeno peppers (or to taste)

4 TBS butter

4 oz cream cheese

S&P to taste

More butter for browning

Parsley – chopped as grnish

For the “meat” filling

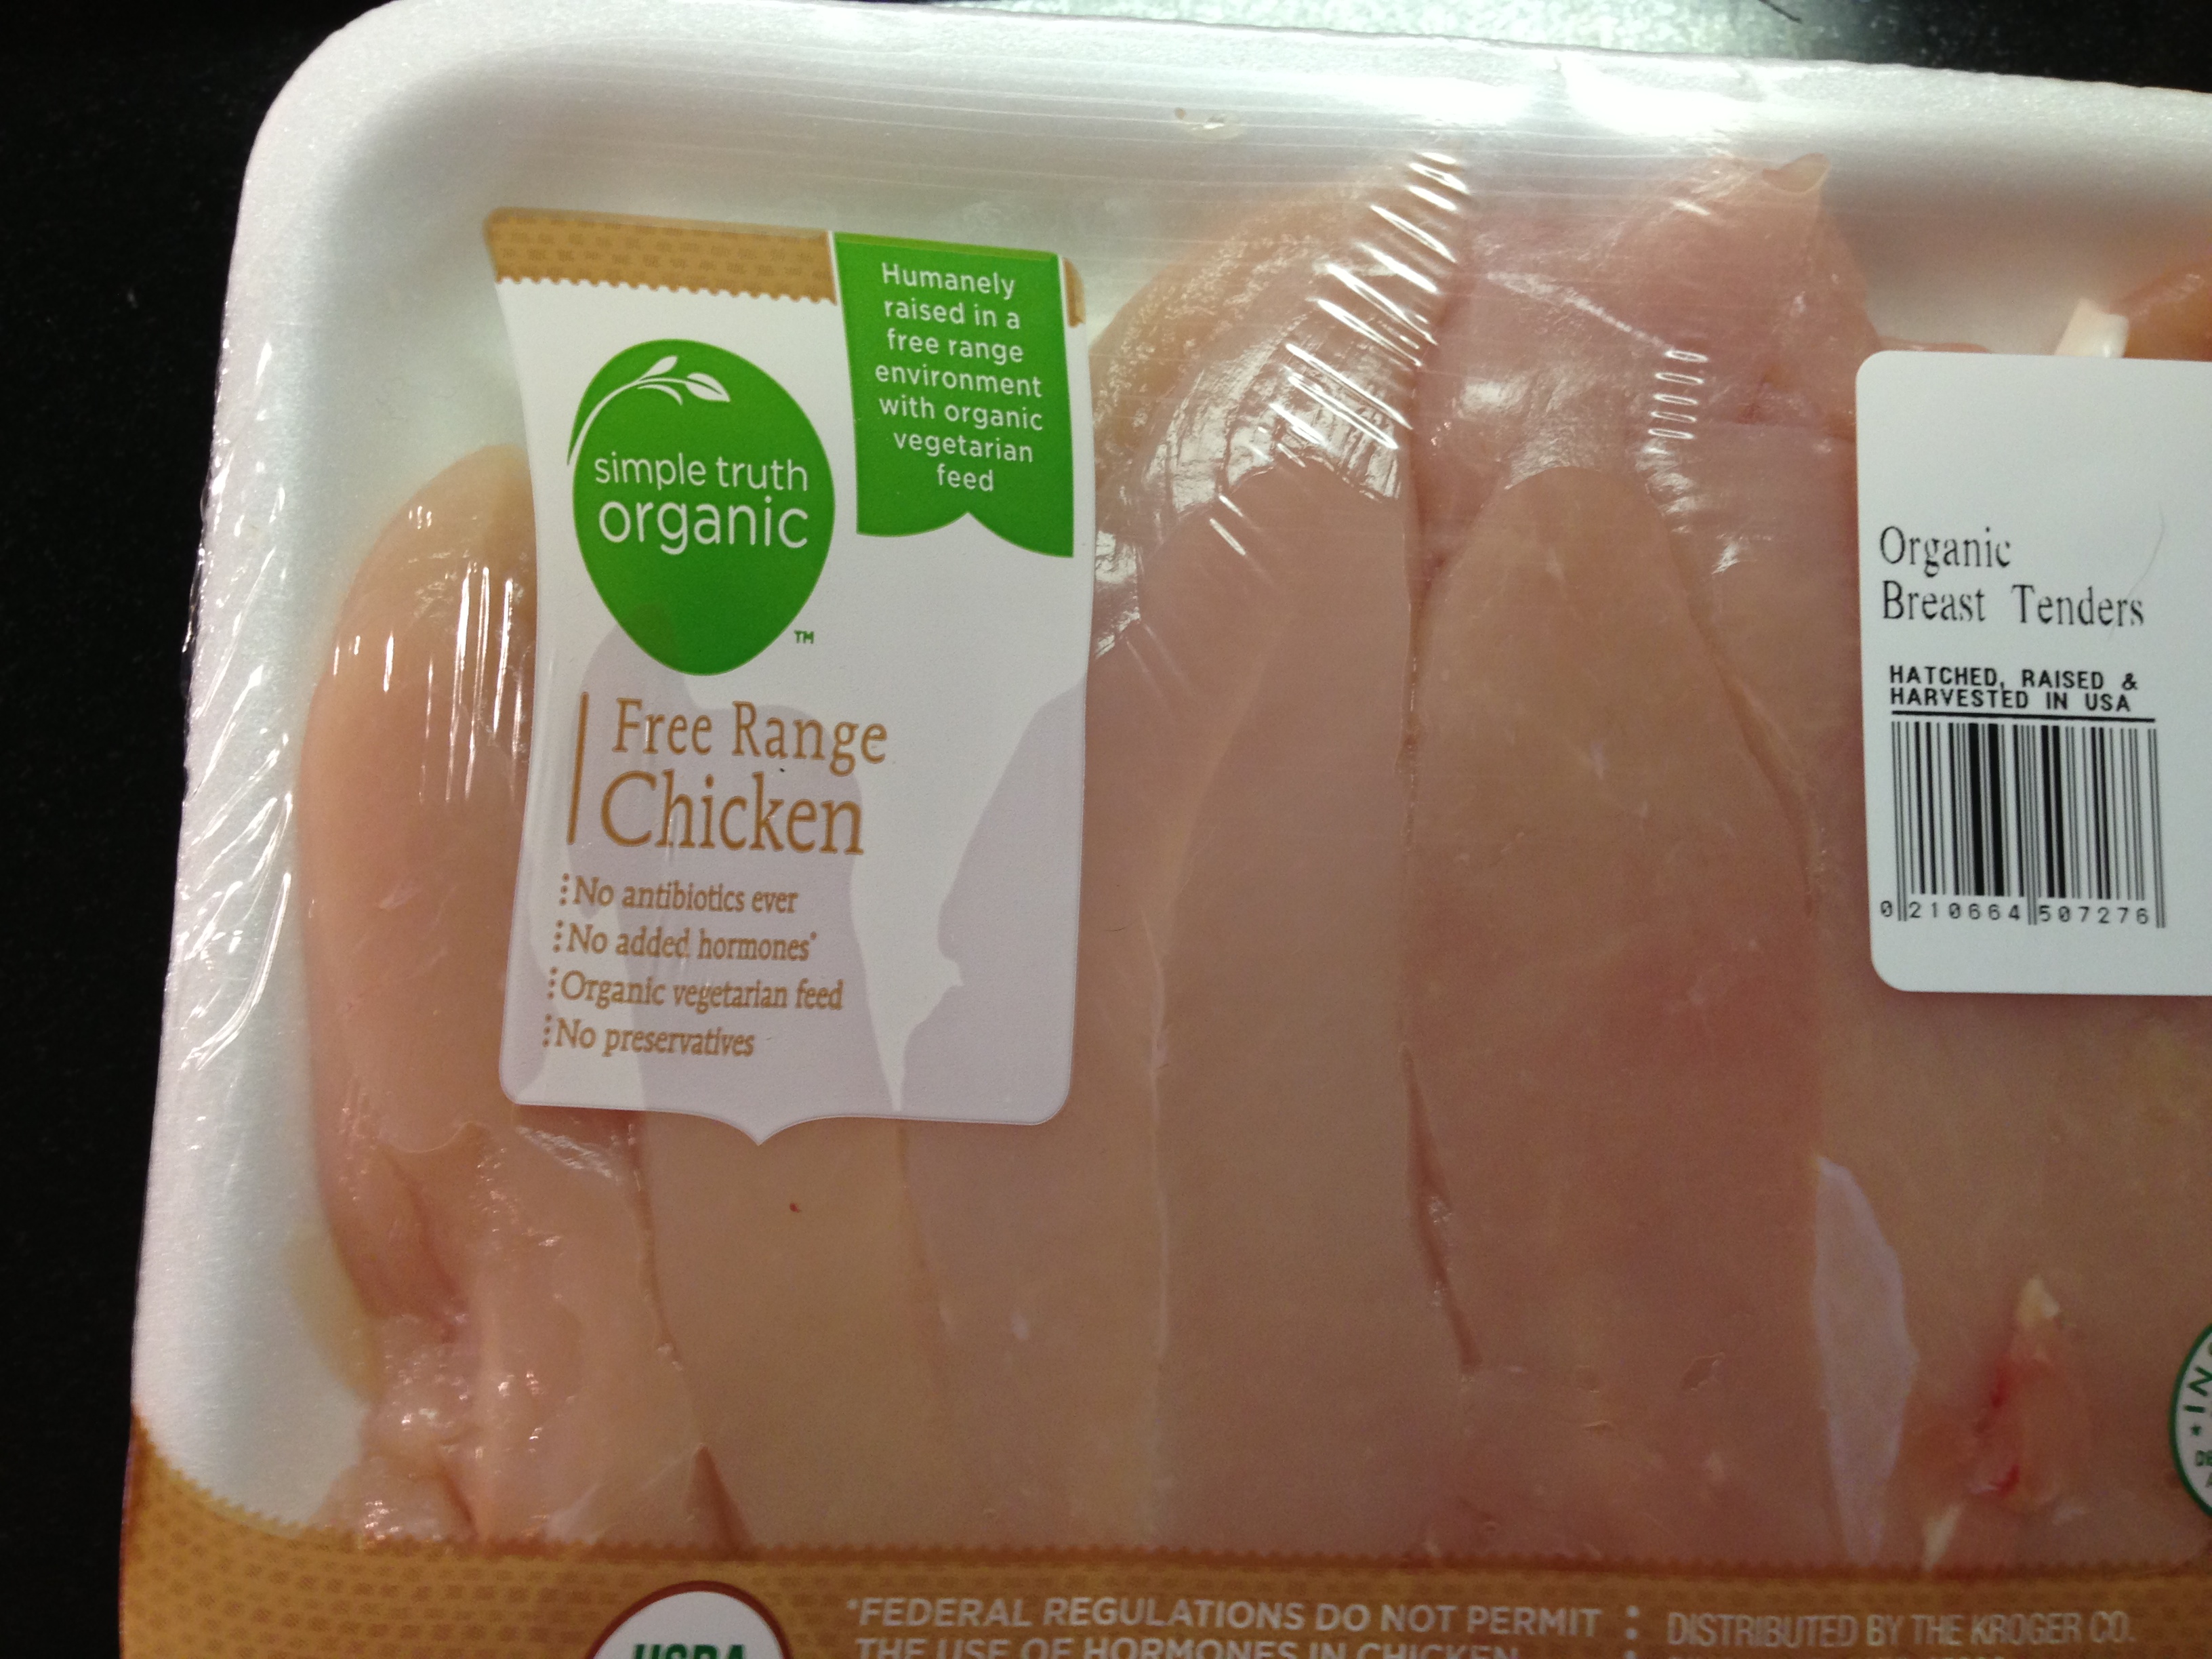
4 oz of freeze dried soy protein plus 1 1/3 cup water (or 8-10 oz or more of another meat substitute)

1 small onion – diced

4 garlic cloves – minced

1/3 cup soy sauce

1 cup walnuts – chopped

olive oil

S&P to taste

OR use the Sundays at Moosewood tofu version noted above for the “meat” filling.

For the vegetable layer

3 carrots – diced

10 Brussels sprouts – chopped

1 fennel bulb – chopped (very optional)

1 jalapeno – seeded & diced (very optional)

olive oil

S&P to taste

For the gravy

3 TBS butter

1/4 cup flour

1 1/2 cup vegetable stock

2 TBS soy sauce

1/2 tsp peper

Image

Image

DIRECTIONS

Heat the oven to 350 degrees.

For the roasted jalapeno mashed potatoes

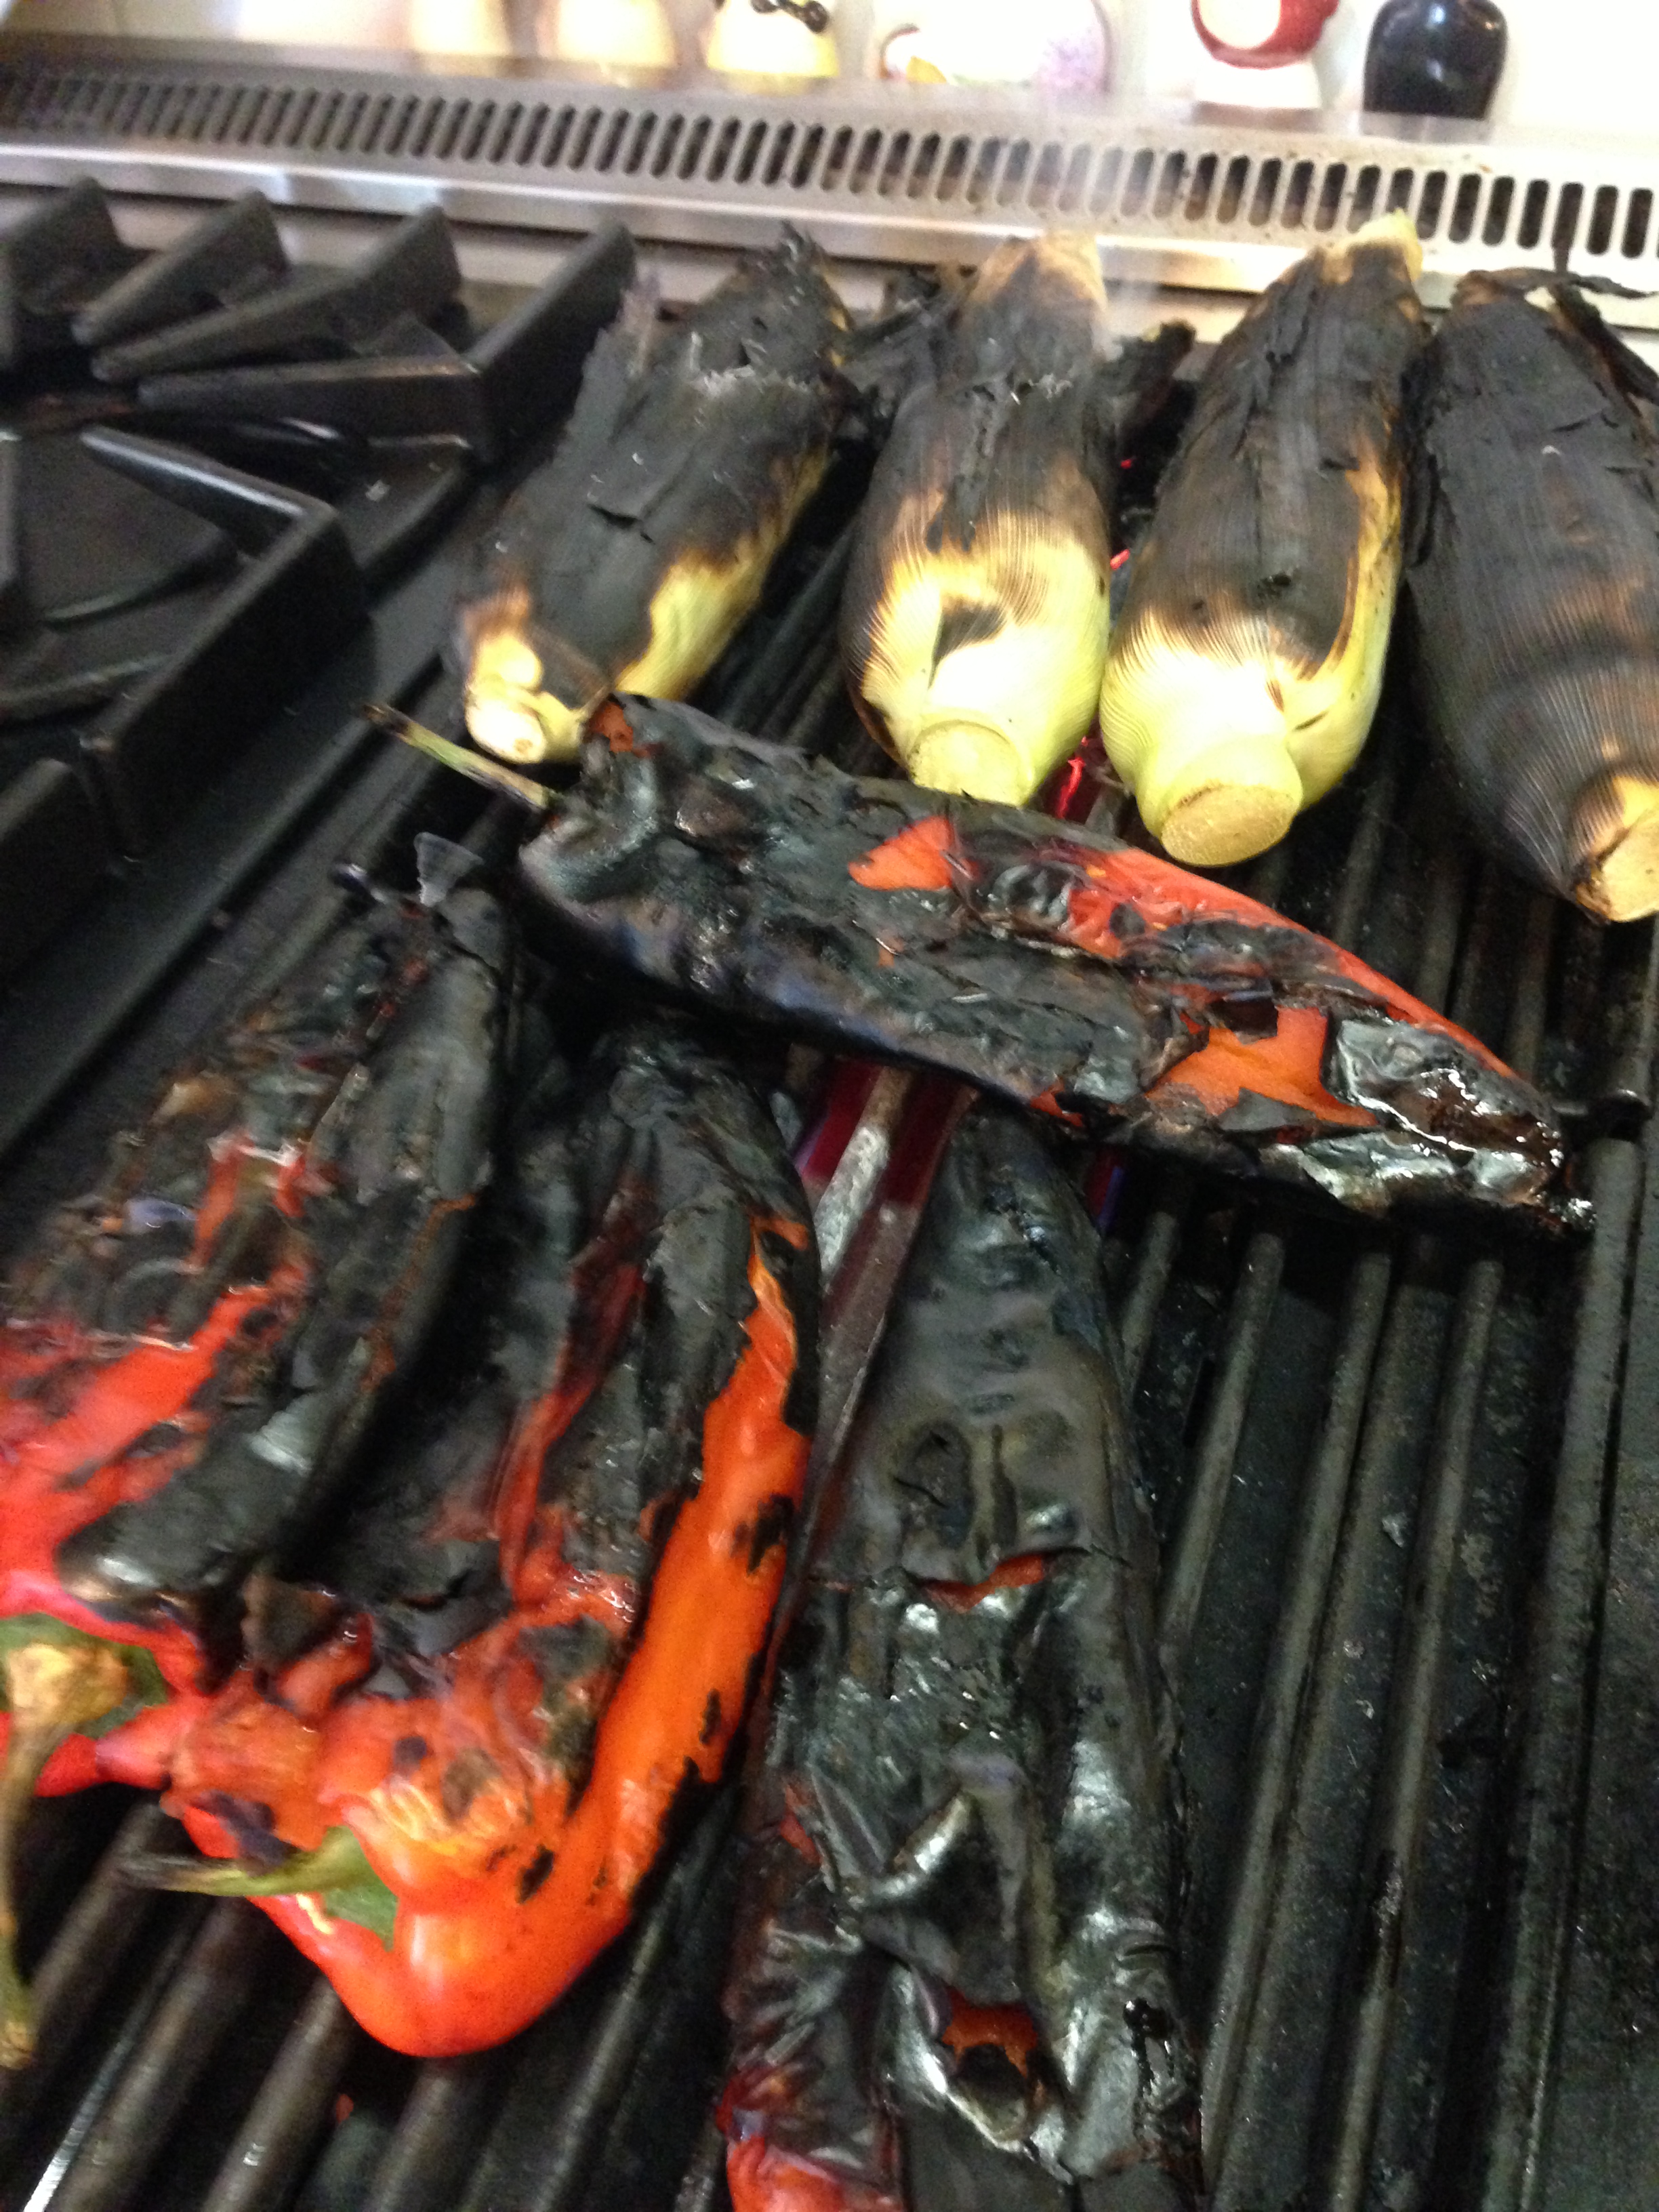
Char the outside of the jalapenos until they blacken.  You can do this directly on the burners or by broiling in the oven.  Once blackened, seal them in Tupperware or wrap them in foil for about 15 minutes.  This will sweat the skin off.  Then, under cool running water, roll the blackened skin away & squeeze off the tops & remove the seeds.  Then – chop the jalapenos finely.

Image

ImageImage

Chop & boil the potatoes.  When tender, drain & puree (I used an immersion blender but any mashing or pureeing device would work) with the roasted jalapeno, butter, cream cheese & some salt & pepper.

I added water to thin mine a bit.  I didn’t want them to dry out in the oven.  Set aside.

Image

ImageImageImage

For the “meat” filling

See the Sundays at Moosewood tofu recipe in the body of text above.  OR-

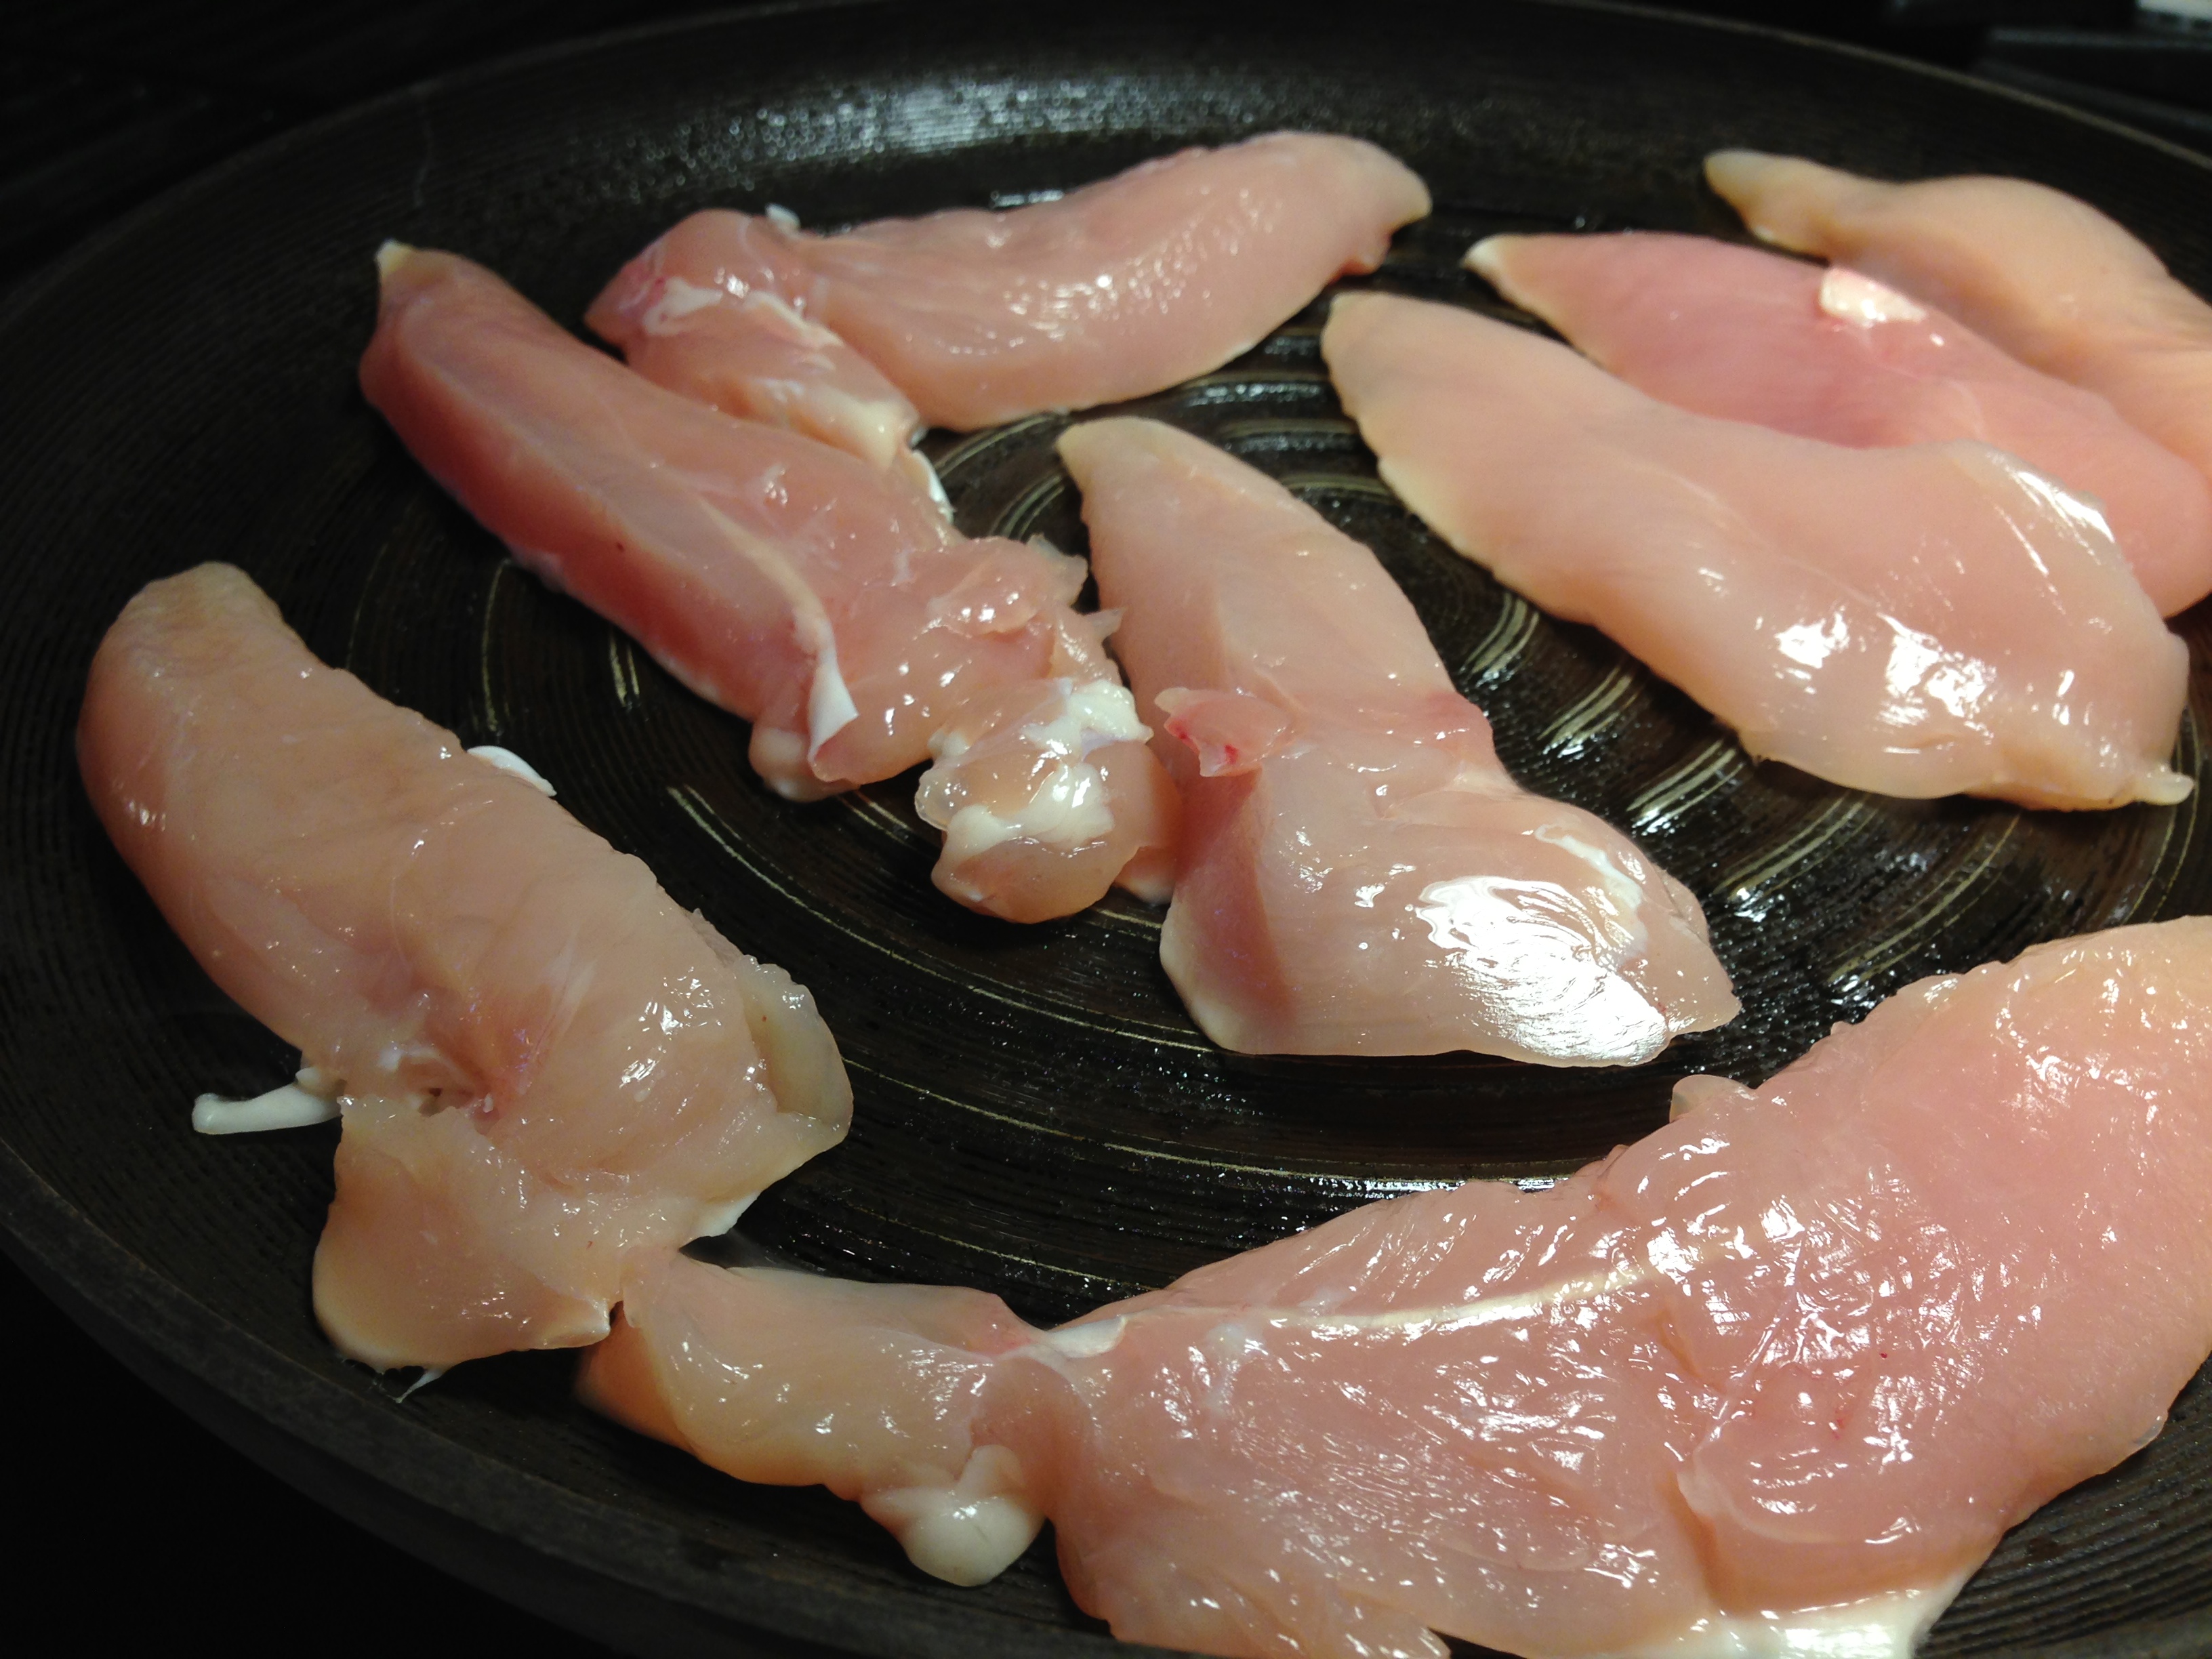
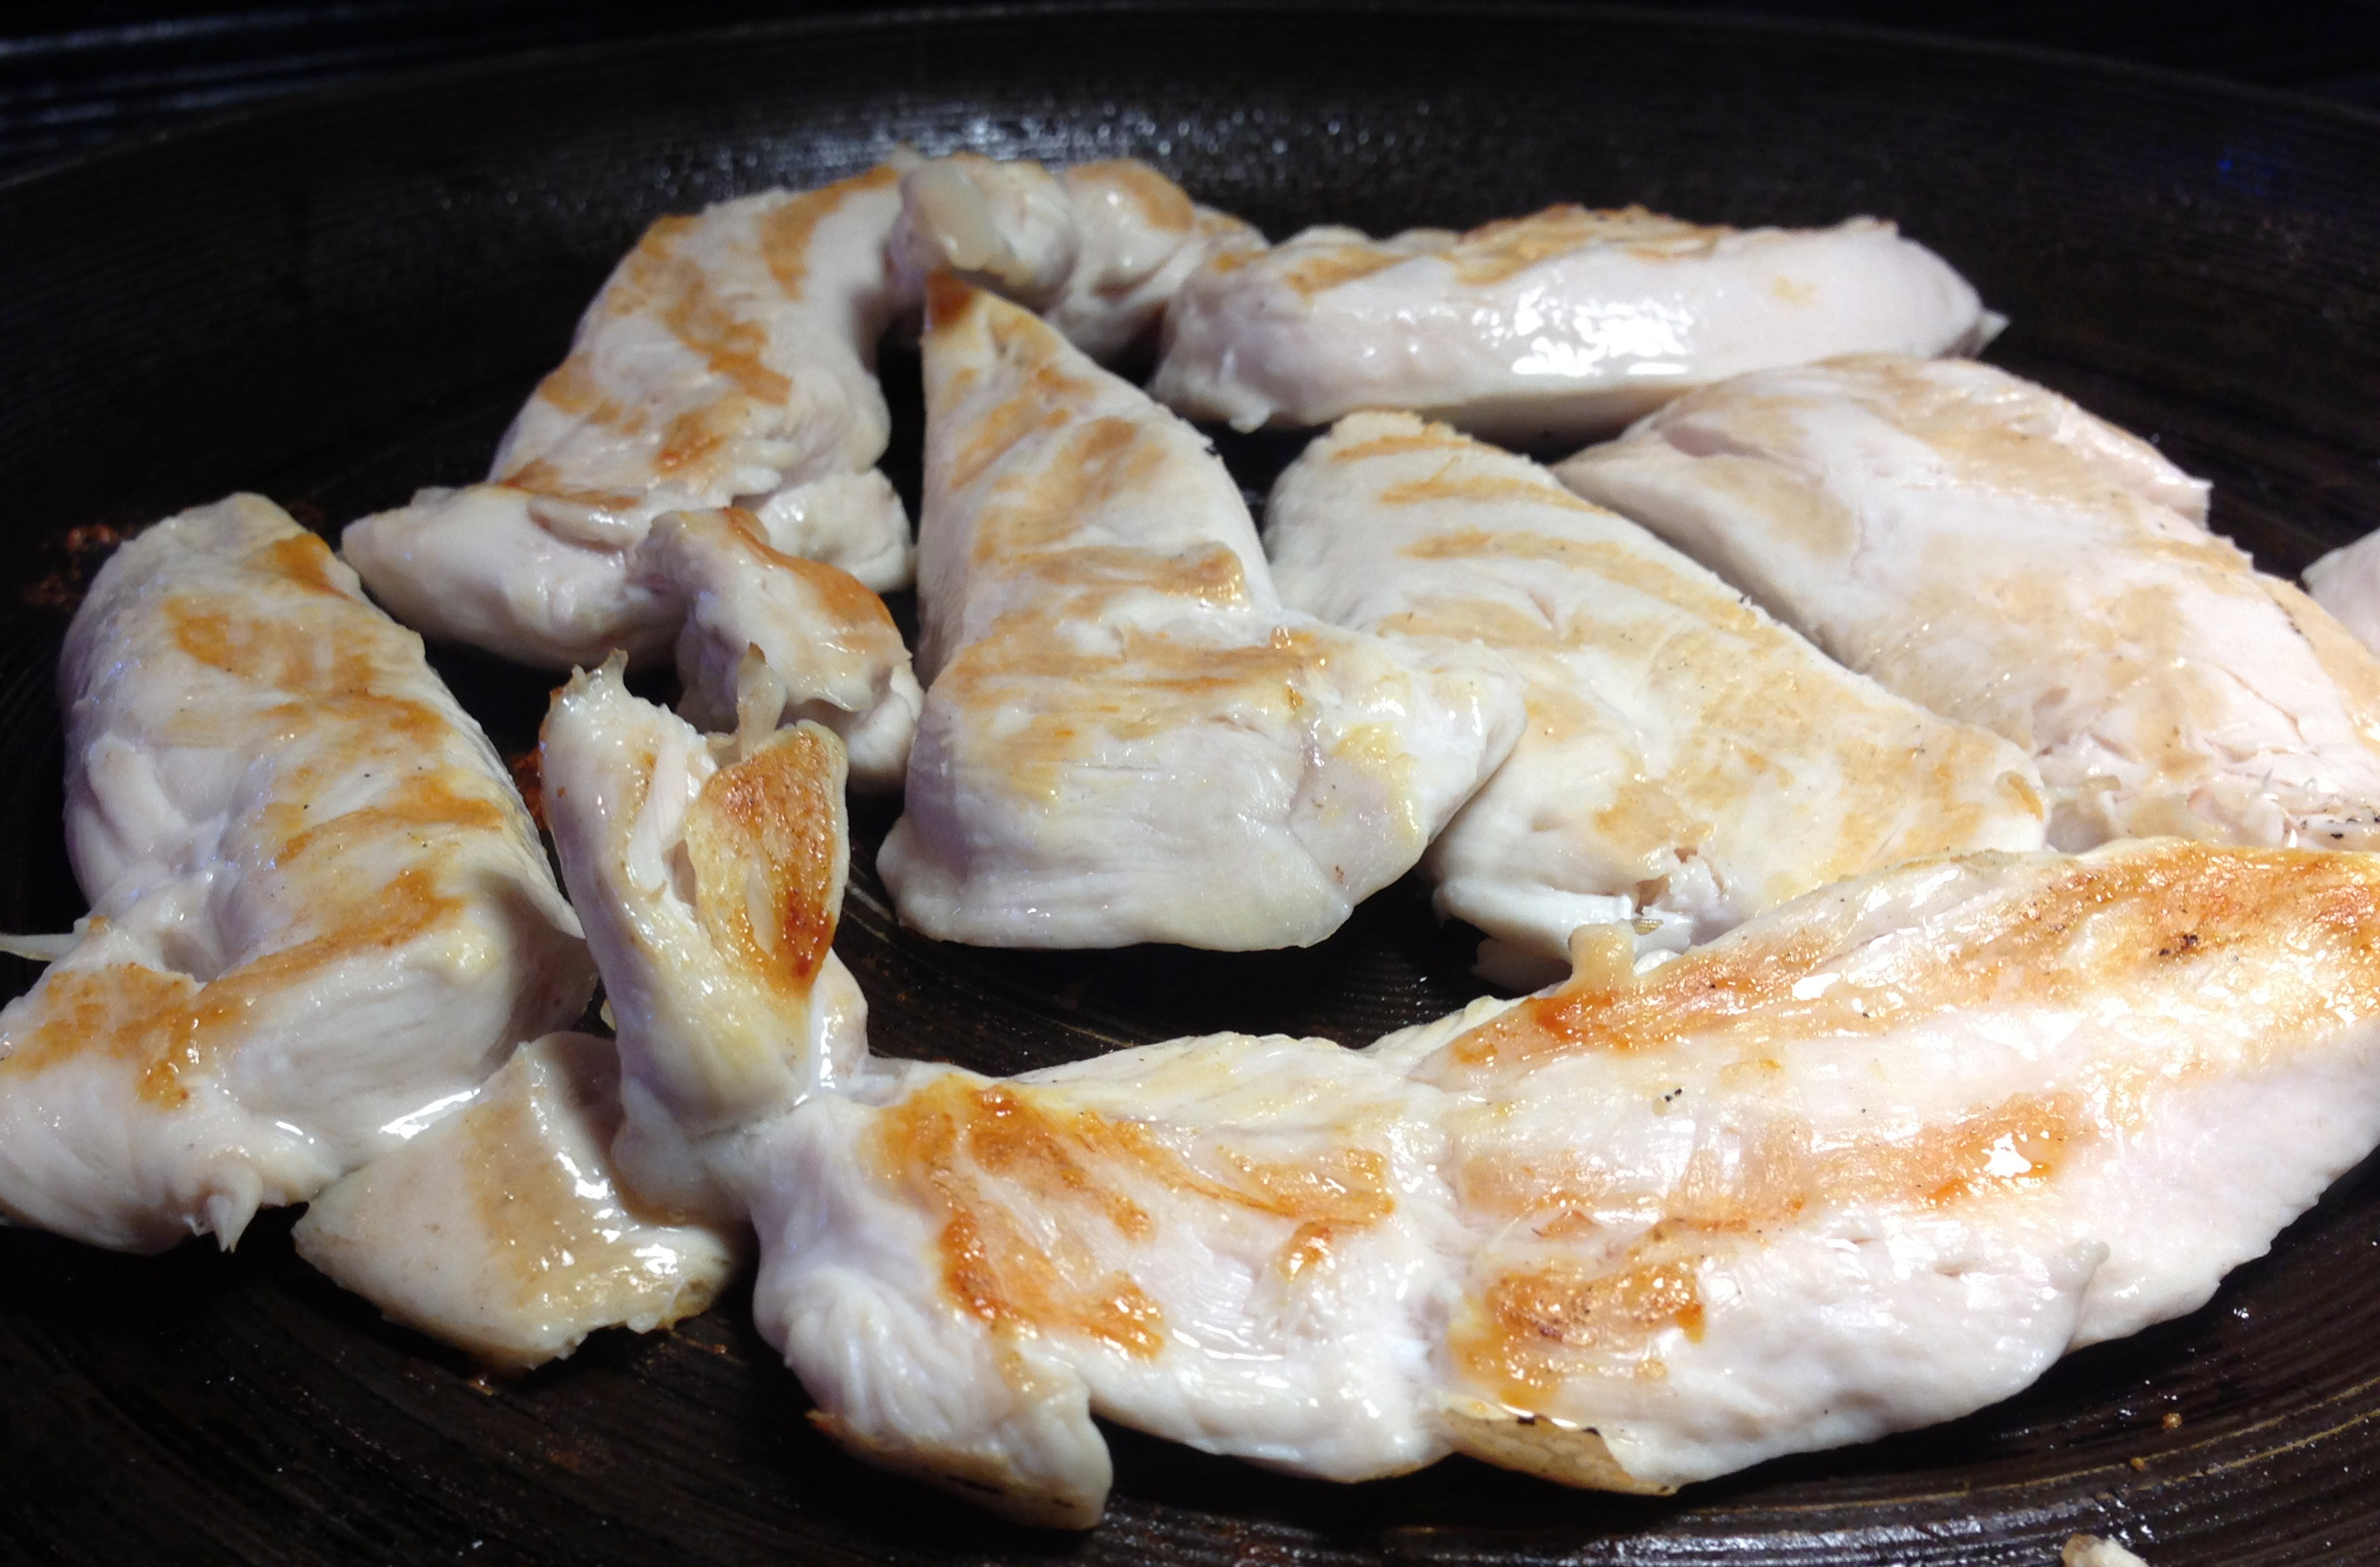
Heat 2 TBS olive oil in a large frying pan.  Saute the onions until softened.  If using REAL meat – add it here & cook it through.  Add the garlic, walnuts & soy sauce & stir to bend.  Add your faux meat.  If using the kooky stuff I used (freeze dried mystery flakes) – add about one to one & a half cups water.  Heat through.  Add S& P to taste.  Set aside.

Image

For the vegetable layer

Use the faux meat pan & add 1 TBS olive oil.  Saute the fennel (if using), Brussels sprouts & carrots & saute 5 minutes or so – or until tender.  No science here as they will cook more in the oven.

ImageImageImageFor the gravy

Melt the butter over med-high heat & add the flour.  Whisk for about 30 seconds.  The butter should absorb that flour very quickly & become a paste.  Add the soy sauce & then whisk in the stock in increments until you have a gravy.  Thin with water if it gets too thick.  Add pepper.  Set aside.

Image

ASSEMBLY!

Spray a casserole pan with cooking spray – or grease it with butter or olive oil.  Layer your “meat” then gravy then veggies & then potatoes.   Apologies – but I actually forgot to get a shot of the veggie layer.  I think you will manage.

ImageImageImage

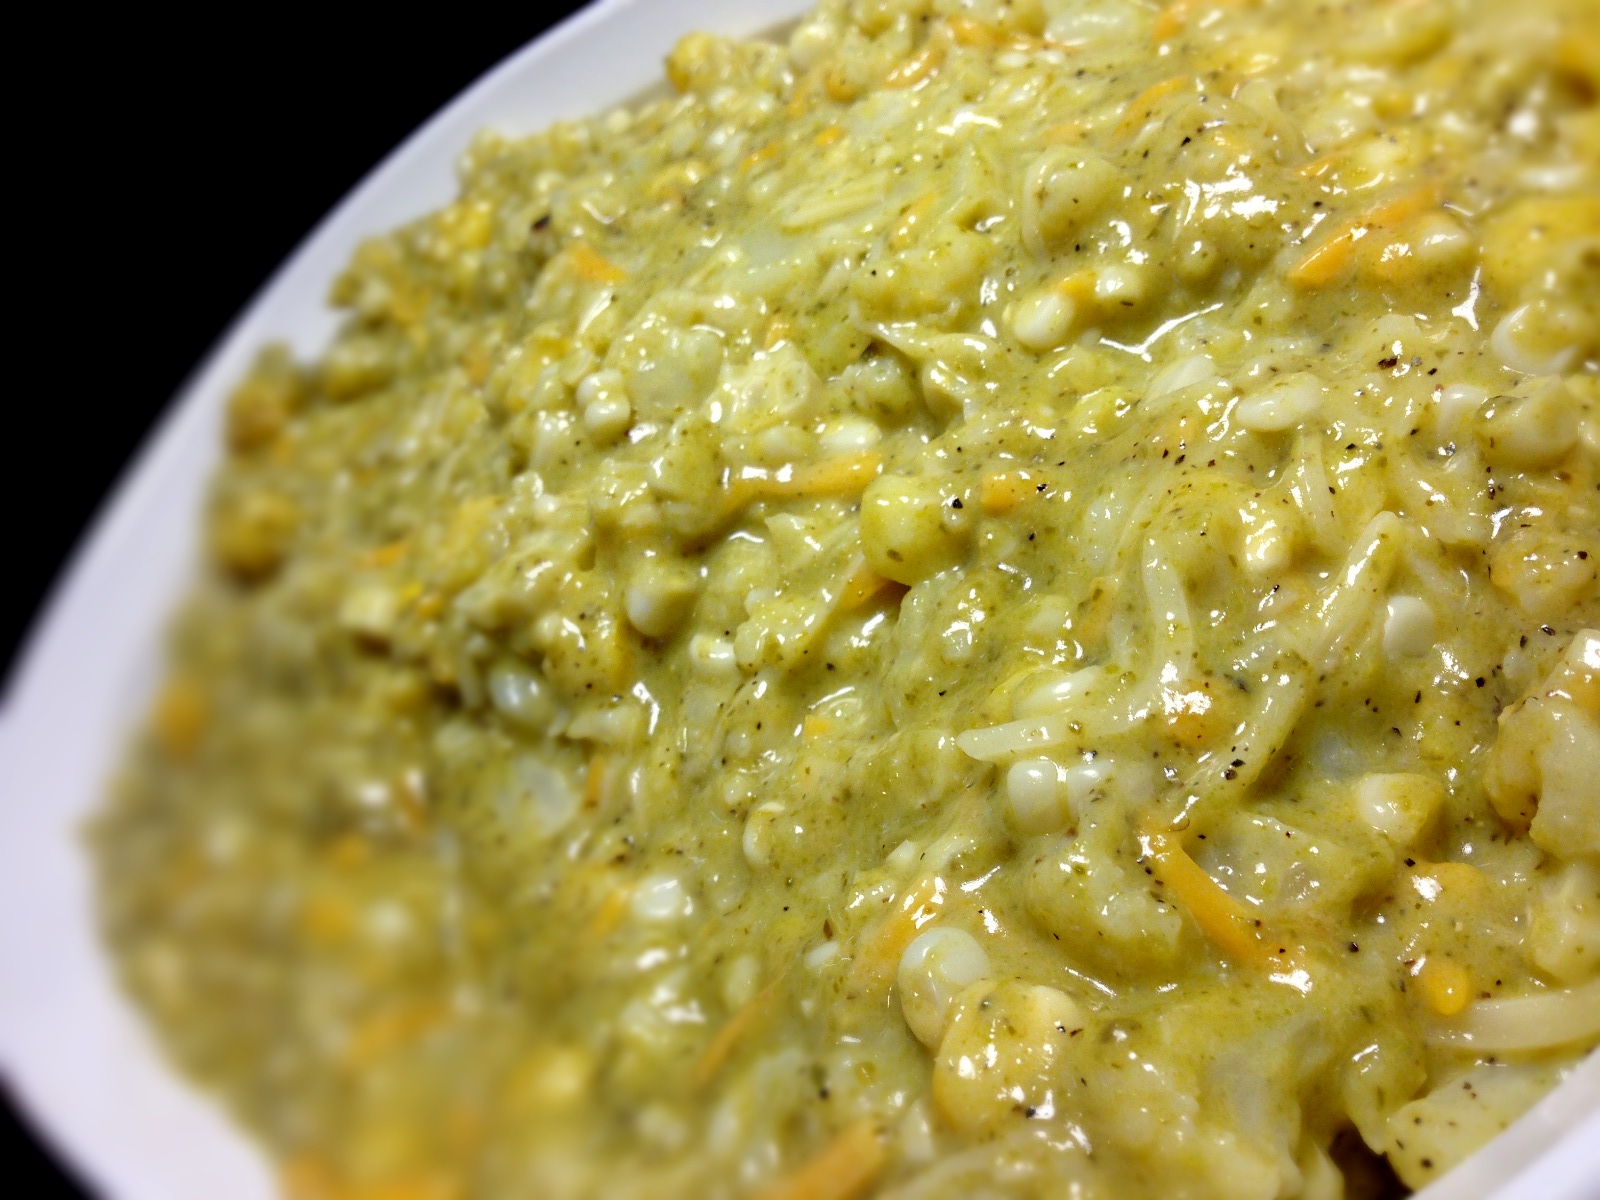
Then bake that sucker for a while.  I baked this at 350 for 30 minutes – COVERED.  It came out like this.

Image

As you can see – the back of my oven is far hotter than the front.  At any rate – I did not like the look of this.  So – I swirled the potato all up & added some butter and chopped parsley & baked it at 400 for another 10-15 minutes.  It came out like this.

ImageImageImage

That is a vast improvement – no?  Despite my unevenly heated oven.

Then just bust out the wine, get a pot holder, use it as a placemat & sit right in front of this casserole dish – hotter than fuck – and eat as much as you possibly can.  Drink too much, too.  Life is short.  And so are hangovers.  Relative to life, that is.

Image

Cauliflower & Hominy “No Mac” & Cheese with Roasted Corn & Poblano Peppers

Leave a comment


All Photos © Christine Elise McCarthy 2013

To see images of my past posts & get links to the recipes – look on my Pinterest board – HERE.

~

Ok – I admit it.  I am obsessed with both cauliflower & now with hominy.  Both are substitutions for things like rice and pasta & potatoes.  I love those things, too, but the cauliflower version is guiltless & the hominy has so much flavor & great texture without even the calorie count of rice.  There is some debating on the nutritional value of hominy (hominy is another name for dried maize kernels, and this common corn-based food is often made into grits).  From the internet:

Low in Calories

One cup of hominy contains just 119 calories. This amount is lower than the amount some other grains provide; for example, 1 cup of white rice provides 242 calories. If you switched from eating 1 cup of white rice to one cup of hominy each day, you’d save 861 calories weekly, enough to lose about 1/4 lb. without otherwise altering your diet.

Low in Fat
Hominy is low in fat, which makes it a good choice on low-fat diets. While low-carbohydrate diets are popular, research suggests that limiting fat intake may be a more effective dieting strategy. Fat is high in calories, and according to a review of research from the May 2001 edition of “International Journal of Obesity and Related Metabolic Disorders,” fat is less filling and promotes a lower rate of calorie burning than other nutrients. Thus, lower fat foods such as hominy may be preferable to low-carbohydrate but fat-rich foods for weight loss.

High in Fiber

Another benefit of hominy is that it is high in fiber. Each cup of hominy provides 4 g of fiber, a nutrient that can help you lose weight because it stimulates satiety. Fiber is important for a number of other roles, as it also aids in the regulation of your blood sugar levels, encourages a healthy digestive system and may help reduce your cholesterol levels.

Low in Sugar

Hominy can also be beneficial due to its low sugar content. Each cup of hominy provides just 3 g of sugar. A low sugar content is beneficial because too much sugar can promote tooth decay, obesity, and according to research from the August 2004 edition of “The Journal of the American Medical Association,” too much sugar can also increase your risk of diabetes.

Yet others say that they are sodium heavy.  I don’t care.  I love hominy!  Hominy is like giant, soft corn nuts that taste like corn tortillas.  In fact – hominy is what they make masa from which is what you make tortillas from – so – that is their flavor.   If you are fearful, maybe buy a small can & add it to your favorite macaroni & cheese recipe.  I do not think you will be disappointed.

My first effort with this dish was for Cinco de Mayo.  I made a boat load of this shit & had to throw away a large portion because it wouldn’t fit into my slow cooker.  My large slow cooker.

Image

It is the white one on the far right of frame.  I didn’t cook the cauliflower before putting it in the cooker & I had never made anything like this before & I was completely winging it & making it up as I went and I was very nervous about the result.  The result was that this dish was one of the most popular I have ever served.  I will post the recipe at the end of this blog but know – this is a recipe that could probably feed 20-30 people.  If you make it – even for your large slow cooker – cut it in half or be ready to bake the remaining stuff in casserole dishes.  No need for a 6+ pound can of hominy unless you really want to cater a party with this stuff.

Image

Also – because I had never tried a dish like this before – I choked and added actual macaroni to the slow cooker.  The smaller recipe I am posting today has no pasta in it.  Also – the ratio of poblano to the overall dish is greater in the smaller recipe so it has a green cast to it.  The huge recipe is yellow.  I didn’t think I was going to post the huge recipe so I didn’t properly document the process or the results.  Mac & cheese & other casseroles are kinda hard to make look pretty sometimes and that held true with both versions of this dish.  Here is a look at the huge recipe that included pasta:

ImageImage

The smaller recipe has a ton of roasted poblano (pasilla) peppers in it and no pasta and looks like this:

Image

I went very heavy on the cheese in the large recipe (as you can see) but tried to keep the smaller one moderately healthy.  In fact – by my calculations – the smaller no-mac recipe has under 2800 calories in the ENTIRE recipe making each of the eight servings about 350 calories. That ain’t bad for something that seems so rich & decadent & is so amazingly delicious.  I actually liked the no-mac version better.  I hope you try one of them some day!

ImageImage

PRINT THIS RECIPE

Cauliflower & Hominy “No Mac” & Cheese with Roasted Corn & Poblano Peppers

INGREDIENTS

1 head cauliflower

1 29oz can hominy (yellow or white – no matter)

4 ears fresh corn (or canned or frozen)

5 poblano peppers (or less if heat bugs you) – OR – a few small cans of green chilies

1 10oz can Cheddar Cheese Soup

1 cup milk

3 cups of grated cheese

4 oz fresh mozzarella (optional)

1/2 cup panko (or other) breadcrumbs

1 tsp salt

1 TBS pepper

Parsley – chopped for garnish

DIRECTIONS

Heat your oven to 400 degrees.

Grill the corn in their husks & the poblanos over your burners until they are black on all sides.  Put the poblanos in a sealed plastic container & let them sweat while you peel the corn & cut the kernels from the cobs.  Then, under running water, peel off the black skins from the poblanos & seed them.  Puree the poblanos in a food processor.

ImageImageImage

Image

Boil the cauliflower (leaves & core trimmed) for about 10 minutes.  I like to cut the cauliflower into florets while it cooks or after I drain it because raw cauliflower crumbles & pops all over the place when you cut it.  Drain the cooked cauliflower.

Image

Image

Drain the hominy.  In a large bowl, mix the cauliflower, the hominy, the pureed poblanos, the corn, the Cheddar soup, the milk and TWO CUPS of the cheese – reserving the last cup to top the casserole.  Add the salt & pepper & mix it all until blended.

Pour this mix into a greased casserole pan & top with remaining cup of cheese, fresh mozzarella & panko breadcrumbs.  Bake for 45 minutes or until the top is golden & it is bubbling up the sides.

Serve with diced parsley.  Fall in love!

PRINT THIS RECIPE

ImageImageImageImage

Image

And now for the ingredients of the HUGE recipe.  After grilling the corn & poblanos as explained above – all I did was put everything (or as much as would fit – throwing quite a bit away) into my slow cooker & left it on high for about 4 hours – stirring frequently.  Voila!

INGREDIENTS

1 6lb can of hominy

1 large head of cauliflower – cut into florets (steam them if you want this dish to cook faster than 4 hours)

1 lb dry macaroni – cooked & drained

4 poblanos – roasted, peeled & seeded & pureed

4 large red chilies (optional) – roasted, peeled & seeded & pureed

4 ears corn – grilled in husks & cut off the cob (or use some canned or frozen)

1 pint heavy cream

8 TBS butter

7 cups grated cheese

2 10oz cans Cheddar Cheese soup

2 cups milk

S&P to taste

OPTIONAL – a 4 or 7 oz can each of either hot green chilies or mild green chilies – or both

Let me know if you try this & your results.

Hominy & Chorizo (Soyrizo) Casserole with Black Beans & Roasted Jalapenos

2 Comments

All Photos © Christine Elise McCarthy 2013

To see images of my past posts & get links to the recipes – look on my Pinterest board – HERE.

~

First of all – these photos are really lame & do not do this dish justice.  Part of the problem is that  it falls apart on your plate when you serve it & just looks messy.  The other part of the problem is that, so often, I am posting my daily meals on here & sometimes, like last night, I am hungry & impatient & not in the mood to walk around my house with a plate of cooling food looking for nice light to shoot it in.  I also have a limited number of dishes to present food on & limited places with proper lighting – especially at night – and I am finding that my images are starting to all look alike.

Anyway – this doesn’t look very pretty but let me assure you – it is delicious & really easy.  I made a hominy mac & cheese on Cinco de Mayo & it was a HUGE hit.  I am waiting to post the recipe until I make it again in a more manageable quantity.  My May 5th recipe feeds about 40.  I will include that recipe, too, when the time comes.

This dish was born, like so many of my recipes, of things I already had around.  I had tomatoes & jalapenos that needed using.  I had left over black beans from the May 5th party.  I had several cans of hominy around & I had some Soyrizo (vegetarian chorizo).  And – as always – I had tons of cheese.  I also had leftover crema (Mexican sour cream) and milk from things I’d made last weekend.

The beans I used in this were already heavily seasoned but you could just use canned black beans if you have no prepared beans around or hanging out in the freezer.

First – you might ask – “WTF is hominy?”  Here is one explanation:

Hominy refers to corn kernels without their germ and their hull, or bran. The germ and hull might be removed by soaking the corn in a special type of solution or by crushing the kernels and then sifting them out. It can be served whole or ground, and as a cereal or as a vegetable. The ground kernels can also be pressed into patties and fried. This dish is especially popular in the southern United States.

How It’s Made

To make hominy, the corn can be soaked in an alkali solution, such as weak lye. This type is sometimes called lye hominy. When the germ and hull are removed mechanically by crushing and sifting, the variety is often referred to as “pearl.” Removing the germ prevents the corn kernels from sprouting while they are being stored.

Other Names and Variations

There are many other names for the variations of hominy. It might be called yellow or white, depending on whether it was made with white corn or yellow corn. It’s often called samp when it’s coarsely ground, and when ground into small grains, it’s often called grits, hominy grits, or little hominy. In some places, when the kernels are whole, it is called posole.

_________________________________________________________________________________________

Hominy has intrigued me from the shelves of my grocery store for years.  It looks like comfort food & it is inexpensive.  Still – it wasn’t until my Hominy Mac & Cheese invention that I ever tried using it.  The mac & cheese was so crazy popular that it has built up my confidence that the earthy corn flavor is something lots of folks respond well to.  It tastes kind of like a corn tortilla.  It has the texture of maybe a grittier garbanzo bean. In recipes, it provides flavor & texture & all the comfort of pasta – without being pasta.   I think it is gluten free & nearly fat free & only has about 119 calories in a cup.  It is a carb but it is also high in fiber. Ground up hominy is another of my favorite things – grits!  I really am kind of crazy for hominy & I hope you will give one of my hominy recipes a try!  Also – I added up the approximate calorie count of this entire casserole using Soyrizo (which could feed 6-8 pretty easily) and it came to about 3200 calories.  That is 400-550 calories a serving.  Even with ALL that cheese!!!   It would be higher with chorizo, though.  But still – that is pretty low for a meal that feels so rich.


Image


5-10-13 (21)

Image

PRINT THIS RECIPE

Hominy & Chorizo (Soyrizo) Casserole with Black Beans & Roasted Jalapenos

INGREDIENTS

2 29oz cans hominy (white or yellow or a combo) – drained

3 tomatoes – diced

10 jalapeno peppers (or less if spice bothers you)

4 garlic cloves – minced

1 onion – diced

2 cups black beans – canned or prepared like THIS

1/4 cup sour cream

1 cup milk

4-5 cups of grated cheese

1 12oz package of soyrizo or similar quantity of chorizo

1 cup cilantro – chopped

2 TBS olive oil

IF YOU ARE USING PLAIN CANNED BEANS also add:

2 tsp cumin

1 tsp chili powder

1 tsp salt

Extra cheese, diced tomato & cilantro as garnish

ImageImage

DIRECTIONS

If you are using chorizo – fry it up in a pan until it is cooked through.  Try to drain the extra grease & set it aside.  If using soyrizo – no extra step required.

Pre-heat the oven to 350 degrees.

On your stove top, char the outside of the jalapenos until they blacken.  You can do this directly on the burners or by broiling in the oven.  Once blackened, seal them in Tupperware or wrap them in foil for about 15 minutes.  This will sweat the skin off.  Then, under cool running water, roll the blackened skin away & squeeze off the tops & remove the seeds.  Then – chop the jalapenos finely.

ImageImageImageImage

Heat the oil in a large saute pan.  Add the diced onion & minced garlic & saute a minute or two – or until the onion is soft.  Add the tomatoes, jalapenos & soyrizo (or chorizo).  Add the beans (and cumin & chili powder & salt, if using).  Stir.  Remove from heat.

ImageImageImage

In a large bowl, mix the hominy with the soyrizo/chorizo & bean mix & the milk, sour cream, cilantro and about 2/3 of the cheese.

ImageImageImage

Grease a large casserole pan or other baking pan & pour the hominy mix in.  Top with the remaining cheese.

ImageImage

Bake for about 30 minutes then increase the temperature to 450 & bake about 20 minutes longer or until the cheese on top is very melted & beginning to turn golden.

Let it rest about 15 minutes before serving.  Garnish with extra cheese and cilantro or chopped tomatoes & jalapeno.

PRINT THIS RECIPE

Image

Image