Pasta Salad with Arugula Pesto & Feta Cheese (Vegan or Vegetarian)

Leave a comment


All Photos © Christine Elise McCarthy 2016

To see images of my past posts & get links to the recipes – look on my Pinterest board – HERE.

images (1)download (1)

5-31-16 (85)

5-31-16 (94)

BathingandthesinglegirlCover

vromans back

5-31-16 (91)

3-2-16-31

A few months ago, I made the vegan arugula pesto you see above.  I made a lot of it & then I froze it in batches of about 1/2 to 1 cup each – freezing each serving in sandwich baggies – like below.

3-2-16-36

They freeze flat – like little DVDs – and take up very little room in the freezer.  Then – you can just thaw it as you need it.  I used some to make this pasta salad for a BBQ this weekend.  I used real feta in this but – at home – I would have used this vegan cheese here – below the feta.  You could do whichever – or leave the extra cheese out entirely.  Your call!  Whatever you decide – this is easy & fresh & tasty!

5-31-16 (78)

5-31-16 (83)

5-31-16 (84)

5-31-16 (98)

Pasta Salad with Arugula Pesto & Feta Cheese (Vegan or Vegetarian)

INGREDIENTS

1 lb pasta – cooked, drained & rinsed in cold water

1 arugula pesto recipe

6 oz feta or vegan cheese – crumbled

1/2 to 1 pint cherry or grape tomatoes – halved or quartered

5-31-16 (79)

5-31-16 (81)

5-31-16 (82)

5-31-16 (89)

DIRECTIONS

Cook the pasta & drain under cold water.

Make (or thaw – if you are using some you froze) the pesto.

Ratio of pesto to pasta is a personal thing.  Start light & add as much as feels right to you.  Mix well.

Stir in cheese & tomatoes.  Season with S&P.

Enjoy!

5-31-16 (103)

5-31-16 (108)

Vegan Cabbage Rolls Stuffed with Grilled Eggplant, Mushrooms & Spinach

3 Comments


All Photos © Christine Elise McCarthy 2016

To see images of my past posts & get links to the recipes – look on my Pinterest board – HERE.

images (1)download (1)

5-25-16 (86)

5-25-16 (79)

BathingandthesinglegirlCover

vromans back

5-25-16 (60)

5-25-16 (84)

5-25-16 (97)

Everybody has had stuffed cabbage but, typically, it is stuffed with a mix of meat & rice.  This recipe uses neither – though you could add some – if you wanted to.  This recipe is more rustic & lighter.   No carbs.  No animal products.  Just loads of veggies & sauce!   I had grilled eggplant in the fridge – leftover from a night of Grilled & Baked Eggplant Pizza Towers with Fresh Mozzarella & Basil Chiffonade – seen below.

6-22-15-1

If you have a grill pan or a grill where you can easily grill the eggplant – I recommend it because it adds a smokey char to the dish that is lovely – though not necessary.  If grilling the eggplant first sounds like a pain in the ass – blow it off & just cut your eggplant into small cubes

Grilled Eggplant

INGREDIENTS

1 eggplant – sliced into rounds

Olive oil or some kind of oil & vinegar salad dressing

DIRECTIONS

Dredge the eggplant through the olive oil or dressing & grill (either on a grill or in a grill pan) –  just to get some grill marks on them & cook out some moisture.  I did it on the grill & it took about 5-7 minutes – flipping the slices occasionally.  You can do this on your burners on the stove or in a grill pan or on a real grill – with or without oiling the slices.

5-25-16 (3)

5-25-16 (50)

5-25-16 (54)

5-25-16 (71)

UPDATE – after eating this for lunch – at dinner – I wanted something more substantial.  So – I added a bag of Beyond Meat crumbles & some grated cheese to the top before I reheated these guys.  AMAZING!

Vegan Cabbage Rolls Stuffed with Grilled Eggplant, Mushrooms & Spinach

Serves 4 very well

INGREDIENTS

1 head cabbage (I used Napa but any kind will work

Olive oil

1 eggplant – either grilled as outlined above or not – and, either way, cubed

1/2 lb mushrooms – sliced or chopped

2 tomatoes – diced

1 onion – diced

2 stalks green garlic or 1-4 garlic cloves – chopped

2+ cups fresh spinach

1 TBS dry parsley

1 TBS dry oregano

Crushed red pepper (to taste)

S&P

2-3 cups pasta sauce (homemade or jarred)

Fresh basil as garnish

OPTION – vegan or fresh mozzarella baked on top of these might be nice.  I opted not to use any – in an effort to keep these very healthy – but I bet it would compliment this dish nicely.  Additionally – adding some faux beef crumbles on top or underneath the rolls makes this dish more substantial.

beefybagv3highresrgb

5-25-16 (65)

5-25-16 (75)

5-25-16 (4)

5-25-16 (16)

DIRECTIONS

Heat the oven to 350 degrees.

Boil a large pot of water – deep enough for the head of cabbage.  Remove the cabbage core & drop the head into boiling water – whole.  With tongs – pluck out each leaf as it becomes tender & plunge into a bowl of ice water.

5-25-16 (6)

5-25-16 (7)

5-25-16 (15)

Heat 1-2 TBS olive oil in a large saute pan.   Add the onions, mushrooms, tomatoes & eggplant.  Saute until the vegetables get tender.  Add garlic & spinach & stir until the spinach wilts.  Add the oregano, parsley, S&P and crushed red pepper to taste.  Remove from heat.

5-25-16 (9)

5-25-16 (11)

5-25-16 (13)

5-25-16 (14)

5-25-16 (17)

Spread about 1 cup of sauce on the bottom of a casserole pan.  Place a cabbage leaf on a kitchen towel & scoop a few TBS of filling into it & roll it up.  I did not really bother with the ends but if you are good at making closed ends – knock yourself out.  Place in the casserole pan – seam-side down.  Continue until all the filling is used up.  Season the rolls with S&P.

5-25-16 (20)

Top with sauce – as much as suits your taste.  You might want t reserve some to add – warmed – to the finished rolls.  Bake for about 40 minutes.   Serve with additional warm sauce – if you like – and some fresh basil.

5-25-16 (26)

5-25-16 (33)

5-25-16 (46)

5-25-16 (52)

5-25-16 (80)

5-25-16 (88)

Vegan Roasted Fennel & Beets Salad with Arugula, Avocado, Pistachios & Goat Cheese

Leave a comment


All Photos © Christine Elise McCarthy 2016

To see images of my past posts & get links to the recipes – look on my Pinterest board – HERE.

images (1)download (1)

5-24-16 (49)

5-24-16 (45)

BathingandthesinglegirlCover

vromans back

5-24-16 (10)

5-24-16 (41)

Fennel is a divisive vegetable.  The sharp licorice flavor is either something you love or hate, it seems.  But, as with garlic, the flavor of fennel mellows into something else entirely – when you roast it.  It becomes soft & sorta sweet & it compliments this salad nicely.

I used arugula but any mixed greens or baby spinach would work, too.  I added pistachios but any nuts would work – especially if you toasted them a bit first.

5-24-16 (7)

5-24-16 (8)

5-24-16 (9)

I used this lovely blood orange olive oil but regular olive oil would work.  I used the dark balsamic – but white balsamic would be lovely, too.

And for the goat cheese – I used this stuff (below).   It has the texture of a soft goat cheese & was really delicious.  If you eat cheese – real goat cheese or feta would also work.

5-24-16 (6)

5-24-16 (12)

5-24-16 (24)

5-24-16 (43)

Vegan Roasted Fennel & Beets Salad with Arugula, Avocado, Pistachios & Goat Cheese

Serves 2

INGREDIENTS

4-6 beets (red or golden – no matter)

1 large fennel bulb

2 fists full of arugula or other greens

1/4 cup pistachios

1 avocado – cubed

Vegan soft cheese (or real goat or feta cheese) – quantity up to you

Olive oil

Balsamic vinegar

S&P

5-24-16 (11)

5-24-16 (30)

5-24-16 (50)

DIRECTIONS

Heat the oven to 350 degrees.

Wrap the beets in foil.  No need to even wash them – as that will happen later.  If they are large (mine were about the size of ping pong balls) – cut them into smaller chunks.

Cut the fronds off the fennel (saving some of the dilly leaves for garnish) & cut the bulb in half.  Place on a cooking sheet & drizzle with olive oil.

Place the beets in foil on the cooking sheet with the fennel & roast 30-45 minutes or until the vegetables are soft.  The beets might take longer than the fennel.

When the beets cool – wash them under running water & rub the skins off.  Cut into bite-sized pieces.

Slice up the fennel.

Place some greens on each plate.  Top with beets, fennel, avocado, pistachios & crumbled cheese. Drizzle with olive oil & balsamic.  Garnish with fennel leaves and S&P.

5-24-16 (15)

5-24-16 (37)

Vegan Sticky, Sweet & Spicy Chinese Five Spice Pork for the Slow Cooker

2 Comments


All Photos © Christine Elise McCarthy 2016

To see images of my past posts & get links to the recipes – look on my Pinterest board – HERE.

images (1)download (1)

5-23-16 (54)

5-23-16 (56)

BathingandthesinglegirlCover

vromans back

5-23-16 (121)

Nothing is easier than a slow cooker dish.  You could make this stove-top by simply simmering it until the sauce is as thick as you like it to be.  Not much more to say about this except that it is damned tasty & crazy easy.

Vegan Sticky, Sweet & Spicy Chinese Five Spice Pork for the Slow Cooker

Serves 2 very well when served with rice

INGREDIENTS

2 (10.5 oz) packages Gardein Porkless Bites (or other vegan pork, beef or chicken) – I threw the sauce packets away

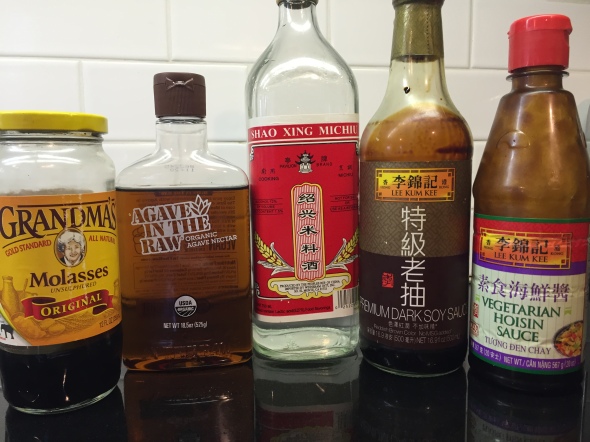
1/4 cup Shao Xing rice wine

2 TBS minced ginger (I used the squeezable kind pictured)

2 TBS minced garlic (I used jarred)

1 TBS tomato paste or ketchup

2 TBS sesame oil

2 TBS vegan hoisin sauce

2 TBS vegan oyster or mushroom-flavored sauce

2 TBS sambal oelek (less if you do nott like a lot of spiciness)

2 TBS sweet Thai chili sauce

2 TBS dark soy sauce

1 – 3 tsp Chinese 5-spice (I used 3 but I think that was heavy-handed.  Maybe start with one & increase it as it cooks – if you think it needs more)

Cooked rice for 2

Garnish – cilantro and/or sliced hot peppers (I used red jalapenos)

5-23-16 (50)

5-23-16 (51)

5-23-16 (52)

5-23-16 (53)

5-23-16 (61)

DIRECTIONS

Put everything except the rice & garnish in a slow cooker & leave on high for 4 hours.  Mine was still too thin at that point – so I cooked it a bit longer with the lid off.  If you are going to leave this on low for 8 hours – maybe add a cup of water – so it doesn’t burn – and then cook off excess moisture at the end by taking the lid off.  If it gets too thick – add water.

Serve with rice & garnish as you desire.

5-23-16 (62)

5-23-16 (69)

5-23-16 (114)

5-23-16 (116)

Vegan Pasta with Creamy Avocado & Spinach Pesto (or Vegetarian)

Leave a comment


All Photos © Christine Elise McCarthy 2016

To see images of my past posts & get links to the recipes – look on my Pinterest board – HERE.

images (1)download (1)

5-17-16 (29)

5-17-16 (18)

BathingandthesinglegirlCover

vromans back

5-17-16 (25)

5-17-16 (36)

5-17-16 (34)

This is a 5 minute recipe so – if you can boil pasta & own a blender – you can make this dish.  I had an avocado that was about a day past its prime & loads of spinach – so this was born.  I used a few serrano peppers for heat but that it totally optional.

*NOTE – I also used fresh basil that I had frozen a few weeks ago.  Worked great – so – if you are ever wanting to preserve fresh herbs so they do not go to waste – they can be frozen & then used in pestos & sauces.

Vegan Pasta with Creamy Avocado & Spinach Pesto

Serves 4

INGREDIENTS

1 lb pasta – cooked as directed

1 large avocado

2 packed cups of fresh spinach

2 garlic cloves

1/4 packed cup fresh basil *See note above

2 serrano or jalapeno peppers (optional) – seeded

1/2 to 1 cup Parmesan (vegan or otherwise) – quantity to your taste

S&P to taste

5-17-16 (15)

5-17-16 (19)

5-17-16 (39)

DIRECTIONS

Blend everything except the pasta in a blender or food processor.  Season with S&P & adjust anything else to suit your fancy.

Toss with warm pasta.

See?  EASY!

5-17-16 (21)

5-17-16 (37)

5-17-16 (32)

Baked Stuffed Eight Ball Squash (or Zucchini) with Leftover Pasta (Vegetarian or Vegan)

Leave a comment


All Photos © Christine Elise McCarthy 2016

To see images of my past posts & get links to the recipes – look on my Pinterest board – HERE.

images (1)download (1)

5-16-16 (50)

5-16-16 (107)

BathingandthesinglegirlCover

vromans back

5-16-16 (57)

5-16-16 (70)

5-16-16 (88)

Farm Fresh To You sent me three little 8-Ball squashes this week – and I had a boatload of leftover pasta and so – this dish was born.   I used the three eight ball squashes & a green & a yellow zucchini I had, too.  The kind of squash is not important but the eight ball squashes do make a cute presentation.   You can eat the flesh (and skin) of the eight ball squashes but I think this might be less pleasant if yours are very large.  Mine were pretty small & got very tender in the oven.

I did stuff the yellow zucchini but ran out of stuffing for the green one & could not be bothered to make more – so – I just filled it with sauce.  I used a teeny bit of real mozzarella on top & a really tiny bit of real Asiago in the filling but vegan cheeses would work just as well.

I used leftover pasta like this & the jarred sauce below.  You can use any type of pasta & sauce you prefer – even homemade ones.  You could add ground meat – like Beyond Meat Beefy Crumble to either the squash filling or your sauce – if you wanted to add protein to the dish.

6-9a-15-93

5-16-16 (25)

5-16-16 (76)

5-16-16 (101)

5-16-16 (103)

Baked Stuffed Eight Ball Squash (or Zucchini) with Leftover Pasta (Vegetarian or Vegan)

Serves 2

INGREDIENTS

12 oz cooked pasta

4 eight ball squashes (or 4 zucchini)

2 TBS olive oil

16 oz pasta sauce (or less but up to 16 oz – depending on how much sauce you like on your pasta)

1-6 garlic cloves

1 TBS fresh oregano – chopped (or 1 tsp dry)

1/4 cup vegan mozzarella)

1/8 cup grated Asiago (or vegan Parmesan)

S&P

Garnish – chopped basil or parsley and maybe extra vegan cheese)

5-16-16 (21)

5-16-16 (23)

5-16-16 (24)

5-16-16 (26)

5-16-16 (27)

5-16-16 (51)

5-16-16 (61)

5-16-16 (63)

5-16-16 (84)

5-16-16 (93)

5-16-16 (95)

DIRECTIONS

Heat the oven to 400 degrees.

Cook the pasta & drain.

Cut the tops off the eight ball squash & carefully scoop out the flesh & set it aside.  A melon-baller or grapefruit spoon might make that easier.  If using zucchini – slice in half the long way & scoop out the seeds & flesh and set it aside.

Take about 1 cup of the cooked pasta & chop it a bit.

Heat the olive oil in a large skillet.  Add the squash flesh & saute a minute or so.  Add the garlic & oregano & stir.  Add the CHOPPED pasta, 1/2 cup or so of pasta sauce stir.  Add Asiago or vegan Parmesan & stir.  Season with S&P & set aside.

5-16-16 (28)

5-16-16 (29)

5-16-16 (30)

Treat a cooking pan with cooking spray.  Carefully stuff your peppers in the pan.  Top each with a little more sauce, some grated mozzarella & then with the squash tops themselves.  Bake for about 30 minutes or until the squash are tender & the cheese is warmed (and/or melted).  If using zucchini – do the same thing – but there will be no little squash hats for the zucchini boats.

5-16-16 (32)

5-16-16 (33)

5-16-16 (34)

5-16-16 (48)

5-16-16 (35)

5-16-16 (36)

This next part is up to you.  You can either boil water & put the remaining pasta in it for about a minute, just before you are ready to serve – or warm as much pasta sauce as you think you need for 2 servings & stir the pasta directly into it to reheat it.   The advantage to heating the pasta & sauce separately is that you can better control how much sauce each serving gets – because some people like lots of sauce & others prefer less.  This is your call.

Whatever you decide – when the squash is ready – plate some pasta & sauce on two plates & place two baked squash on top of each.

Garnish with basil and/or parsley & grated cheese.

5-16-16 (52)

5-16-16 (105)

5-16-16 (108)

5-16-16 (146)

Super Easy 5-Ingredient Homemade Frascatelli Pasta with Mustard Greens & Parmesan Cheese (Vegetarian or Vegan)

4 Comments


All Photos © Christine Elise McCarthy 2016

To see images of my past posts & get links to the recipes – look on my Pinterest board – HERE.

images (1)download (1)

5-13-16 (44)

5-13-16 (36)

BathingandthesinglegirlCover

vromans back

5-13-16 (59)

5-13-16 (75)

My Farm Fresh to You delivery came today & there were mustard greens in there.  I’ve never cooked with them so I Googled them for some inspiration.  And did I find it!!!  The mustard greens in a recipe – sure.  But the revelation is the FRASCATELLI!    I had never heard of frascatelli before & I was intrigued.  It was the photo below (from Bon Appetit) that caught my eye. Looks like gnocchi.  I read more & discovered it was a 2 ingredient pasta that required no tools or resting time.  I had to try it.  Immediately!

frascatelli-with-pecorino-and-mustard-greens1-940x600

Incredibly, frascatelli is as easy to make as the instructions suggested & I am certain I will be making this stuff over & over again.

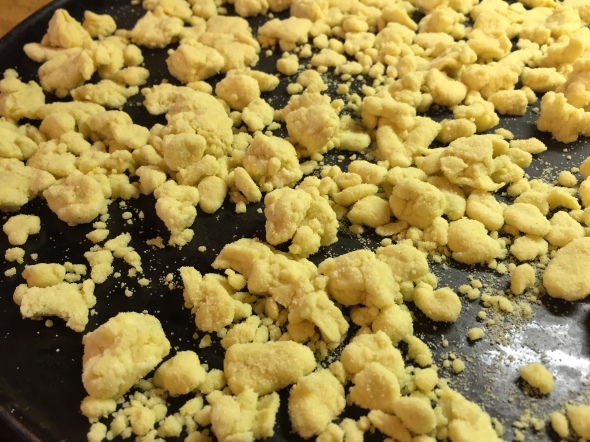
The process is to spread out 2 cups of semolina flour & splatter it with water.  Then scoop it up, put it in a colander & shake it around.  Tiny dumplings form & the rest of the semolina falls back to the work surface.  Repeat.  When all my flour was used up – I manually pressed some of the teensy bits into larger dumplings but that is not necessary.  And guess what?  You can cook it immediately & it is done in 30-60 SECONDS.  Yes – seconds.  You MUST try this.  It would be a great thing to make with kids.  I think they would love the process.  Here are the directions from Bon Appetit:

  • Spread semolina flour in an even layer in an 8x8x2-inch baking dish. Fill a small bowl with 1 cup water and set next to dish. Working in 4-5 batches, gather your fingertips and thumb of 1 hand together and, working quickly, dip into bowl of water, lift hand from bowl, and splatter water over semolina. Repeat several times until surface of semolina is dotted with ragged wet patches about the size of a nickel. Let stand until water is absorbed, forming individual dumplings, about 5 seconds. Using a fish spatula or slotted spoon, turn dumplings over to coat with semolina, then transfer to a sieve. Shake gently over same baking dish to remove excess semolina; transfer dumplings to a large rimmed baking sheet. Repeat with remaining semolina and water until all of the water or all of the semolina has been used (there may be some water or semolina left over).
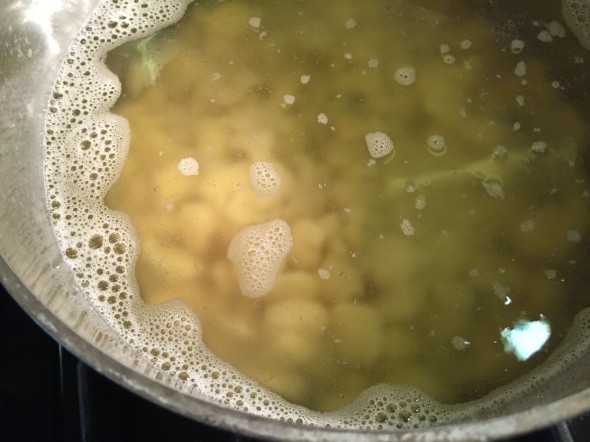
  • Working in 3-4 batches, cook dumplings in a large pot of slowly boiling salted water (if the water is boiling too rapidly, it may break up the dumplings), gently swirling water once or twice to prevent sticking, until al dente, about 30 seconds. Using a slotted spoon, transfer frascatelli to another large rimmed baking sheet.

5-13-16 (9)

5-13-16 (10)

5-13-16 (11)

5-13-16 (12)

5-13-16 (13)

5-13-16 (14)

5-13-16 (15)

5-13-16 (17)

Frascatelli is like a softer cavatelli or a chewier & more dense gnocchi.    Worked great with the cheese & mustard greens but a red sauce or cream sauce or anything would work with this stuff.  Just amazing!  I have no idea how frascatelli was not on my radar until today.

5-13-16 (37)

5-13-16 (79).JPG

5-13-16 (85)

5-Ingredient Homemade Frascatelli Pasta with Mustard Greens & Parmesan Cheese (Vegetarian or Vegan)

Serves 2 very well

INGREDIENTS

2 cups semolina flour

1 bunch mustard greens (or collard greens or spinach or arugula or chard) – ribs removed & chopped

2-3 TBS butter (or vegan butter or olive oil)

1-6 garlic cloves – chopped

1 cup Parmesan – vegan or otherwise (or any other cheese/vegan cheese you like blended into pasta)

OPTIONAL  – Crushed red pepper, S&P

5-13-16 (55)

5-13-16 (19)

5-13-16 (20)

5-13-16 (69)

5-13-16 (81)

DIRECTIONS

Make the frascatelli & set aside.

Prep the other ingredients.

Bring a pot of salted water to a slow boil & immerse the frascatelli.  Stir so it doesn’t stick.  Scoop out a cup or two of the boiling pasta water & reserve it.  In 30-60 seconds – drain the frascatelli & set it aside.

5-13-16 (21)

5-13-16 (23)

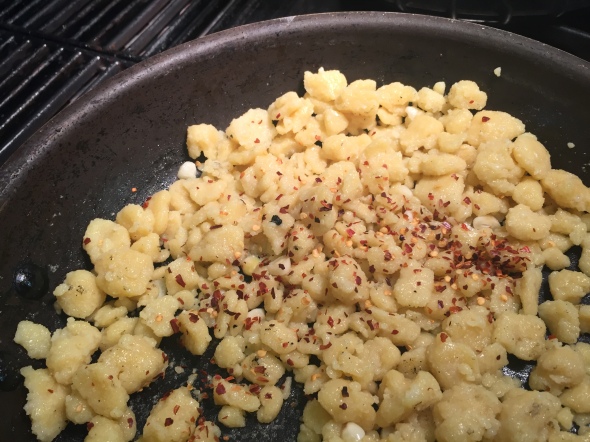
Heat the butter (or vegan butter or olive oil) in a large saute pan.  Add the frascatelli.  Warm it through – stirring but trying not to crush or mush the dumplings.  I added some crushed red pepper here – about 1 TBS.

Add the garlic & greens.  Stir in a little of the reserved pasta water to wilt the greens.

5-13-16 (24)

5-13-16 (25)

5-13-16 (26)

5-13-16 (27)

5-13-16 (29)

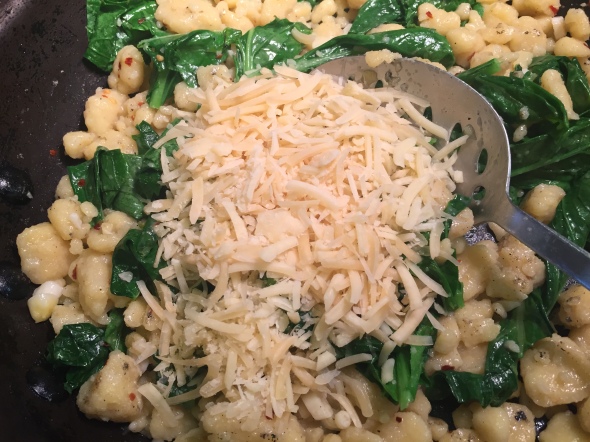
Add the cheese & some more pasta water (only use as much water as you need to melt & blend the cheese).  I added a bit of salt & a bunch of pepper.

Serve with extra cheese.

5-13-16 (38)

5-13-16 (72)

5-13-16 (60)

5-13-16 (46)

Vegan Black Jasmine Pork Fried Rice with Egg (Thai Rice Berry)

Leave a comment


All Photos © Christine Elise McCarthy 2016

To see images of my past posts & get links to the recipes – look on my Pinterest board – HERE.

images (1)download (1)

5-12-16 (40)

5-12-16 (78)

BathingandthesinglegirlCover

vromans back

5-12-16 (43)

VeganEgg-packaging

Follow Your Heart came out with a vegan egg (photo above stolen from Google).  The first time I tried it – I was put off by the fact that it is a powder you add water to & that it takes FOREVER to set & become eggy.  It seemed like a chemical rubber to me & I talked shit about it a bit.  When I decided to make a fried rice – it crossed my mind that this egg might work better as part of a larger dish – without the pressure of having to stand on its own.    So – I made it again.  I noticed that the powder even has a very faint eggy-sulfur smell – that I did not notice the first time.  And – this time – I let the pan get very hot before I added the mix.

5-12-16 (13)

5-12-16 (14)

5-12-16 (15)

5-12-16 (16)

And – this time – it came together a bit more quickly.  I added some salt to it before it set & scrambled it until it was no longer wet.  And tasted it.  And, this time, I kinda liked the result.  The visual isn’t perfect but the taste & texture were actually pretty good.  I wonder how a quiche or chilaquiles might turn out with this stuff.  I will experiment & report back.  But – if you crave breakfast eggs – I am changing my thumbs down on these to a pretty enthusiastic thumbs up.   Omelettes might be the ideal way to use this stuff – because added flavors & textures can only help.

One thing – once set – these eggs don’t break up like real egg & so – cut up – they look sorta plastic (visually – see below) and were lost & overwhelmed in this rice.  Just FYI.

5-12-16 (18)

5-12-16 (21)

5-12-16 (35)

5-10-16 (133)

As to this rice dish – it was just an excuse to make my awesome Vegan Char Siu or Chinese BBQ Pork Ribs – above.  Those fuckers are so convincing & delicious – I just had to make them again the very next day!  I also had a myriad of random vegetables to use up & I really wanted to experiment with the vegan egg again – so – this dish was born.  It is a pretty straight-forward stir-fry & you can add anything you want to it or lose anything from it that you don’t like or have around already.    Two notes – the egg gets sorta lost in this so it might be a waste to use them for this dish and – I stirred the chopped “pork” into the stir-fry where the heat sorta steamed their crispy, stickiness away.  In the future – I would top each plate with a portion of the ribs — on top or on the side.

4-29-16-6

4-29-16-7

Also – I made this with my newest rice discover – Thai Rice Berry (black jasmine) rice.  ANY rice will work – but I had this left over so that is what I used.

I saw this new rice at my favorite Thai grocery store – Bangluck.   $10 for 5 pounds – so I could not resist.  I looked it up online & found THIS:

Riceberry  Rice is the new variety of rice that has been bred in Thailand. The rice is deep purple in colour; this rich dark colour is typical of plants that yield high nutrition. Rice berry rice is cross pollination of three hardy and loved rice strains; they are:

  • Thai Hom Mali Race – also known as fragrant jasmine rice, the highest quality and most sort after rice in the world, after cooking it retains its structure but takes on a soft fluffy consistency.
  • Hom Nin Rice – has well known and documented antioxidant properties, but this grain can become a little chewy if it isn’t cooked through.
  • Khao Dawk Mali 105 – a hardy seed which will grow in a broad range of agricultural environments.

The cross-pollination of these three rice plants has resulted in Riceberry Rice, a new and exciting rice variety. Riceberry takes on the best attributes of each of the grains that were used in its inception. The light fluffy texture and flavour from Thai jasmine rice, high in minerals and antioxidants from Hom Nin rice and hardy and high yield characteristics of Khao Dawk Mali 105.

Riceberry Rice Nutrition Profile

Riceberry rice is rich in many antioxidant that help our immune system stay healthy. It contains significant levels of:

  • Beta-carotene
  • Gama Oryzanol
  • Vitamin E
  • Folic Acid
  • Tannin
  • Zinc
  • Fiber
  • Bran Oil

These antioxidants, vitamins and minerals give riceberry rice a nutrition profile that is relatively unique. The dark purple colour it matures signifies it high nutrition content and gives it a unique appearance when served.

The rice is also extremely high in fiber and bran oil, this natural aids digestion and helps keep the stomach free from disease.

Thai Rice Glycemic Index

Riceberry rice has been graded as low-medium in the glycemic index. The abundant fiber and bran oil which it contains helps to reduce the risks of diabetes by hindering the absorption of sugars into the blood through the stomach. It also helps the pancreas function better.

– See more at: http://www.thenaturalhealthmarket.co.uk/riceberry-organic#sthash.388tjdGM.dpuf

5-12-16 (37)

5-12-16 (39)

5-12-16 (74)

Vegan Black Jasmine Pork Fried Rice with Egg (Thai Rice Berry)

Serves 4

INGREDIENTS

Vegan Char Siu or Chinese BBQ Pork Ribs

3-4 cups cooked rice

2-3 TBS olive or coconut oil

1 small onion – diced

1 large carrot – diced

1 red (or other) bell pepper – diced

1-6 chili peppers (I used 2 serrano & 4 jalapeno – but I love heat)

2 cups purple cabbage (or green or both) – chopped

1 head Swiss chard – ribs removed & chopped

4 radishes – sliced

1 cup peas

4 TBS liquid aminos (or soy sauce or tamari)

1 TBS minced ginger

1 TBS minced garlic

2 Follow Your Heart vegan eggs (optional)

GARNISH – more radish slices and/or lime wedges, sliced scallions or sliced green garlic

5-12-16 (10)

5-12-16 (11)

5-12-16 (12)

5-12-16 (24)

5-12-16 (26)

DIRECTIONS

Make the pork ribs & set aside.  When cool enough to handle – chop them up.

If using the eggs – make them, chop them up & set aside.

Heat the oil in a large saute pan or wok.

Basically – just dump everything (except the rice, egg & ribs) in there & cook until the veggies are soft.  You might want to wait until it is close to done before adding the peas so that they don’t get all smooshed.  Add the rice & combine.  My photos show adding the egg & ribs to the pan but I think they would work better added to each serving when you plate the rice.

Plate the portions & top with chopped egg & pork and any garnish you prefer.

5-12-16 (27)

5-12-16 (28)

5-12-16 (29)

5-12-16 (32)

5-12-16 (33)

5-12-16 (34)

5-12-16 (35)

5-12-16 (36)

5-12-16 (57)

5-12-16 (70)

Vegan Spicy Szechuan Green Beans with Minced Pork

Leave a comment


All Photos © Christine Elise McCarthy 2016

To see images of my past posts & get links to the recipes – look on my Pinterest board – HERE.

images (1)download (1)

5-10-16 (87)

5-10-16 (109)

BathingandthesinglegirlCover

vromans back

5-10-16 (113)

4-20-16-43

So – I came across several kinds of canned seitan (seen above) at my favorite Thai market – Bangluck.  I used the first can (on the left) in my Easy Vegan Thai Minced Pork with Holy (& Sweet) Basil – Pad Ga Prao Muu – in Lettuce Cups (below) & it was a huge success.

4-20-16-108

Today – I wanted to use one of them for my Green Beans & Minced Pork.  I looked at the calorie count of each of the two remaining cans and was surprised to see a huge calorie disparity despite the fact that the ingredients list is identical.

5-10-16 (70) 5-10-16 (71) 5-10-16 (72) 5-10-16 (73) 5-10-16 (74) 5-10-16 (75)

5-10-16 (76)

So – since the “roast duck” had fewer calories – I used that one.  Despite the image on the can – it looked exactly like the fried gluten one did.  I have not opened the third can yet but I suspect it is just more of the same but – somehow – with more than twice the calories – so – I likely  will feed it to my dogs & just use the others in the future.  I man – see below?  First image below is the fried pork & the second is the duck.

4-20-16-62 5-10-16 (77)

Same thing.  Canned seitan in water.  So – for this dish, you could use canned & drained seitan or your favorite brand of seitan  – or even a faux beef like Beyond Meat’s Beefless Crumbles (or other brand of ground beef).  The flavors in this dish are very strong & will take over the dish.  You could even use Beyond Meat’s chickenless strips.  No matter.

4-29-16-6

I served this with my newest rice discover – Thai Rice Berry (black jasmine) rice.

I saw this new rice at my favorite Thai grocery store – Bangluck.   $10 for 5 pounds – so I could not resist.  I looked it up online & found THIS:

Riceberry  Rice is the new variety of rice that has been bred in Thailand. The rice is deep purple in colour; this rich dark colour is typical of plants that yield high nutrition. Rice berry rice is cross pollination of three hardy and loved rice strains; they are:

  • Thai Hom Mali Race – also known as fragrant jasmine rice, the highest quality and most sort after rice in the world, after cooking it retains its structure but takes on a soft fluffy consistency.
  • Hom Nin Rice – has well known and documented antioxidant properties, but this grain can become a little chewy if it isn’t cooked through.
  • Khao Dawk Mali 105 – a hardy seed which will grow in a broad range of agricultural environments.

The cross-pollination of these three rice plants has resulted in Riceberry Rice, a new and exciting rice variety. Riceberry takes on the best attributes of each of the grains that were used in its inception. The light fluffy texture and flavour from Thai jasmine rice, high in minerals and antioxidants from Hom Nin rice and hardy and high yield characteristics of Khao Dawk Mali 105.

Riceberry Rice Nutrition Profile

Riceberry rice is rich in many antioxidant that help our immune system stay healthy. It contains significant levels of:

  • Beta-carotene
  • Gama Oryzanol
  • Vitamin E
  • Folic Acid
  • Tannin
  • Zinc
  • Fiber
  • Bran Oil

These antioxidants, vitamins and minerals give riceberry rice a nutrition profile that is relatively unique. The dark purple colour it matures signifies it high nutrition content and gives it a unique appearance when served.

The rice is also extremely high in fiber and bran oil, this natural aids digestion and helps keep the stomach free from disease.

Thai Rice Glycemic Index

Riceberry rice has been graded as low-medium in the glycemic index. The abundant fiber and bran oil which it contains helps to reduce the risks of diabetes by hindering the absorption of sugars into the blood through the stomach. It also helps the pancreas function better.

– See more at: http://www.thenaturalhealthmarket.co.uk/riceberry-organic#sthash.388tjdGM.dpuf

4-29-16-7

4-29-16-9

4-29a-16-39

5-10-16 (104)

5-10-16 (107)

This green bean dish is very easy.  I used fresh green beans & loads of spices.  You could use frozen green beans but I think canned ones will just become mush.

Vegan Spicy Szechuan Green Beans with Minced Pork

serves 2 with rice

INGREDIENTS

10+ oz seitan (or other faux meat)

1 lb green beans – trimmed & cut in half

1 TBS olive oil

2-3 TBS cornstarch

1-6 cloves garlic – minced (I used 6)

2 TBS brown sugar

1/4 cup hoisin sauce

1 tsp to 2 TBS crushed red pepper (according to your taste for heat)

2-3 TBS liquid amino acids (or low sodium soy sauce or tamari)

1-6 dry red chilies (VERY spicy & VERY optional) – cut in half (I used 6)

GARNISH – cooked rice, sesame seeds

5-10-16 (84)

DIRECTIONS

Cook the rice.

Mince the faux meat & toss with the cornstarch.

Heat the olive oil in a large saute pan & add the rest of the ingredients – EXCEPT THE GARLIC.

Stir to combine.  If using fresh green beans – add about 1/4 cup water, bring to a boil & cover for 3-5 minutes or until the green beans are cooked to your taste.  Frozen beans won’t need this step but you can still add water if your sauce cooks off too much or the meat sticks to the pan too much.

When it all seems warmed through & the sauce is thick – toss in the garlic & stir for one minute.  Serve with rice.

5-10-16 (80)

5-10-16 (82)

5-10-16 (83)

5-10-16 (86)

5-10-16 (96)

5-10-16 (112)

Vegan Char Siu or Chinese BBQ Pork Ribs

29 Comments


All Photos © Christine Elise McCarthy 2016

To see images of my past posts & get links to the recipes – look on my Pinterest board – HERE.

images (1)download (1)

5-10-16 (126)

5-10-16 (140)

BathingandthesinglegirlCover

vromans back

5-10-16 (158)

One of my all-time favorite foods, since childhood, is BBQ ribs – especially of the Chinese variety.  Sticky, sweet & chewy – just delicious.  I lived above a Chinese take-out while I was in high school & smelled this shit cooking every day & never tired of it.  Even as the grease filled the air & I could feel my skin breaking out – I still craved these all the time – even if I only let myself have them on special occasions – mainly because I perceived them as extremely fattening and bad for you.

Then I gave up meat in the eighties & all ribs of all varieties fell forever from my diet.

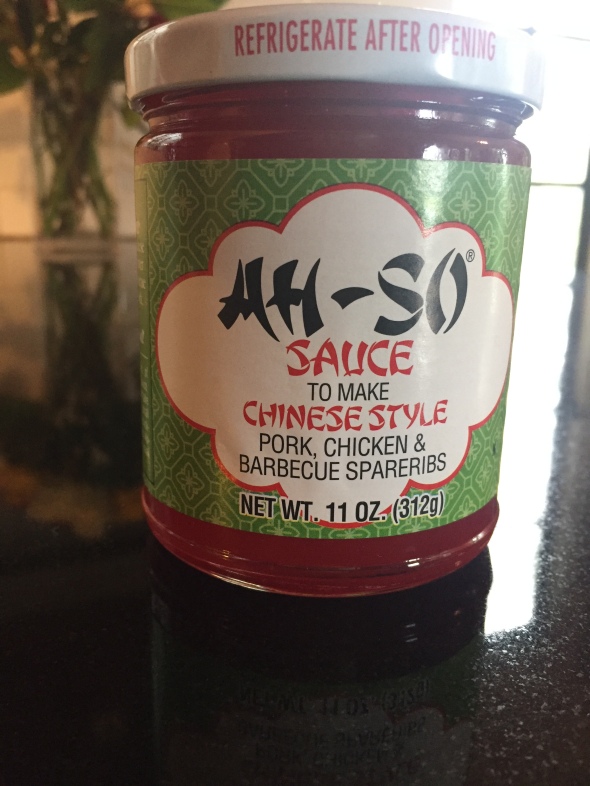
Still – I craved that BBQ sauce & would have my mother send me the Ah-So Sauce (below)  – a brand not available in Los Angeles – and I would stir it into rice or dip vegetables in it.  It was not nearly as satisfying as ribs but I learned to live with it.

5-10-16 (78)

5-10-16 (79)

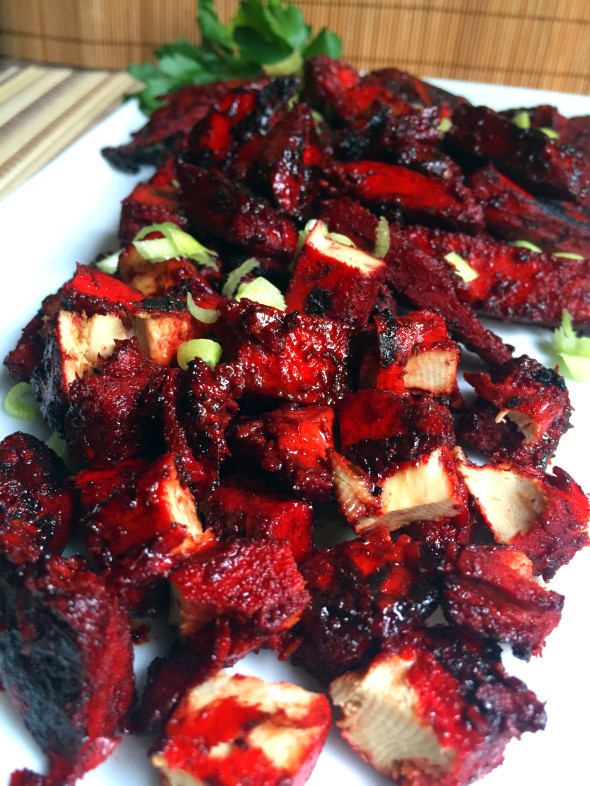
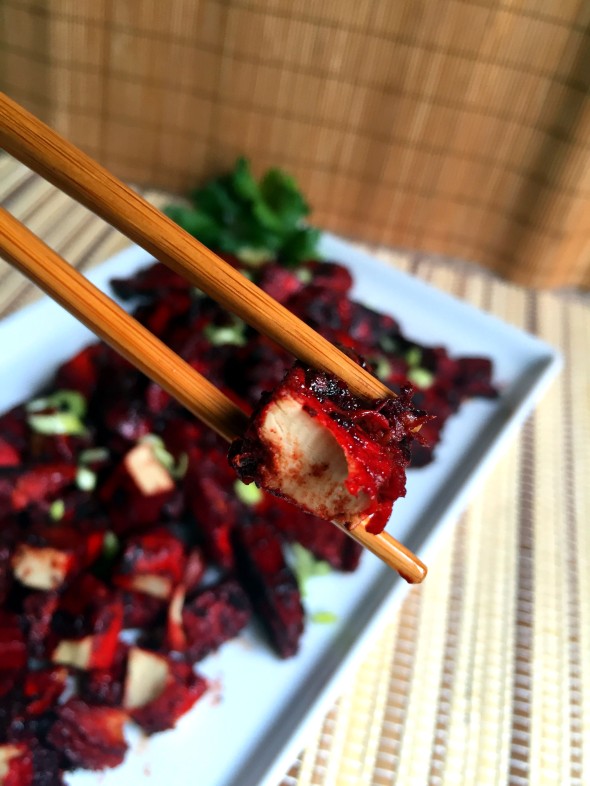
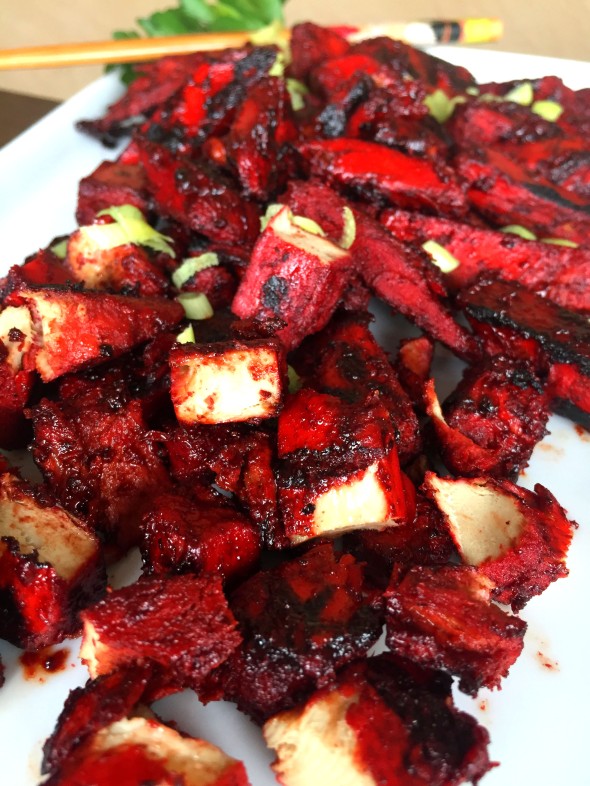
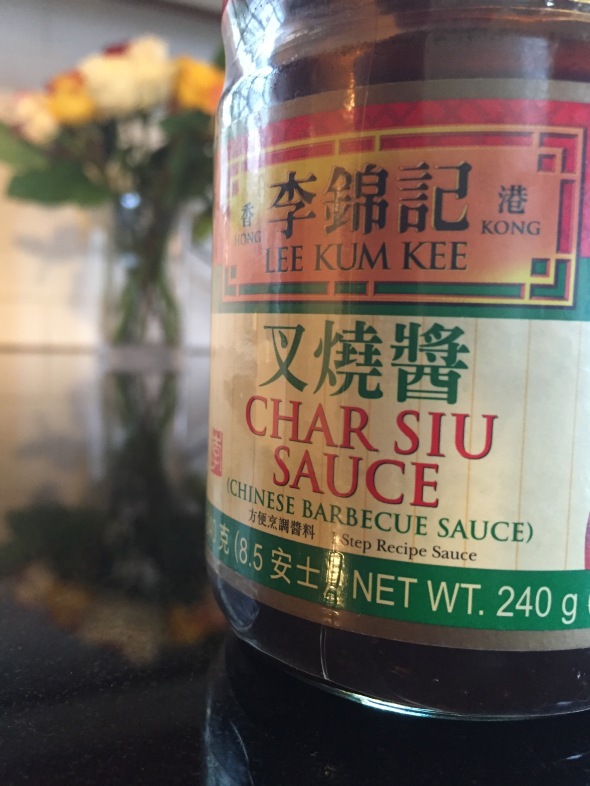
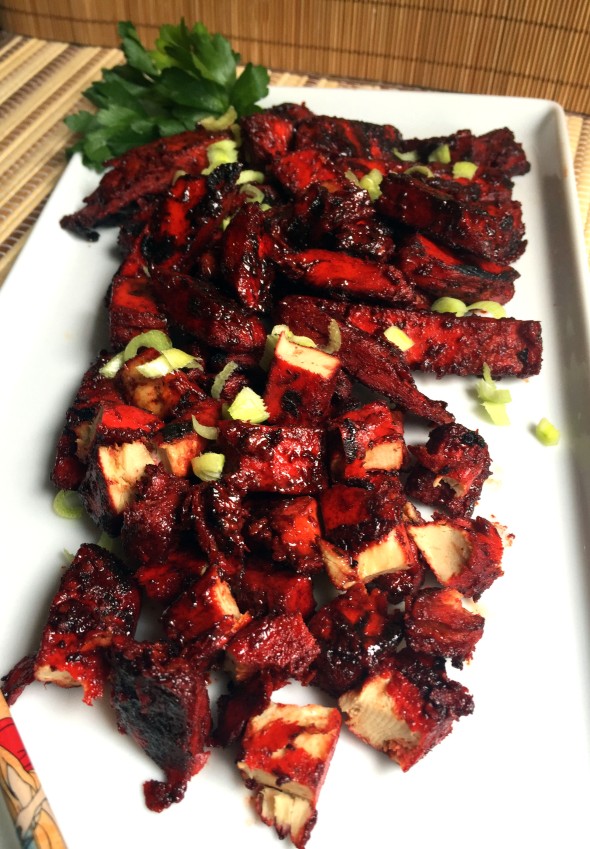
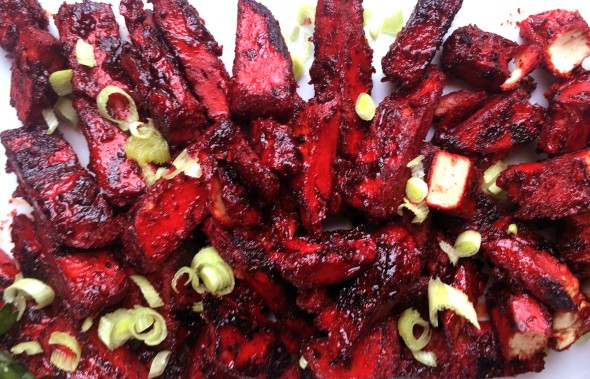
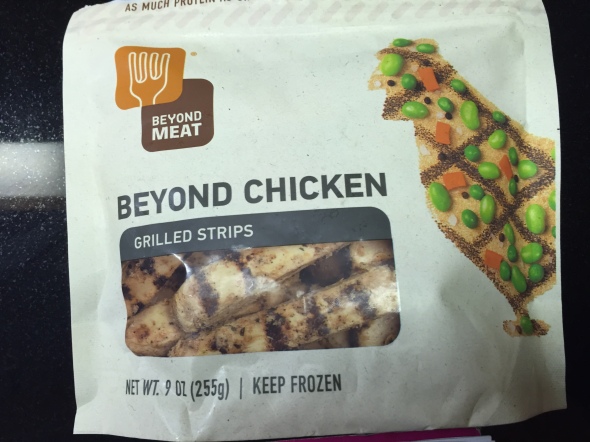
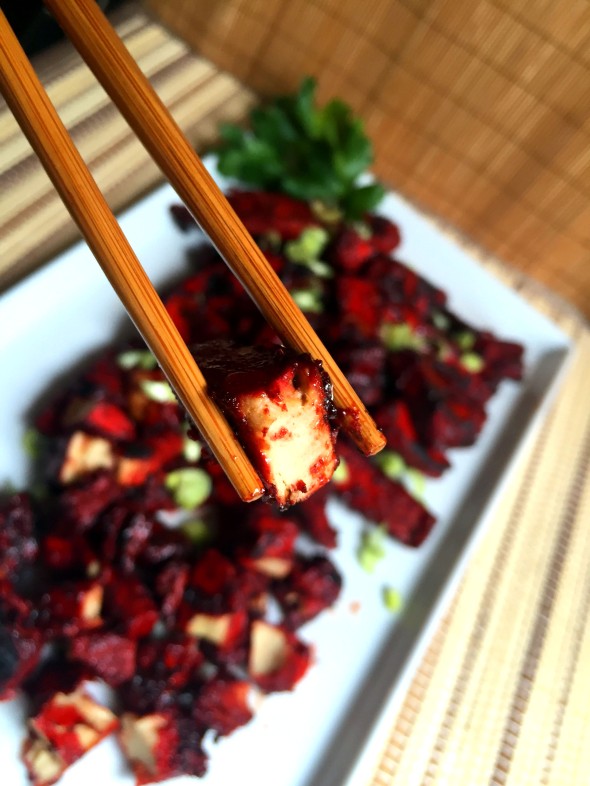
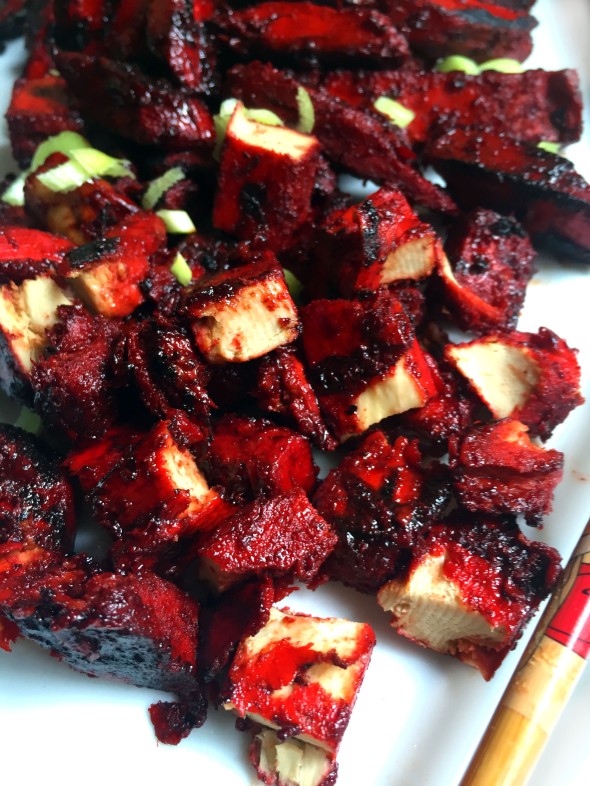
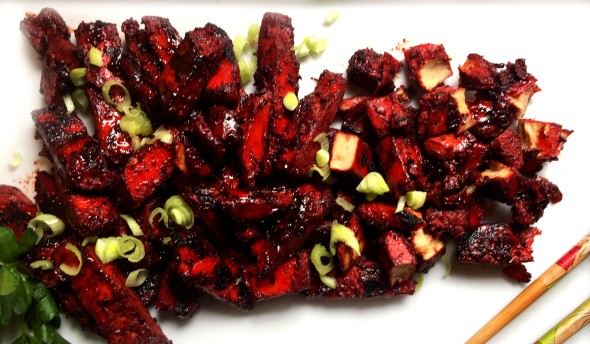
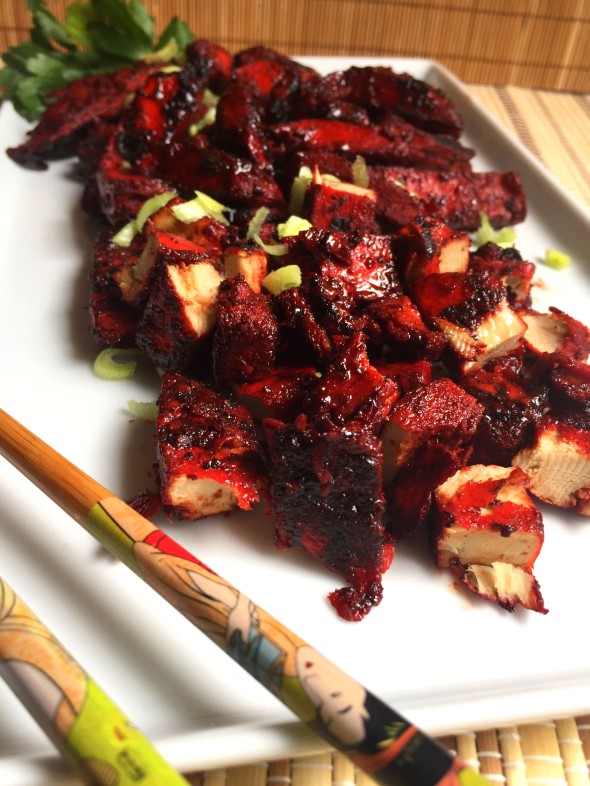
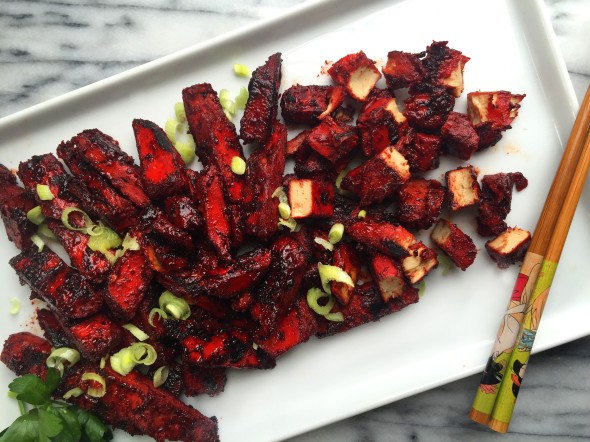
Chinese BBQ pork is called Char Siu.  Lee Kum Kee brand is widely available & certainly available online.  I saw this jar on a shelf & a great idea popped into my mind.  Why not make BBQ pork using Beyond Meat vegan chicken?  Why not, indeed!  Their chicken strips have a texture that can be experienced as chicken OR pork – as pork & chicken really do have a very similar quality.   And – I also decided to make the Char Siu sauce from scratch.  The ingredients are not terribly exotic & can certainly be purchased online – if your local ethnic or regular grocery stores don’t have them all.  The result was visually vibrant & the flavor is dead on.  I recommend this dish very highly!  You could also chop these “ribs” up & make a pork fried rice that would feel even the most deenerate carnivore.

I marinated the chicken overnight (in the bag) but that is totally unnecessary.  You can whip these up in ten minutes & feel all take-out Chinese-y & get your late night, OMG-I-drank-too-much experience right in the comfort of your own kitchen.

5-10-16 (120)

5-10-16 (149)

Vegan Char Siu or Chinese BBQ Pork Ribs

Serves 2 as an appetizer – double the marinade recipe if you like lots of BBQ sauce on your ribs

INGREDIENTS

9-12 oz vegan chicken (or seitan strips)

1/2 tsp Chinese 5 Spice

2 TBS agave nectar

2 TBS Shao Xing Chinese rice wine

1 TBS hoisin sauce

1 TBS Thai chili sauce

1 TBS dark soy sauce

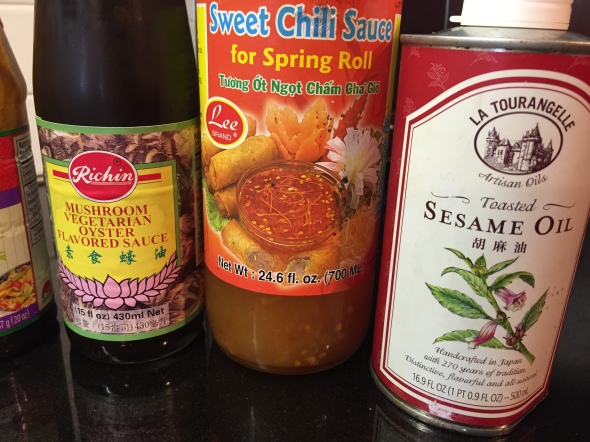
2 tsp vegan oyster or mushroom-flavored sauce

2 tsp molasses

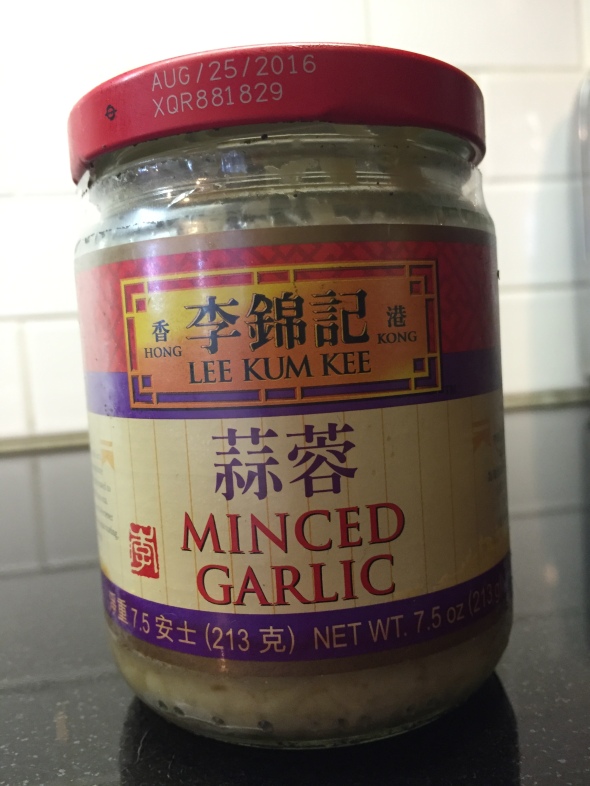
1 TBS minced garlic

1 TBS sesame oil

1 tsp red food coloring (critical for the fiery red color)

GARNISH (optional) – sliced scallions or green garlic

5-10-16 (61)

5-10-16 (62)

5-10-16 (63)

5-10-16 (66)

DIRECTIONS

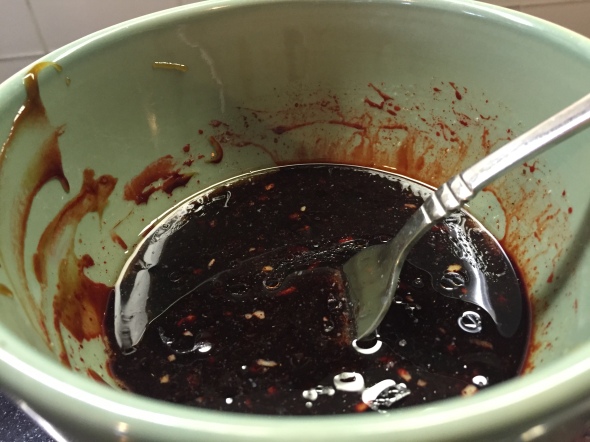
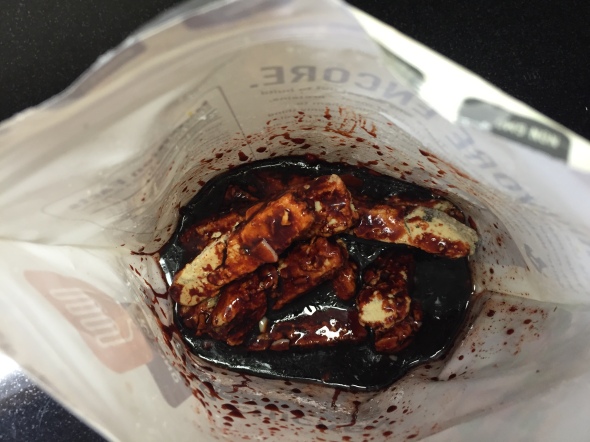
Blend all the ingredients together & then add the chicken.  Marinate for a few minutes – or overnight.  I did this right in the Beyond Meat packaging.

5-10-16 (65)

5-10-16 (67)

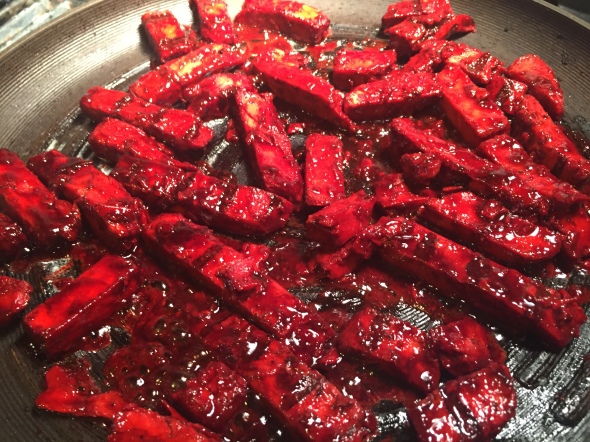
When you are ready to cook them – heat a pan treated with cooking spray.  Add the MARINADE first & heat until it bubbles.  Add the chicken & cook, on high, turning often.  The idea is to let them get a bit blackened.  The sauce will thicken very quickly – which is why I suggesting doubling the marinade recipe if you like lots of sticky BBQ sauce.  You could even heat part of the marinade in a separate pan & pour it over your finished ribs.

5-10-16 (115).JPG

5-10-16 (131)

5-10-16 (137)

5-10-16 (121)

5-10-16 (122)

5-10-16 (143)

Vegan Crab California Rolls – Sushi

8 Comments


All Photos © Christine Elise McCarthy 2016

To see images of my past posts & get links to the recipes – look on my Pinterest board – HERE.

images (1)download (1)

5-4-16 (17)

5-4-16 (40)

BathingandthesinglegirlCover

vromans back

5-4-16 (18)

5-4-16 (19)

5-3-16 (68)

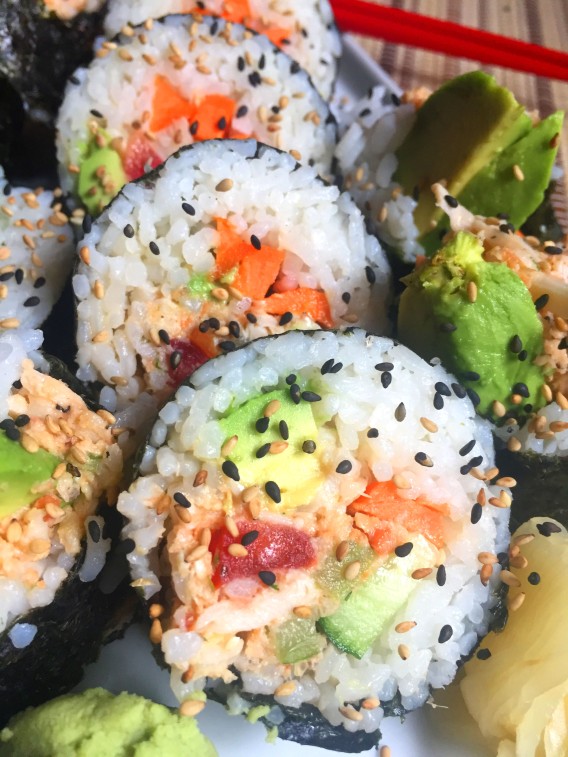
Yesterday, I posted my Vegan Hearts of Palm Crab Salad (seen just above) – fully intending to make these California rolls with it and – today – I did!  California rolls are no mystery & this is just a suggested way to use the crab salad.

If your local market makes sushi or carries fresh sushi – they usually sell extra wasabi & ginger there, too.  That is where I get mine.  Powdered wasabi (that you add water to) is also good but just buying it ready to go is cheap & easy so – why the fuck not?

I buy the nori at my local Thai market because they charge under $2 for a package & Gelson’s charges closer to $5.  Same for the sushi rice.  Ethnic foods are – typically – WAY less expensive in ethnic markets than they are in the ethnic aisles of your local grocery store – so – look into that option (if saving money appeals to you).  Indian markets & Asian markets & Hispanic markets are great resources for rices & spices at drastically discounted prices.  Just FYI.

Sushi rice is shorter than most other common rices but I think you can make sushi rice with any rice.  I used the stuff you see below.

5-3-16 (20)

5-3-16 (78)

As to the filling of a California roll – I went pretty traditional – using the vegan crab, avocado and cucumber – and I added carrots.  This is absolutely not a science so do what suits you.

Sushi Rice

2 cups rice – washed until the water runs clear

3 cups water

1/2 cup rice vinegar

1 tsp salt

1/8 – 1/4 cup sugar (I like less sugar but this is a matter of taste)

5-3-16 (80)

DIRECTIONS

Put the rice in the water & bring to a boil.  Reduce heat to low & cover.  Cook for about 20 minutes.  Wrapping the lid of the pan in a kitchen towel creates a tighter seal & cooks the rice more quickly but be careful not to set the towel on fire.  When it is done – transfer to a large bowl, fluff & allow to cool.

(Photo stolen from Google)

Allrecipes-How-To-Cook-Rice-7

Heat the vinegar & stir in the sugar & salt.  Stir until the salt & sugar dissolve.  Allow to cool.

When the rice is cool – stir in the vinegar & mix it in well.  Store in the fridge until you are ready to use it.  I actually like the rice room-temp, so I leave it out before I use it – but this is just my preference.

5-3-16 (81)

5-4-16 (10)

5-4-16 (42)

5-4-16 (46)

California Rolls 

INGREDIENTS

Cooked sushi rice

Nori sheets

Vegan crab (see link above)

Avocado – sliced

Carrot – cut into long matchsticks

Cucumber – cut into long matchsticks

GARNISH – wasabi, ginger, soy sauce, black and/or white sesame seeds

DIRECTIONS

I don’t use a sushi roller mat.  I just free-form it.  HERE are a bunch of videos & other technique options you might like to try.

I do it near the sink with cool water running.  Sticky rice is, indeed, sticky & will stick to everything.  The water helps rinse it off.

Put the shiny side of the nori down & pack some rice onto it.  Go light.  I went heavy & my rolls were huge (in girth) and messy to eat.  You can probably go more sparse with the rice than you guess – just leave about 1-inch clean on one end.

Layer the other ingredients in there & roll it.  Wet that clean inch with wet fingers & roll over that to close to roll.  Leave it resting on the seam as you roll any others you might be making.

Slice with a wet, sharp knife.

Garnish as you will & eat!

5-4-16 (6)

5-4-16 (7)

5-4-16 (8)

5-4-16 (9)

5-4-16 (11)

5-4-16 (31)

5-4-16 (35)

5-4-16 (25)

Saint Benoit Creamery French-Style Yogurt

Leave a comment


All Photos © Christine Elise McCarthy 2016

To see images of my past posts & get links to the recipes – look on my Pinterest board – HERE.

images (1)download (1)

All my posts now have a VERY customizable PRINT & PDF option.  Create a PDF & save the recipe to your computer or just print it out.  It offers a “remove images” option & you can delete any part of the post you do not need before printing.  The button is below by the Twitter & Facebook links.

5-4-16 (55)

5-4-16 (48)

BathingandthesinglegirlCover

vromans back

I don’t hawk products very often – if at all – but this fucking yogurt is so amazing, I just had to give them a shout out.

As a person who eats vegan about 90% of the time (vegetarian always) – I very seldom eat yogurt.  Typically, I am underwhelmed by it anyway & can think of more fun ways to eat those calories.  But – I am a sucker for yogurt in glass packaging.  I spotted this stuff on the shelf at the Hollywood Gelson’s yesterday & both the glass & the red “grass fed” caught my eye.

5-3-16 (18)

So – I bought that big jar of vanilla & a baby jar of the Meyer lemon & took them home.  I opened the vanilla after dinner & was immediately blown away.  First of all – there seemed to be a thicker cream layer on the top – which I mixed in.  The yogurt is pretty thick but insanely creamy.  And the taste!  So subtle!  Almost like eating clotted cream or a very sweet, soft butter.  Unlike any yogurt I have ever had.  Absolutely the height of quality.

Curious – I about the “grass-fed” claim & more detail about the company – I looked up Saint Benoit Creamery.

It seems to be owned by the man below & his family.  Gorgeous photos and – if you can believe what they show you – happy cows in a gorgeous, green & rolling environment. (Photos below from their site.)

80b422bd54ea370d714134355b4ef5a5212173ec.large

5oz-cropped

486875999_1280x720

Their philosophy is “terroir.”

“Terroir” is a French word describing food “of a place”, food that reflects the character of the land from which it came. By extension, it defines a lifestyle that emphasizes the benefits of using local products.

Saint Benoît’s ‘terroir’ is Sonoma County. From this coastal land’s unique climate, geography, history, traditions and diverse population comes some of the best wine and food on the West Coast.

In western Sonoma County, we found a family dairy of many generations that produces the richest and healthiest milk we have ever tasted. This exceptional Jersey cows’ milk is the key element to the unique flavor of Saint Benoît yogurts.

We also found fruit orchards and fruit growers who hand make fruit preserves. The preserves we use in our yogurts are made with organic tree-ripened fruit using significantly less sugar than commercial jams.

Last but not least, we make Saint Benoît yogurt in small batches right on the farm. It is indeed food “of a place” – its freshness is exceptional!

Here is their posted story:

“I wanted to make a product I could feel good about giving my children.”
– Benoît

When my brother David and I started our company back in 2004, we were on a mission to: “create healthy, “terroir”, gourmet products from the San Francisco Bay Area in order to satisfy consumers’ curiosity for local artisanal products and for new food experiences.” We created a unique package for our product, the ceramic brown container featured in our logo, and brought our French-style yogurts to Bay Area farmer’s markets. Our small batch approach to yogurt making was well received by our local audience.

Today, here we are ten years later, and our small batch creamery has scaled to provide a low-heat, vat pasteurized, organic, whole milk, as well as an entirely new series of yogurt packaged for national distribution.

We still sell our products at many Farmer’s Markets in Northern California, and we love engaging with our customers and hearing how they are using our products.

While our original ceramic container and ball jar packages are now retired, we remain steadfast in our efforts to keep plastic out of our landfills and have designed new glass containers to support standard recycling programs around the U.S.

In 2008 we began our renovations to build a clean room, sustainably and for future product development. We’re really proud of the green approach we were able to take with our partners.

Doing things right

We have always been located in Sonoma, but initially were unable to produce the yogurt on the farm which meant we had to haul the milk a short distance to make the yogurt. In July of 2008, we began transforming an old milking parlor on the Mattos farm into our new creamery. With a little help from people like Whole Foods and John Mattos (dairy partner) who believed in us, some ingenuity, many months of planning and forethought, our seeds have grown into a thriving and sustainable creamery. Uncle Bill helped bring the project to fruition, making sure the creamery reflected our mission and philosophy of respecting the land and food shed we cherish. He helped us design a system that reuses water from yogurt production for irrigation and reduces energy costs. He repurposed old materials from building sites such as doors and windows that he hand fitted into the existing building. Together we chose a new type of wall covering that is not only state of the art, it also just happens to be made from recycled plastic milk bottles. We kept the old cement walls that conserve the cool air, which will help us save energy when we install our new walk-in cooler. And best yet, the milk is right there… the girls are creating it from those lush organic pastures beneath our very eyes, every day, right outside the new-old windows of our new-old creamery.

There is a very interesting video at the bottom of THIS PAGE talks about the fact that they use environmentally-friendly packaging & process their products as little as they can & keep it within regulations.  Watch the video – it is really interesting.

Here is what they say about the yogurt:

Saint Benoît Creamery is excited to introduce a new line of yogurt featuring glass packaging. The new glass package is recyclable, much lighter than our ceramic jars, which will help us significantly reduce carbon emissions during transportation, and offers a better seal, which will help us deliver our high-quality yogurts nationwide.

Unfortunately, this means an end to our returnable yogurt program. While we are sad to see it go (and say goodbye to our ceramic containers), we’re excited about our new packages and hope you are as well.

Our Yogurt is made solely from Jersey cow’s whole milk and is cultured with Bulgaricus, Thermophilus, Acidophilus and Bifidus, the yogurt making bacteria. We use wholesome pasture-fed organic cow’s milk from John Mattos’ family farm in Two Rock in Sonoma county. Our Yogurt culture comes from France where it has been used for decades to produce sweet, mild and smooth yogurts. Unlike most producers, we add no thickeners, stabilizers or preservatives. Just milk and culture, that’s it!

All of our fruit-spreads are made from whole, locally-grown organic fruit and handcrafted for us by our partner farm Lagier Ranches. We use the whole fruit peel and all, so look for the little bits of zest floating around in the Meyer lemon. The fruit is at the bottom, so just mix—or dig! We do not use imported fruits, frozen purées, or commercial “yogurt jams.” This guarantees the freshest tastiest product with the least amount of waste. It also means that the flavor, texture, and color may vary according to the season. We never change the recipe, but good old Mother Nature has to have her say in how it turns out!

The Four Seasons

The cows’ milk naturally varies according to the season. For example, at some points of the year the cows’ milk contains more carotene and therefore the cream layer is a buttery yellow color. At other times of the year, the cream is whiter. Because the lovely ladies are pasture-fed, this greatly affects their milk. In the hot summer months, the girls get quite thirsty and drink more. This means their milk may also contain more water and make the yogurt slightly thinner. January also brings this about, but it’s because the grass in the fields is so rich, green, and waterlogged that they get more water from the grass itself. The same processes can affect the cream content. Because we do not remove the fat and re-inject it into the yogurt (as most companies do) and do not add milk powder to thicken it, our yogurt has a seasonal quality to it. Two benefits are that you have a product that is closer to the original state of the ingredient, and that delightful new mixtures occur. For example, when the milk contains more water and the bees are buzzing away in heavy-pollen season, all the factors align to give a whole new twist to our honey yogurt. The milk flavor is slightly less prominent, the rich honey comes through even more, and you can even find a slight dusting of pollen on the cream layer!

5-4-16 (50)

5-4-16 (51)

5-4-16 (52)

Seriously.  This looks to be as close to an old-fashioned & humane farm as a company could hope to be.  Look HERE to see where you can buy it near you.  And if it is available & you eat yogurt – you simply MUST try this stuff at least once!

Vegan Hearts of Palm Crab Salad

10 Comments


All Photos © Christine Elise McCarthy 2016

To see images of my past posts & get links to the recipes – look on my Pinterest board – HERE.

images (1)download (1)

All my posts now have a VERY customizable PRINT & PDF option.  Create a PDF & save the recipe to your computer or just print it out.  It offers a “remove images” option & you can delete any part of the post you do not need before printing.  The button is below by the Twitter & Facebook links.

5-3-16 (45)

5-3-16 (68)

BathingandthesinglegirlCover

vromans back

5-3-16 (38)

11-7-15-205

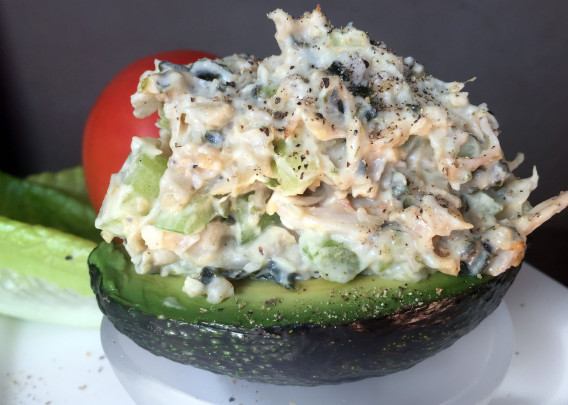
While I was very pleased with my Vegan Jackfruit Tuna Salad (seen just above in the avocado) – I know that jackfruit is an exotic ingredient & not easily found by many people.  So – I endeavored to make a vegan seafood dish with something more readily available – hearts of palm – and had great success!  Nothing in this recipe is hard to find.  If you are not vegan & eat real mayonnaise – this Japanese mayo used for sushi might be nice in this – as it adds a sweetness.

5-3-16 (72)

5-3-16 (73)

5-3-16 (74)

I only mention that stuff because I plan on making California rolls with this crab salad & the Kewpie would make them more authentic.  Still – I did not use Kewpie.  I used Just Mayo.

5-3-16 (31)

5-3-16 (26)

5-3-16 (27)

I also used Old Bay seasoning – which is vegan.   One of the best things about this recipe is the low calorie count of the hearts of palm.  Check it out:

5-3-16 (21)

5-3-16 (22)

So – hears of palm, vegan mayo, Old Bay & few other ingredients & voila!  Comes together as fast as a real tuna salad would.  I used a food processor but this is not entirely necessary.  In fact – I might just finely chop the hearts of palm next time – because crab salad is textured & chunky.  Still – I am going  for a California roll with this (which I will post soon) so the finer chop seemed like a good idea.  Either way – I think you will be very happy with this salad!

5-3-16 (37)

Vegan Hearts of Palm Crab Salad

Serves 2 on a salad or in avocado halves or in sandwiches

INGREDIENTS

2 (14 oz) cans hearts of palm – drained

1/4 onion – minced

3 celery stalks – minced

2 tsp Old Bay seasoning

1/2 cup vegan mayo

1 small tomato – seeded & chopped finely

1/4 cup grated carrots – chopped even more

2 tsp prepared horseradish (optional)

4-5 springs of fresh dill – fronds chopped

S&P to taste

5-3-16 (28)

5-3-16 (29)

5-3-16 (30)

5-3-16 (32)

DIRECTIONS

You can either finely chop everything to suit your taste & combine them or – do as I did – and pulse MOST OF (not all) the onion & celery & tomato then add ONE can of hearts of palm – and pulse.  Add mayo & horseradish & Old Bay & pulse.  Add the second can of hearts of palm & pulse until it is mostly chopped & then simply stir in some larger chunks of celery, tomato & chopped carrots for color & texture.  Stir in the dill.  Taste for S&P.

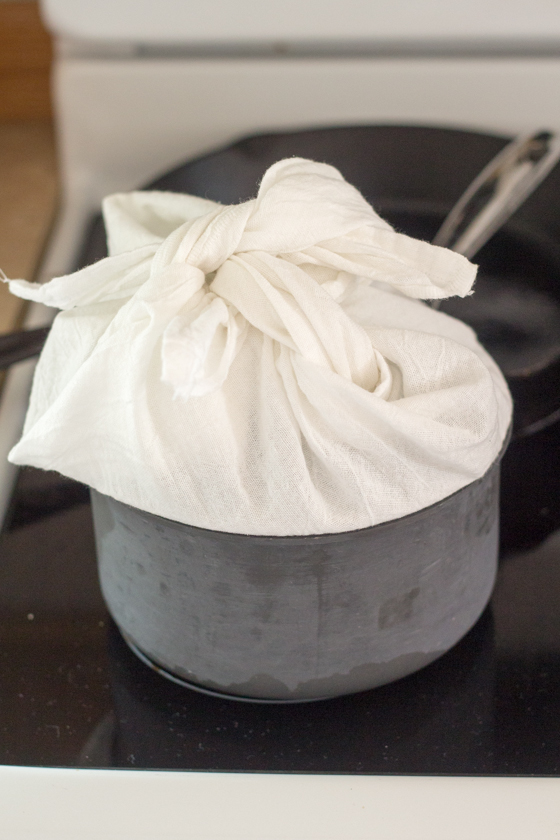
If your resulting salad is too wet – (mine was very wet) – simply wrap it in a clean kitchen towel & twist out all the excess moisture.

5-3-16 (35)

5-3-16 (36)

Once the excess liquid is out – you can decide whether or not to add more mayo  or additional spices.  Serve as you will with maybe some extra fresh dill as garnish.

5-3-16 (40)

5-3-16 (61)

5-3-16 (71)