Vegan Meatloaf Cupcakes with Sriracha Mashed Potatoes

1 Comment


All Photos © Christine Elise McCarthy 2014

To see images of my past posts & get links to the recipes – look on my Pinterest board – HERE.

images (1)download (1)

~

All my posts now have a VERY customizable PRINT & PDF option.  Create a PDF & save the recipe to your computer or print it out.  It offers a “remove images” option & you can delete any part of the post you do not need before printing.  The button is below by the Twitter & Facebook links.

~

Image


3-27a-14 (68)


These are pretty yummy and can be made with any sort of meatloaf – whether meat or vegetarian or vegan.  I made this up from things I thought would be in real meatloaf – without the meat – even though I have never made meatloaf before. I know real meatloaf recipes usually require eggs but I was determined to make this vegan WITHOUT making a run to the store for special ingredients.  I whipped the resulting “meat” into a puree in my food processor – because I wanted it to be as authentic seeming as possible.  So many vegan meatloaf recipes result in evident rolled oats & other visible ingredients that would tip off to a meat eater that they were getting something “healthy.”

My only warning about these is that they were a tad hard to get out of the cupcake pan because they were very soft & moist.  That is a good thing for eating but a bad thing for presentation so – simply remedy!  Use paper or foil cupcake liners.  Or maybe let them cool a bit before trying to move them but the paper liners seem foolproof – so I recommend very highly that you use them.

This recipe made 7 cupcakes and two of them filled me to capacity for dinner.  So – I would guess this recipe safely feeds three as a main course – with maybe a side veggie.  Use my Vegan Sriracha Mashed Potatoes recipe HERE or whatever mashed potato recipe you prefer – or try mashed cauliflower!

3-27a-14 (25)

3-27a-14 (38)

3-27a-14 (58)

 Vegan Meatloaf Cupcakes

INGREDIENTS

1 lb meatless ground beef

1-2 TBS olive oil

5 celery stalks – diced

1 onion – diced

1 jalapeno – seeded & diced (optional)

4 garlic cloves – chopped

1/4 cup fresh parsley – chopped

2 tsp dry oregano

1 tsp pepper

Salt to taste

1 tsp vegan Worcestershire sauce or tamari

1 TBS sriracha

1/4 cup ketchup

1/4 BBQ sauce

2 TBS Dijon mustard

1/4 cup breadcrumbs

2 tsp onion powder

2 tsp garlic powder

1 tsp dry sage

Extra ketchup or BBQ sauce as a glaze

Cupcake liners

Scallions & sriracha as garnish

3-27a-14 (66)

3-27a-14 (3)

3-27a-14 (7)


DIRECTIONS

Heat the oven to 350 degrees.

Make your MASHED POTATOES.  Set aside.

Heat the olive oil over medium heat & saute the onions & celery until soft.  Then – pretty much add all the other ingredients & blend together.

3-27a-14 (5)

3-27a-14 (6)

3-27a-14 (8)

If you are using cupcake liners – you can just start shoving this meatloaf into the cupcake pan.  Either way – you might choose to do what I did – which was puree this shit in a food processor.

3-27a-14 (10)

3-27a-14 (13)

3-27a-14 (14)


I really recommend using cupcake lines but, if you do not, grease the cupcake pan with cooking spray & put the meatloaf in the pan.  Top each with a little ketchup or BBQ sauce & bake for about 30 minutes.  When they have cooled a bit – pop those bad boys out & top with mashed potatoes.  I left mine like this & reheated them for about 20 minutes at 350 when I was ready to eat.  If you are rearing to go – top those potatoes with sriracha & some chopped scallions.  Settle in & eat them all if you want.  Then – in a food coma – navigate your ass to www.BathingBook.com and buy my book!  Read the reviews!  IT IS A HILARIOUS book – I promise!

3-27a-14 (64)

LARGE BathingandthesinglegirlOrangeV52

Vegan Sriracha Mashed Potatoes

2 Comments

All Photos © Christine Elise McCarthy 2014

To see images of my past posts & get links to the recipes – look on my Pinterest board – HERE.

images (1)download (1)

~

All my posts now have a VERY customizable PRINT & PDF option.  Create a PDF & save the recipe to your computer or print it out.  It offers a “remove images” option & you can delete any part of the post you do not need before printing.  The button is below by the Twitter & Facebook links.

~


3-27a-14 (31)

This hardly counts as a recipe but I am posting it as a companion to my next post.

Here is the recipe:

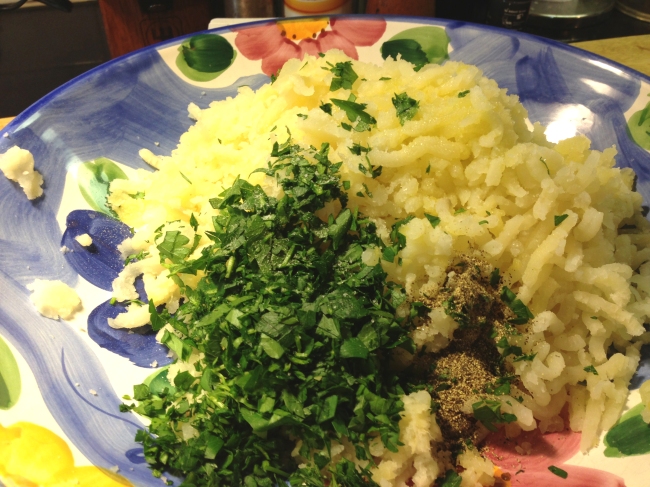
Make your favorite mashed potatoes – vegan or otherwise – and swirl some sriracha on them and use a knife to marble the sriracha into the potatoes.

What I actually used was about 7-8 Yukon gold potatoes.  I cut them up & boiled them until they were soft.  I mashed them with about 1-2 TBS vegan butter & a splash of almond milk.  I added S&P to taste.

I garnished them with the sriracha and some chopped scallions.  Voila!

Image

Image

Image


Check out how to use them on vegan meatloaf cupcakes!

3-27a-14-48

Vegan Parsley Herbed Gnocchi with a Spicy Basil Marinara

2 Comments


All Photos © Christine Elise McCarthy 2014

To see images of my past posts & get links to the recipes – look on my Pinterest board – HERE.

images (1)download (1)

~

All my posts now have a VERY customizable PRINT & PDF option.  Create a PDF & save the recipe to your computer or print it out.  It offers a “remove images” option & you can delete any part of the post you do not need before printing.  The button is below by the Twitter & Facebook links.

~

Image

OK – spicy marinara is really arrabbiata – I know.  And I have posted many versions of simple pasta sauce before but I am just gonna go ahead and post another here.  Pasta sauce is so easy – there is no excuse to buy bullshit jarred sauce at a far greater price.   HERE is one you can make in the time it takes your pasta to cook.  But – in a pinch – your favorite jarred sauce will do.

I used some wrinkly sad cherry tomatoes in my sauce.  Every time I consider whether produce is still edible, I think of the Diary of Anne Frank.  They lived on sub-par or rotting produce.  For years.  So, I am usually guilted into finding a way to use the questionable items.

Image

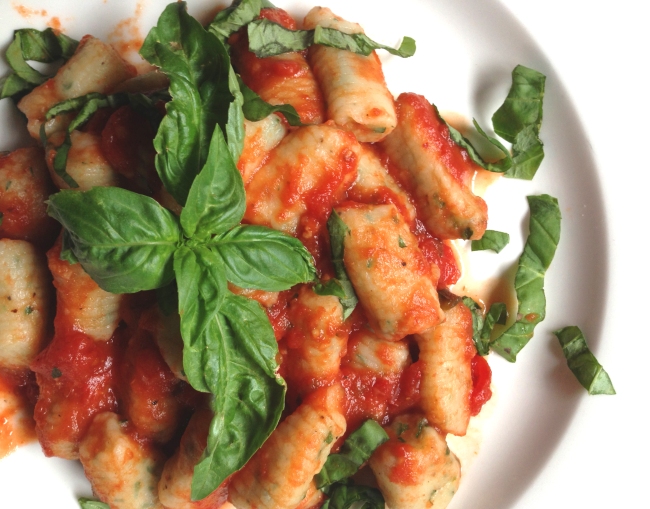
Gnocchi are remarkably easy to make, too.  Once the potatoes are baked – it can all come together pretty quickly & so incredibly delightfully.  This recipe should feed 4 pretty easily but if you want to save a bunch for the future – simply put uncooked gnocchi on a cookie sheet lined with parchment paper.  Put the sheet in the freezer & once the gnocchi are frozen, put them into sandwich bags in the freezer.  When you want to eat them – boil them frozen or they will get gooey.

In the past, I have made these with eggs but this recipe is vegan & they came out SO LIGHT & PILLOWY!   I will never use eggs in gnocchi again.  I had to subsidize my Russet potato quotient with some random yellow potato.  It didn’t hurt anything.  But try to use Russet because of the starch & moisture factors.

Image

Vegan Parsley Herbed Gnocchi with a Spicy Basil Marinara

INGREDIENTS

for the gnocchi

3 lbs Russet potatoes

1 TBS olive oil

1 cup chopped fresh parsley

1 1/2 cups (plus more) flour

S&P to taste

for the spicy basil marinara

1 6 oz can tomato paste

2 28 oz crushed tomatoes

30 grape or cherry tomatoes – quartered

1 TBS olive oil

6 garlic cloves – chopped

1/2 cup chopped basil

1-3 tsp crushed red pepper – optional

S&P to taste

Image

Image

DIRECTIONS

for the spicy basil marinara

Heat the olive oil over medium heat & saute the garlic for about 30 seconds.  Add the tomato paste & fry another minute or so.  Add the crushed tomatoes, chopped tomatoes & basil & about 1 cup of water.  Add the crushed red pepper – if using.

Simmer covered on low for the hour it takes to bake the potatoes.

Image

Image

for the parsley herbed gnocchi

Heat the oven to 400 degrees.  Bake the potatoes (directly on the rack) for an hour or until soft.

Halve the potatoes & let cool a bit & then peel them.  If you have a ricer – rice the potatoes.  Otherwise – mash’m up good with a potato masher.

Image

Image

Image

Image

Mash in the olive oil, parsley & some S&P.  By hand, incorporate the flour 1/2 cup at a time until you get a dough that you can handle without it being too sticky.  Depending on the sort of potatoes you used & their moisture – this might take more or less flour.

Roll out chunks of the dough into snakes less than an inch thick & cut into gnocchi.

Image

Image

You can leave them like that or roll them on a fork or a gnocchi board to get little grooves on them.

Image

I like the little gnocchi board so that is what I used.  They are super cheap – if you decide to buy one – like maybe $5.

Image

Image

Now – you can either freeze a bunch as I explained above or get to cooking them up.  I let mine sit out an hour or so.  It didn’t harm them.

Boil some salted water & when it is rolling – add the gnocchi.  They are done when they float & stay at the top.  Scoop out with a slotted spoon & serve with the marinara & more basil.  Add some cheese or vegan cheese – if you desire.  YUM!

Image

Image

Oh – and remember to buy my book!  IT IS HILARIOUS!  www.BathingBook.com

Image

Creamy Vegan Cauliflower Chowder

Leave a comment


All Photos © Christine Elise McCarthy 2014

To see images of my past posts & get links to the recipes – look on my Pinterest board – HERE.

images (1)download (1)

~

All my posts now have a VERY customizable PRINT & PDF option.  Create a PDF & save the recipe to your computer or print it out.  It offers a “remove images” option & you can delete any part of the post you do not need before printing.  The button is below by the Twitter & Facebook links.

~

Image

I don’t know how many of you are hip to unsweetened almond milk but it is genius!  Between the vegan milk options available now & coconut milk – there are increasingly fewer excuses not to cut dairy out completely.  I’m still a bit hooked on cheese, though.   I was a pescatarian for 25 years but just this year gave up seafood.  I am still adjusting to that reality but, I have to admit, I aspire to a vegan diet & am making baby steps all the time.  Chowders like this one make that so much easier!  Creamy & thick & vegan!  MMMMMM!

Say – have you heard?  I am an actress & used to be known – primarily – for my role as Emily Valentine on the original 90210.  Remember her?

Image

Image

But now I am a published AUTHOR & now I look like this & here is the book I wrote!

Image

Image

Image

The reviews om Amazon are VERY encouraging so I hope you all will give it a read!

That said – let’s get on with the chowdah!  There are lots of ingredients but they are all simple & easy to find.  You can add corn or other veggies if you like or – if you are still eating meat or fish – add a couple of cans of clams or some cooked (or vegan) chicken pieces.  But I promise – this is very satisfying as it is!

Image

Image

Creamy Vegan Cauliflower Chowder

INGREDIENTS

1 small head cauliflower – cut into small pieces

1 large onion – diced

4 carrots – diced

5 celery stalks – diced

1 potato – cubed

Corn – either a can or the kernels cut from a few cobs (optional)

3 bay leaves

2 TBS olive oil

2 TBS vegan butter (or real butter – if you are not vegan)

1-2 vegetarian bouillon cubes

1/4 cup flour

1 13 oz can unsweetened coconut milk (I used lite)

4 cups almond milk (unsweetened)

1 tsp pepper

Salt to taste

2 TBS fresh thyme

1 generous pinch dry thyme

1 TBS dry parsley

1-3 tsp sriracha or other hot sauce (optional)

1 large handful chopped fresh parsley

Image

Image

Image

Image

Image

DIRECTIONS

Heat the olive oil & butter & bay leaves over medium heat in a large stock pot.  Add the onion & saute until soft – about 5 minutes.

Image

Image

Add the bouillon cubes, carrots, celery, potato, cauliflower & corn (if using) and saute another 5 minutes or so – stirring often.  Then stir in the flour.

Image

Image

Image

Image

Incorporate the flour & then add the coconut & almond milks.  Stir in the pepper, fresh & dry thyme, dry parsley & sriracha (if using).

Image

Simmer for about 20 minutes – stirring often – and cook until the vegetables are tender.  If the chowder gets too thick – add more almond milk.  This works when reheating leftovers, too.  If it is too thin, add a TBS of flour or just simmer it until it reaches the desired consistency.

Add salt to taste & add the fresh chopped parsley.  Garnish with more sriracha – if you like a little heat in your comfort food!   Eat it up, you crazy vegan sonofabitches!

Image

Image

Image

Garlicky Kale & Mushroom Pasta (with a Vegan Option)

Leave a comment


All Photos © Christine Elise McCarthy 2014

To see images of my past posts & get links to the recipes – look on my Pinterest board – HERE.

images (1)download (1)

~

All my posts now have a VERY customizable PRINT & PDF option.  Create a PDF & save the recipe to your computer or print it out.  It offers a “remove images” option & you can delete any part of the post you do not need before printing.  The button is below by the Twitter & Facebook links.

~

Image

You may or may not have noticed that I often use certain ingredients in streaks.  This is primarily due to a desire to recreate with the leftovers from a previous recipe.  This is one of those.

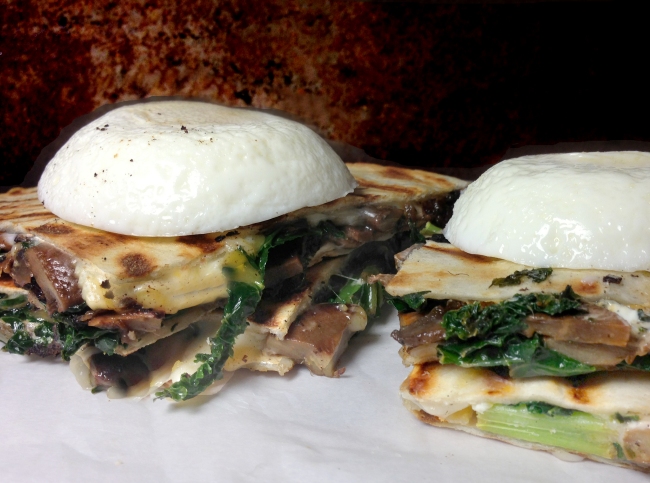
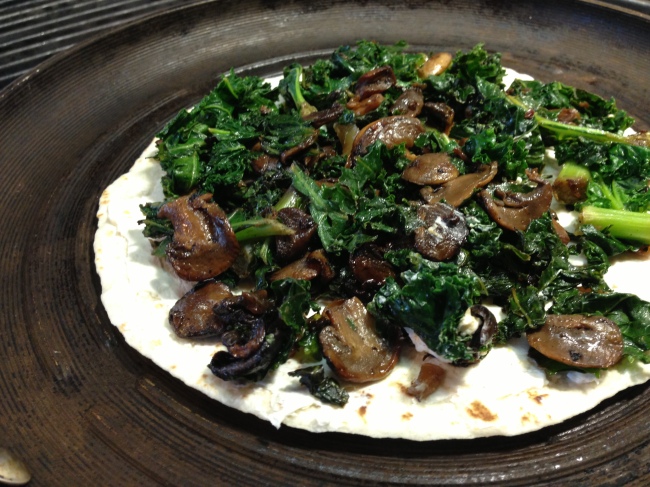
Yesterday I presented Sauteed Kale & Mushroom Quesadillas with Horseradish Cream Cheese & Poached Eggs.

Image

The fact is, I sauteed the entire 10 oz package of chopped kale & the entire 8 oz package of mushrooms & that quesadilla did not use very much of that up.  So – I now present this pasta dish.

I used heavy cream & real Parmesan.  If you are vegan – just sub those out with a vegan variety or eliminate them entirely.  The dish is pretty flavorful & the absence of dairy should not have any negative impact.

Image

Image

Garlicky Kale & Mushroom Pasta

feeds 4 easily

INGREDIENTS

1 lb pasta (I used macaroni leftover from my Smoky Guinness Mac & Cheese with Crispy Fried Onions)

10 oz bag (or one large bunch) kale – stemmed & chopped

2 TBS olive oil

8 oz mushrooms – sliced

4 garlic cloves – chopped

1 tsp garlic powder

1/3 cup Parmesan (or vegan alternative) – grated – optional

1/2 cup heavy cream (or vegan alternative) – optional

Parsley – chopped

Extra Parmesan as garnish – optional

S&P to taste

Image

Image


DIRECTIONS

Cook the pasta, drain & set aside.

Heat the olive oil in a large saute pan over medium heat & add the garlic & garlic powder.  Add the kale & mushrooms & saute over med-high heat until the mushrooms & kale are tender, 5-10 minutes or so.  Add the heavy cream & Parmesan (if using) and blend it in completely.  I added a bit of salt (not a lot because the Parmesan is salty) and a LOT of pepper – 2 tsp or more.  Go lighter if you do not like a lot of spice.

Add the pasta & mix it all in.  Taste for S&P.  Add the chopped parsley.  Serve it up & add more Parmesan, if you like!

Image

Image


Image

Sauteed Kale & Mushroom Quesadillas with Horseradish Cream Cheese & Poached Eggs

1 Comment


All Photos © Christine Elise McCarthy 2014

To see images of my past posts & get links to the recipes – look on my Pinterest board – HERE.

images (1)download (1)

~

All my posts now have a VERY customizable PRINT & PDF option.  Create a PDF & save the recipe to your computer or print it out.  It offers a “remove images” option & you can delete any part of the post you do not need before printing.  The button is below by the Twitter & Facebook links.

~

Image

Sometimes I feel guilty posting something as a “recipe” when all I am really doing is suggesting a combination of ingredients.  I had:

INGREDIENTS

Tortillas

Kale – chopped into small bits (stems removed first)

Mushrooms – sliced

Cream Cheese

Horseradish

Grated cheese blend (mozzarella & cheddar)

Eggs

Olive oil

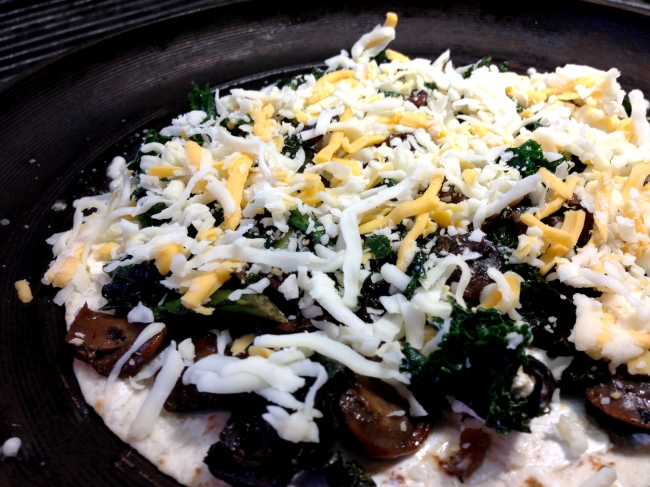
I made the thing you see here.

Poaching eggs can be quite a thing.  I have this handy little poacher:

Image

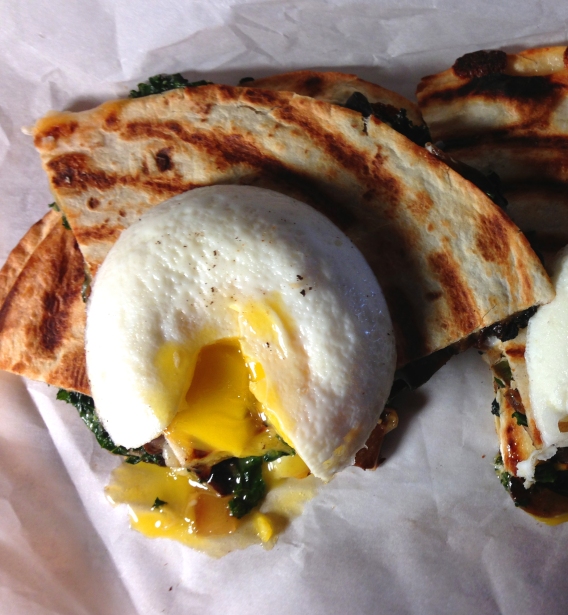
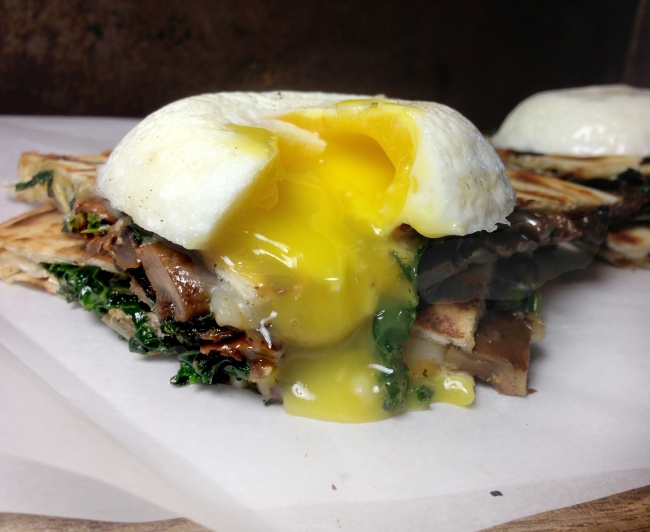
I boiled the water beneath that the egg cuppy thing.  A sprayed the cuppies with cooking spray.  I added the egg & turned the heat off & covered the pan.  I waited three minutes.  I had poached eggs.  HERE are some more professional suggestions about poaching eggs.

Image

Image

Sauteed Kale & Mushroom Quesadillas with Horseradish Cream Cheese

DIRECTIONS

Wait to poach your eggs until the quesadilla is nearly done.

Heat 1-2 TBS olive oil in a large saute pan.  Add the kale & mushrooms & saute over med-high heat until the mushrooms & kale are tender. 5-10 minutes or so.

Image

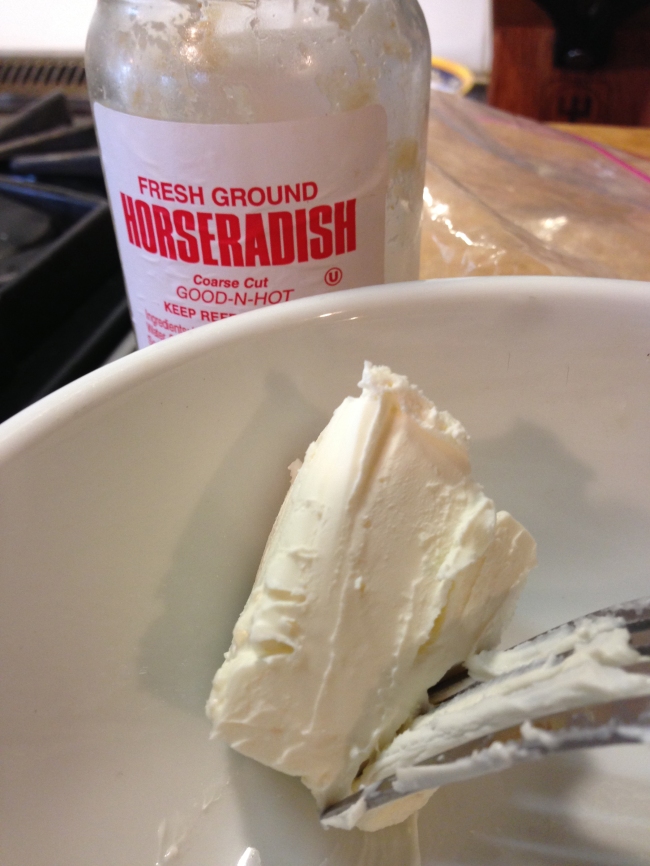
Meanwhile – with a fork, mix prepared horseradish – to taste – into a chunk of cream cheese.  Set aside.

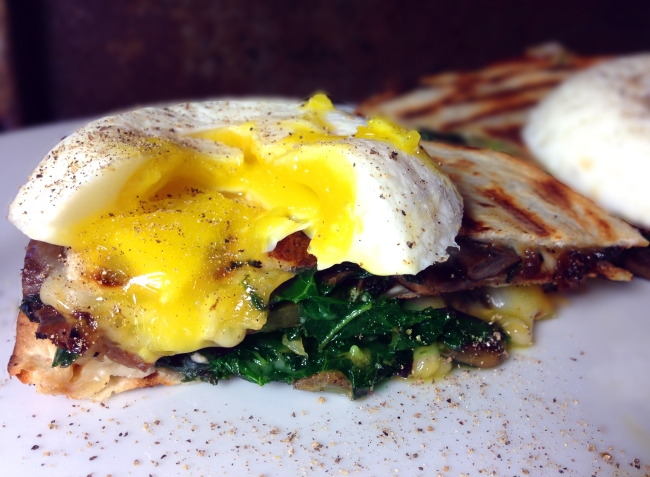
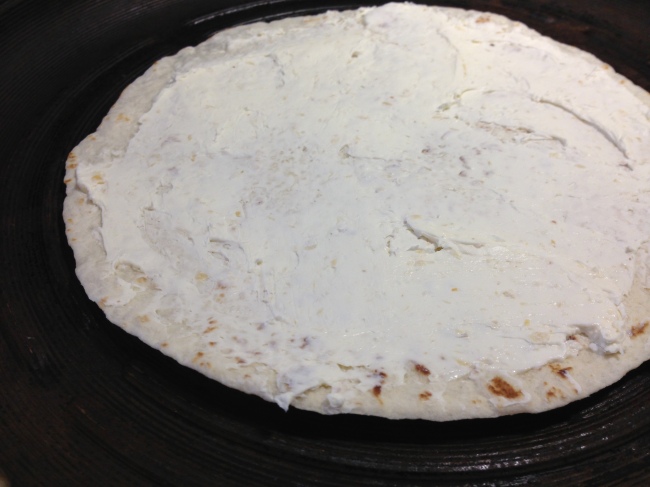
When you are ready to eat, heat a clean saute or grill pan over medium heat.  Smear the cream cheese on a tortilla & place it the pan.  Top with kale & mushrooms & grated cheese.  Top with the another tortilla.  Get the water for your poached eggs boiling.

Image

Image

Image

Image

Image

Press this with the lid of a pan & heat a minute or two (or until it begins to brown), give it a good press with the lid & then carefully flip it.  Press with the lid.

Now poach your eggs in the manner you selected.

When the quesadilla is ready, slice it up & stack it up & top it up with poached eggs.

Pour yourself a mimosa & get your feed on!   Then go HERE on Amazon and buy my book!

HAPPY SUNDAY!

3-23-14 (15)

Image

Image

Image

Vegan Cauliflower, Potato & Chickpea Wrap (or Rice Bowl) with Lentil Hummus

Leave a comment

All Photos © Christine Elise McCarthy 2014

To see images of my past posts & get links to the recipes – look on my Pinterest board – HERE.

images (1)download (1)

~

All my posts now have a VERY customizable PRINT & PDF option.  Create a PDF & save the recipe to your computer or print it out.  It offers a “remove images” option & you can delete any part of the post you do not need before printing.  The button is below by the Twitter & Facebook links.

~

Image

3-21-14 (70)

Do not be intimidated by the list of ingredients.  If you look closely, you will see that most are just spices and things you probably already have around.  This is simple to throw together.  You can use this curry in a wrap or over rice.  I like a heavy amount of spice in my curries so I am going to put a range with the spices in this recipe.  You can start lighter & add more if you feel it needs it.  In every case – I went with the higher quantity.

As a note – you can make chickpeas from dry beans and lentils & even rice and, once cooked, put small quantities (measure one cup or two per bag) into sandwich baggies & fill them just enough that they can be closed & still be flat – as if a sandwich were in there.  Mark the bag with the quantity inside & then freeze them for later use.  You can do this with leftovers, too.

Image

Image

Vegan Cauliflower, Potato & Chickpea Wrap (or Rice Bowl) with Lentil Hummus

INGREDIENTS

Tortillas or wraps of your choice OR cooked rice of your choice

1 TBS olive oil

1 cup cooked chickpeas

2 cups potatoes – cubed

2 cups cauliflower – cut into small florets

1/2 cup peas

1 jalapeno – seeded & diced

2-4 garlic cloves – chopped

1 TBS ginger – minced

2 TBS grapeseed or canola oil (or olive oil)

1/2 – 1 TBS cumin seeds

1/2 – 1 tsp turmeric

1/2 – 1 tsp ground coriander

1/2 – 1 tsp ground cumin

1/2 – 1 tsp chili powder or cayenne

1/2 – 1 tsp salt

cilantro – chopped

some red onion – diced

sriracha

for the lentil hummus

1 cup cooked lentils

10 cherry tomatoes – quartered (or similar amount of other tomato)

1/2 TBS olive oil

1/2 tsp each: salt, cayenne, ground cumin, garlic powder

1 tsp sriracha

Image

Image

DIRECTIONS

for the lentil hummus

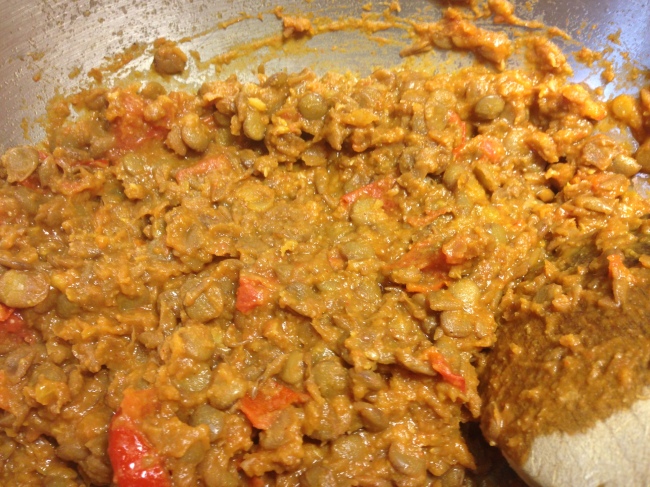
Heat the oil in a pan.  Add the other ingredients.  Heat through & mash with a wooden spoon.  Set aside.

Image

Image

for the Vegan Cauliflower, Potato & Chickpea Curry

Chop all the vegetables so they are ready to go.

Heat the oil over medium heat.  When hot, add the cumin seeds & heat until they begin to pop.  Add garlic, ginger & jalapeno & cook for about a minute.  Add the potatoes & cook, covered, for two minutes.

Image

Image

Image

Meanwhile, whisk the turmeric, ground cumin, ground coriander, and chili powder into 1/2 – 1/3 cup water.

Add the cauliflower, chickpeas, peas & spice water to the potatoes and stir to blend.  Reduce heat to med-low.  Cover & simmer for 10-15 minutes – being careful not to burn the vegetables.

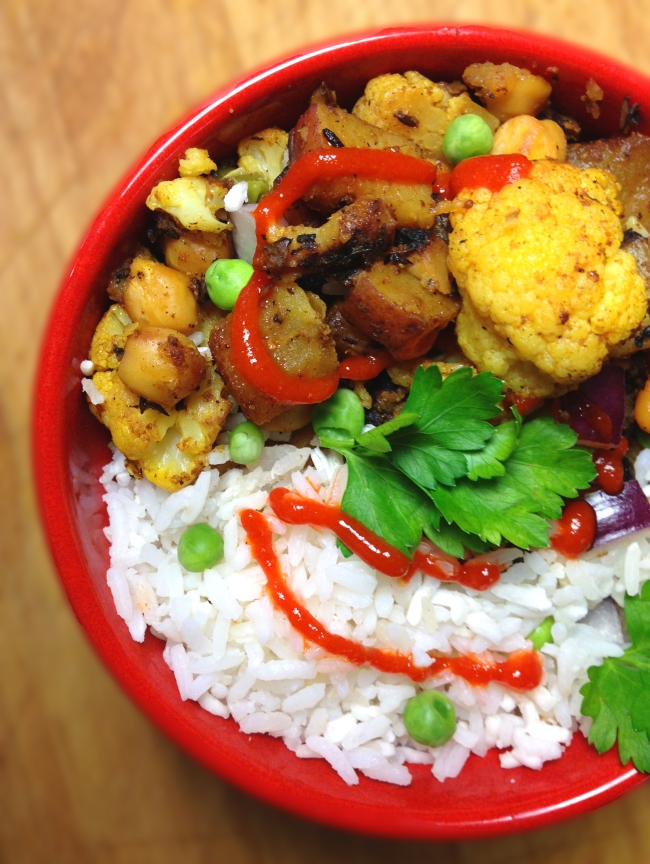
Now – simply dish this out over some rice & garnish with cilantro, red onion & sriracha.

Image

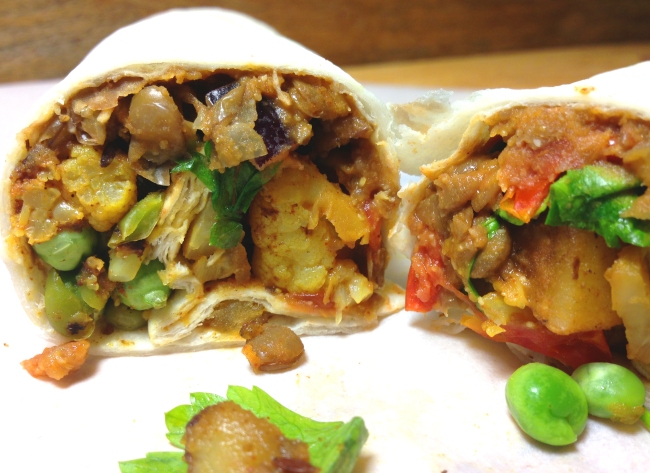
Or – spread some hummus on a wrap.  Top with onion & cilantro & some curry.  Add sriracha, if you like.  Roll that fucker up & eat it with abandon!  Then, feeling all awesome & vegan & badass – go onto Amazon.com & buy my book!  Read the reviews!  Men & women both seem to love it!

3-21-14 (41)

3-21-14 (42)

3-21-14 (44)

3-21-14 (46)

Image

Image

Image

Cinnamon-Apple Cheddar Grilled Cheese Sandwich on Irish Raisin Bread with Orange & Fig Jam

Leave a comment


All Photos © Christine Elise McCarthy 2014

To see images of my past posts & get links to the recipes – look on my Pinterest board – HERE.

images (1)download (1)

~

All my posts now have a VERY customizable PRINT & PDF option.  Create a PDF & save the recipe to your computer or print it out.  It offers a “remove images” option & you can delete any part of the post you do not need before printing.  The button is below by the Twitter & Facebook links.

~

Image

Image

So, yeah – it was St. Patrick’s Day – for what felt like a week.  By the actual day – it seemed obscene to mention it.  But it is seldom, if ever, obscene to mention melted, cheesy goodness!!

Here is what I had around – post festivities:

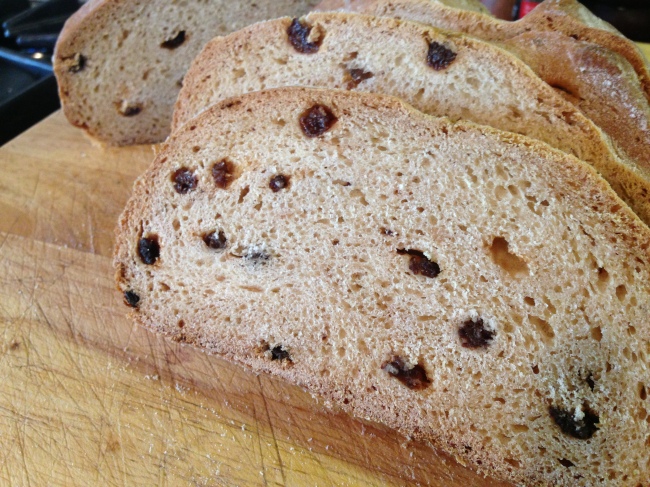
Leftover Irish Raisin bread

Leftover Cinnamon-Apple cheddar cheese

Orange-fig jammy spread

Awesome GMO-free, $7 a pound butter

And a powerful amount of indulgent self-pity.

Image

Image

Image

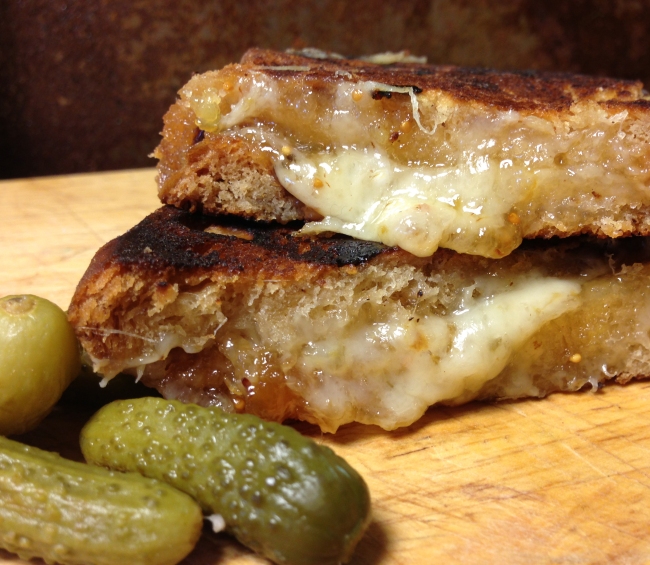
No photos of the leftover cheese exist except as it sits on the bread in the pan – here:

Image

My self-pity is very hard to photograph, though I assure you it exists.  I won’t get into what prompted it but I will say that this incredible sandwich went a long way in eliminating it.

The cheese sounds odd but you only taste cheddar at first.  Then – you think, “Hey!  Am I tasting cinnamon?”  And, as you swallow to consider that question – a delicate essence of apple haunts you.  Really quite nice.  But any cheddar will do.

I used this yummy orange-fig spread (usually found near the expensive cheeses) but any regular jam would do.

Image

Image

Image

So – here’s whatcha do –

You slice up some bread & cut the cheese thin.  Melt some butter in a frying or grill pan over medium heat & maybe spread some on the bread.  Put a slice of bread & cheese in that bad boy.

ImageImage

Then slap some jammy goodness on the other piece of bread & put it, jam-side down, on the cheesy slice.  Maybe add some butter to the top.  Cover the pan to assure your cheese melts.  In a minute or two – press it together with a spatula & flip it.  Cook each side as long as it takes to get it to the golden-melty place you desire.

If your cheese is stubborn – a minute in a hot oven might fix that.

Slice it up, shove it your face & remember how much tastier it is than that wacky boiled meat people get into this time every year!

Slainte!

Image

New England Irish Boiled Dinner (Corned Beef & Cabbage)

1 Comment

All Photos © Christine Elise McCarthy 2014

To see images of my past posts & get links to the recipes – look on my Pinterest board – HERE.

images (1)download (1)

~

All my posts now have a VERY customizable PRINT & PDF option.  Create a PDF & save the recipe to your computer or print it out.  It offers a “remove images” option & you can delete any part of the post you do not need before printing.  The button is below by the Twitter & Facebook links.

~

Image

I am a vegetarian.  Not the strictest ever – as I will eat Worcestershire sauce (anchovies) and that sort of thing & I do not get all freaky if my veggie dog kisses a real hot dog on the grill.  But I haven’t had boiled dinner (as we called it when I was growing up) in a good 35 years or more and I certainly have never made it.  I wasn’t going to make it yesterday, either, but I had a small group to feed and a few very finicky palates.  I couldn’t find anything that one guest and I had in common – food-wise – except pizza & spaghetti and I didn’t want to do that for a St. Patrick’s Day meal.  I decided to make the Smoky Guinness Mac & Cheese with Crispy Fried Onions

Image

and I was considering some sort of vegan colcannon and maybe a vegetarian Irish stew but it was already 80 degrees in LA yesterday by 10AM.  All that cooking seemed oppressive in the heat.  Then I saw the brisket/corned beef thingies and saw that I could buy 4 lbs of the stuff for $10.  Fuck it, I thought.  The directions literally read “Boil for 2 hours.”  I knew I could pull that off.  So – I put it in my basket with some potatoes, carrots, cabbage & turnips & headed out.

My 4 lb piece of meat fed 6 people – what with the mac & cheese and the boiled veggies.

The recipe is thus:

Corned beef with spices in the bag

Cabbage

Carrots

Potatoes

Turnips

Put the meat (and whatever “juice” and spices (usually pepper corns & bay leaves) in a pot with enough water to cover it by an inch.  Bring to a rapid boil & reduce to simmer for two hours.

Peel your veggies & cut them into big chunks.  I cut the cabbage into 6 wedges with the core in tact.  When you are about 20-30 minutes from eating – add the veggies to the meat & let simmer until tender.

I cooked some veggies separate with a vegetable bouillon cube or two, peppercorns & bay leaves so I could eat some.

Then – cut the meat in the opposite direction from the grain.  Put it on a platter with the boiled vegetables & serve.  When I grew up – the traditional condiment for this dish was French’s yellow mustard.  Period.  Seriously.  Yesterday – I ate my veggies with a jalapeno mustard.  All the charm of tradition with just a little kick.

And there you have it!

HAPPY SAINT PATRICK’S DAY!

Image

Image

Image

Smoky Guinness Mac & Cheese with Crispy Fried Onions

2 Comments

All Photos © Christine Elise McCarthy 2014

To see images of my past posts & get links to the recipes – look on my Pinterest board – HERE.

images (1)download (1)

~

All my posts now have a VERY customizable PRINT & PDF option.  Create a PDF & save the recipe to your computer or print it out.  It offers a “remove images” option & you can delete any part of the post you do not need before printing.  The button is below by the Twitter & Facebook links.

~

Image

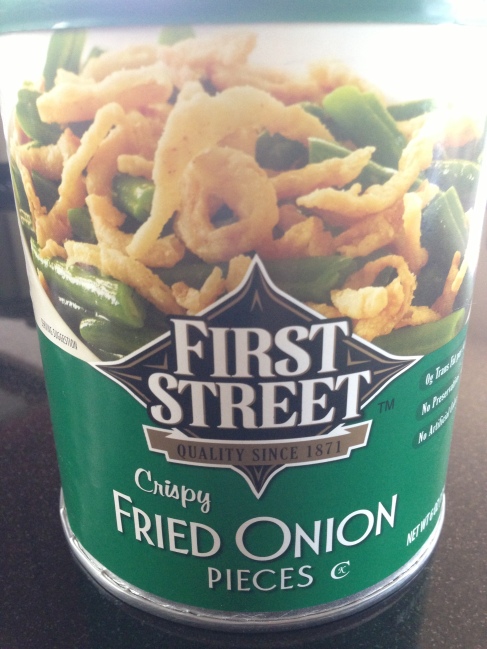
This is a slight adaptation from a recipe posted by one of my favorite food bloggers – How Sweet It Is.  The main difference being simply that she topped hers with panko & fresh basil.  I opted for canned crispy onions!

Image

This is a really easy dish & the flavor of the Guinness really does come through.  Because of the dark beer – the dish has a browner color than traditional mac & cheese.  The crispy onions on top add a bit of sweetness.  A perfect dish for St. Patrick’s Day!!!

Image

Image

Image

Image

Smoky Guinness Mac & Cheese with Crispy Fried Onions

serves 8-12

INGREDIENTS

5 cups uncooked macaroni

4 TBS butter

4 TBS flour

16 ounces milk (I used unsweetened almond milk)

16 ounces Guinness or other stout (or other beer)

16 ounces cheddar (I used a mix of 7 oz Kerrygold Dubliner & 9 oz Tillamook sharp) – grated

plus 1 cup grated cheese (I used cheddar)

8 ounces Parmesan – grated

1/2 tsp smoked paprika

1 tsp pepper

pinch of nutmeg

6 ounces crispy fried onion pieces from a can

Additional grated cheese to top the casserole – optional

Image

Image

DIRECTIONS

Heat the oven to 375 degrees.

Cook & drain the pasta.  Feel free to under cook it a minute or two as it will cook more in the baking process.

In a large sauce pan, melt the butter over med-high heat.  Whisk in the flour & stir constantly for a few minutes – until it begins to brown.

Image

Slowly add the milk & beer – in increments – and stir constantly as it thickens.  It will not be as thick as most recipes because of the beer.  Once incorporated, add the 16 ounces of cheese & blend.  Add the spices & blend.   Lower the heat to medium & simmer about 5 minutes.  Add the pasta & blend.  Add an additional cup of grated cheese – if you feel it needs it.  I did.

3-17-14 (26)

3-17-14 (30)

Transfer the mix to a greased casserole pan.  Top with more cheese (optional – I did not add more here) and top with the crispy onions.

Bake 25-30 minutes & then allow to set & cool for about 5 minutes before serving.

Slop that baby out onto some plates & swill it down with more Guinness!  HAPPY ST. PATRICK’S DAY!

3-17-14 (44)

Image

Image

LARGE BathingandthesinglegirlOrangeV52

Baked Tortellini with Pesto and Roasted Tomatoes & Cauliflower

Leave a comment

All Photos © Christine Elise McCarthy 2014

To see images of my past posts & get links to the recipes – look on my Pinterest board – HERE.

images (1)download (1)

~

All my posts now have a VERY customizable PRINT & PDF option.  Create a PDF & save the recipe to your computer or print it out.  It offers a “remove images” option & you can delete any part of the post you do not need before printing.  The button is below by the Twitter & Facebook links.

~

Image

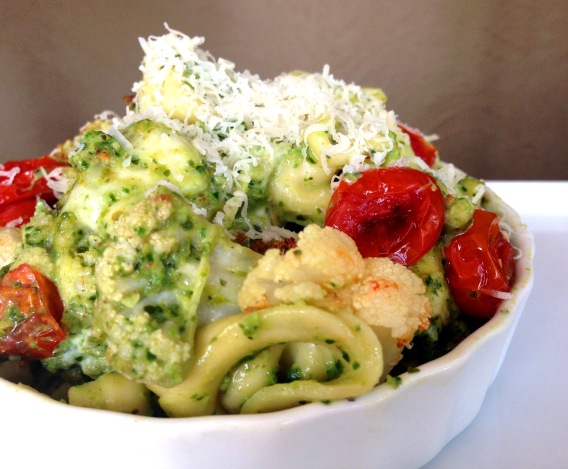
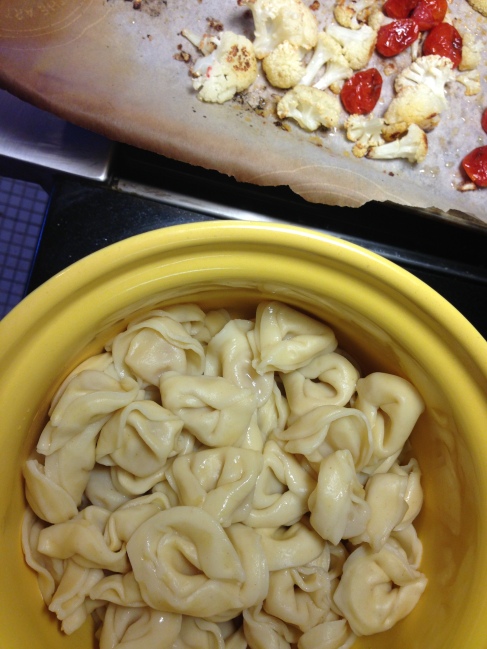
Yummy comfort food!  There are a couple of steps required but all are simple – so do not be intimidated.   I include a recipe here for pesto but you can use a pre-made one, if you prefer.  I used a cheese tortellini that I had left over from my Easy Make-Ahead Tortellini & Caprese Skewers.

Image

In fact, I also used leftover tomatoes & mozzarella balls and basil.  At any rate, I used cheese tortellini but you can use any type you prefer.  Easy peasy!  Give it a try!

Oh!  And buy my HILARIOUS novel – Bathing & the Single Girl!  The reviews are coming in on Amazon & they are very flattering!  MEN love it, too!

Image

Image

Image

Baked Tortellini with Pesto and Roasted Tomatoes & Cauliflower

Feeds 4

INGREDIENTS

12 oz tortellini – cooked as per directions & drained

1/2 small head of cauliflower – cut into bite-size florets

20-30 cherry tomatoes

1/4 cup cream cheese

1/2 cup pesto (1 cup basil, 1/4 cup grated Parmesan, 1/4 cup olive oil, 1/4 cup walnuts, 2 garlic cloves, 1/4 tsp salt & 1 tsp lemon juice – blended until smooth)

10 small mozzarella balls – sliced

Olive oil

S&P

Grated Parmesan as garnish

Image

Image

DIRECTIONS

Heat the oven to 450.

Toss the cauliflower & tomatoes in 2 TBS olive oil & sprinkle with salt.  Roast at 450 for 20 minutes or until the cauliflower begins to brown.

Meanwhile – cook the tortellini, drain & set aside.

Blend the pesto ingredients.  Add the cream cheese to the pesto & blend.  Set aside.

When the vegetables are done roasting – set them aside & lower oven temperature to 350.

Grease a casserole pan with cooking spray or olive oil.

Image

Image

Image

In a large bowl (or in the casserole pan – if you can manage it) – toss the tortellini with the cauliflower & tomatoes & pesto.  Put in the casserole pan & top with mozzarella balls.  Bake at 350 for 20-30 minutes or until the cheese is melted & bubbly.

Serve that shit up with grated Parmesan & some Chablis from a box.  Read my book.  Pee yourself laughing!  Drink more wine.  Tell the world to kiss your ass!

Image

Image

Image

Roasted Purple Cauliflower & Brussels Sprouts with Lemon and Pasta

Leave a comment

All Photos © Christine Elise McCarthy 2014

To see images of my past posts & get links to the recipes – look on my Pinterest board – HERE.

images (1)download (1)

~

All my posts now have a VERY customizable PRINT & PDF option.  Create a PDF & save the recipe to your computer or print it out.  It offers a “remove images” option & you can delete any part of the post you do not need before printing.  The button is below by the Twitter & Facebook links.

~

Image

Hey!  Pardon my shamelessness, but I wrote a fucking funny book!  It was a lot of work.  I am excited.  It is huge!  In that – it is literally huge.  It weighs 1.5 pounds.  C’mon!  That is a pound and a half of pure & shamelessly raunchy COMEDY!  Why not buy a copy?  The paperback is under ten dollars & the iBook, Kindle & Nook versions are only $3.99.  Seriously.  Read it!  I promise that both men & women will declare it is the funniest book ever written!  Yes.  Funniest. Prove me wrong.  Read the reviews on Amazon.  Read the first couple of pages!  But know that the dirty stuff kicks in after page 100.  Buy it HERE!

Image

Image

OK – now food!  This recipe is simple but it requires that you be bold with the few ingredients.  Salt & parsley often get written off as insignificant but they are not.  Remember when salt was the villain of the day & we were all warned to swear off of it?  In the eighties?  Well – I swore off of it.  In that period, I shared a staple mushroom pasta recipe with an old friend.  A year or so later, my then boyfriend tried her version & was SO EXCITED by it – he made me promise to get her recipe.  Well, in fact, it was MY recipe – she was just a bit more liberal with the salt – in that she used some.

Salt has since been let off the hook as an evil culinary pleasure as we face far more significant dangers like GMOs and, really, anything processed.  But that was a great lesson for me & I took it to heart.  I am still not one to heavily salt things but I have discovered that a bit of salt can truly bring other flavors out in a dish that, before the addition of salt, had been hiding from my taste buds.

This dish will require that you use salt – maybe more than you are accustomed to.  It will require the use of Parmesan & olive oil & lemon zest.  The precise amount of each of these ingredients will be hard for me to outline for you because I will not, for example, know if you are using a bland processed Parmesan or a delightfully salty, higher quality, freshly grated cheese.  Olive oils vary enormously.  Some are just yucky oil.  Others are fruity & sweet.  Even lemons vary in their power.  So – while this is a relatively simple recipe, it will require your confidence to experiment with the quantity of each ingredient – until you achieve a flavor that excites you.

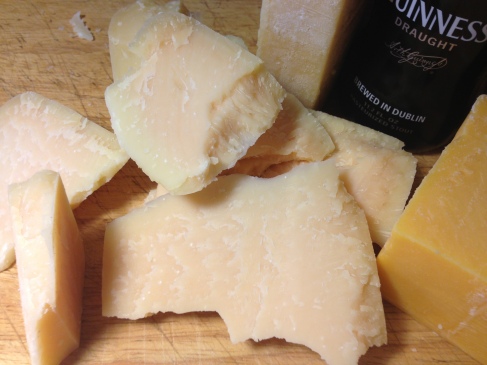
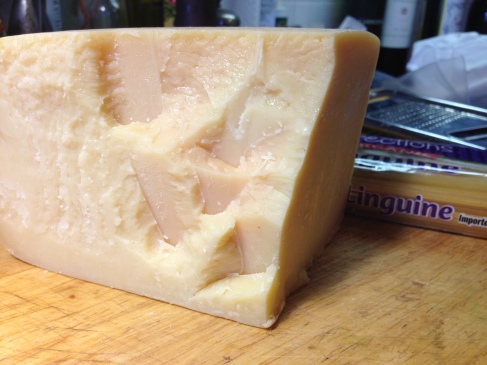
Most recipes with only a few ingredients benefit enormously when the ingredients are as high quality & as fresh as possible.  In my case, the Parmesan was grated fresh from this huge block that has the most amazing crystal-like texture when eaten in chunks.

Image

My lemon was from a tree in my yard.

Image

But the parsley & olive oil were bullshit, standard supermarket varieties.  As was my pasta.  This dish would be perfect for a handmade pasta – as the flavors are so clean & simple.

Image

Image

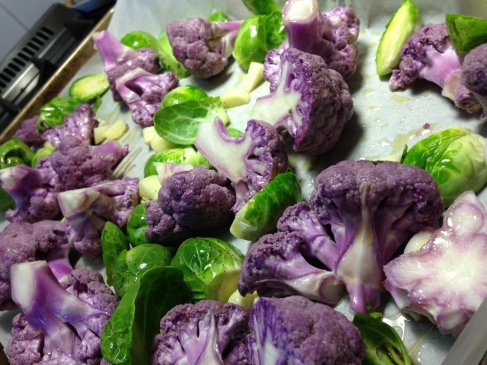
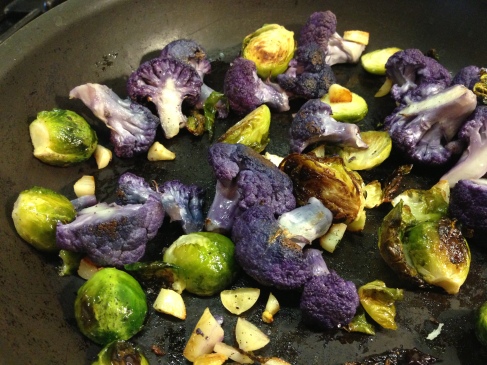
My purple cauliflower & Brussels sprouts were also supermarket finds and both had the misfortune of sitting in my fridge for weeks before I finally used them but they seemed to rally nicely – both in color & flavor.

Image

Image

I used purple cauliflower because, fuck, I have a food blog.  I am trying to mix it up.  But 1) I paid about $7.50 for a tiny head of it and 2) purple is a very difficult color to pull off in food.  Google purple cauliflower recipes.  HERE, look!  Sorry, but those purple soups are mostly revolting.  So – use regular cauliflower if you want to.

Image

Image

Roasted Purple Cauliflower & Brussels Sprouts with Lemon and Pasta

Feeds 2 very well

INGREDIENTS

1/2 lb pasta

Purple (or other) cauliflower – about 2 cups of cut florets

10+ Brussels sprouts – ends trimmed & halved

4 garlic cloves – roughly chopped

Olive oil

Lemon zest – 1-2 TBS or to taste

Grated Parmesan – 1/4 cup (or to taste)

Chopped parsley

S&P to taste

Garnish: more Parmesan, lemon zest, S&P

Image

Image

DIRECTIONS

Heat the oven to 400 degrees.

Prepare the cauliflower florets & Brussels sprouts.  Toss them with 2-3 TBS olive oil & the chopped garlic.

Put on a cooking sheet lined with parchment paper or foil (for easier clean up) and roast for 25-30 minutes.

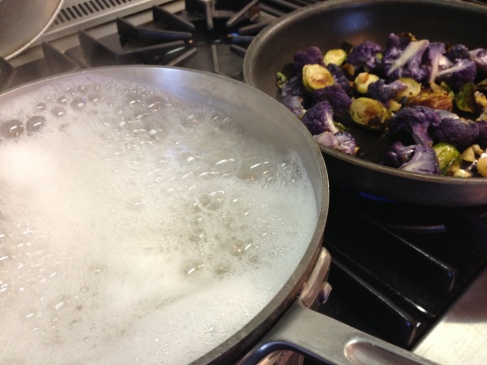
Cook the pasta according to directions.

Heat a saute pan over medium heat & add the roasted vegetables.  The vegetables should have enough residual olive oil on them without greasing the pan but add more olive oil if you think it needs it.  Add more chopped garlic, if you desire.  Add the lemon zest & keep warm while the pasta cooks.  When the pasta is ready, set aside about 1/2 cup of the pasta water & drain the pasta & add the pasta to the pan with the vegetables.

Image

Image

Image

Toss the pasta & vegetables.  Add the cheese – perhaps even more than I suggested.  Use some of the reserved pasta water to aid in combination of the ingredients & to create a very light creaminess.  Add SALT & PEPPER.  Seriously.  Add salt.  Add pepper.  Taste.  Add more salt or pepper or lemon zest or cheese.  Don’t stop experimenting with flavors until you get it right.

Serve with a drizzle of olive oil & some chopped parsley.  Maybe even add more cheese and S&P.  Fuck it!  Who’s watching?  Mmmmmm!

Image

Image

Vegan Crispy Chickpea, Caper & Lemon Pasta

2 Comments

All Photos © Christine Elise McCarthy 2014

To see images of my past posts & get links to the recipes – look on my Pinterest board – HERE.

images (1)download (1)

~

All my posts now have a VERY customizable PRINT & PDF option.  Create a PDF & save the recipe to your computer or print it out.  It offers a “remove images” option & you can delete any part of the post you do not need before printing.  The button is below by the Twitter & Facebook links.

~

Image

Image

Image

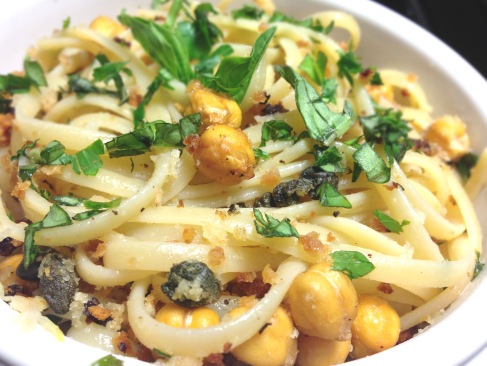
Some recipes are hard to photograph.  This one should not have been but I cannot help but feel I haven’t succeeded it translating visually how simple & delicious this is.  A few simple & easy-to-find ingredients & this is the kind of dish movie characters whip up in their kitchen late at night after a romantic dalliance.  The ratio or capers to chickpeas to lemon is kind of a matter of personal preference but I will tell you how much I used.  I LOVE lemon & I LOVE capers so – keep that in mind.

Image

Crispy Chickpea, Caper & Lemon Pasta

Feeds 2 well

INGREDIENTS

1/2 lb pasta

1 cup cooked (or canned) chickpeas

1/2 cup panko

1/4 cup capers

4 garlic cloves – chopped

1 TBS lemon zest

2 TBS fresh lemon juice

olive oil

S&P

Parsley and/or basil – chopped as garnish

Caperberries – as garnish (optional)

Parmesan (or vegan Parmesan) – optional but I did not use any cheese

Crushed Red Pepper – optional if you prefer some heat

Image

Image

Image

Image

Image

DIRECTIONS

Heat the oven to 400 degrees.

I am IN LOVE with parchment paper!  It makes clean up so easy & NOTHING sticks to it.  If you have some – line a cooking sheet with it.  Otherwise – treat the pan with cooking spray.

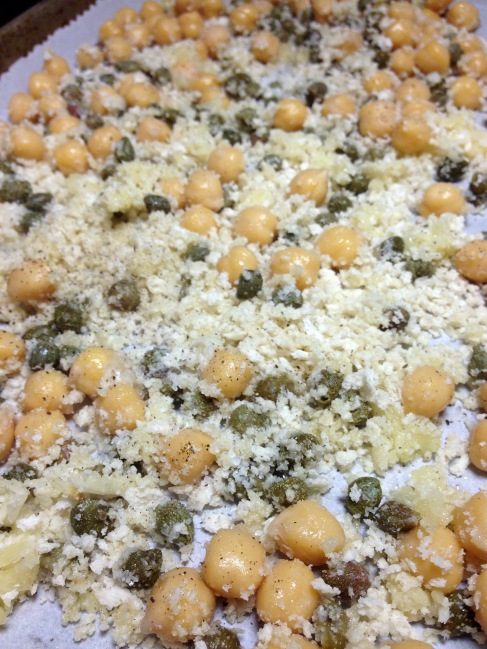
Toss the chickpeas, garlic, panko & capers in a drizzle of olive oil – maybe 1 TBS or so.  Bake at 400 for twenty minutes.

Cook the pasta as per box & drain.

Toss the hot pasta & the warm chickpea mixture together with the lemon zest & juice.  Add S&P to taste.  Drizzle with a bit more olive oil.  Serve garnished with the chopped basil and/or parsley & some caperberries – if you so desire.

You can add Parmesan (or vegan Parmesan) or crushed red pepper if you are of that mind.

Eat that shit up!

Image

Image

Desano Pizza Bakery – East Hollywood, California

Leave a comment

All Photos © Christine Elise McCarthy 2014

To see images of my past posts & get links to the recipes – look on my Pinterest board – HERE.

images (1)download (1)

~

All my posts now have a VERY customizable PRINT & PDF option.  Create a PDF & save the recipe to your computer or print it out.  It offers a “remove images” option & you can delete any part of the post you do not need before printing.  The button is below by the Twitter & Facebook links.

~

Image

Apologies!  I have been a REALLY naughty blogger!  Or rather – a very distracted one.  My badass boyfriend was in town for the last two weeks & that is always distracting.  But, add in the work I am doing for Waterfront Film Festival & auditions I have as an actress & trying to promote my new novel – well, the blog took a back seat so far back – it was like a can dragging behind a wedding car.

Image

The book (for sale HERE) is doing well.  Check out the reviews on Amazon!  I am very flattered!

Image

OK – so – while I do have a few recipes I mean to spring on you soon, my first post back will be about this AMAZING pizza place – DESANO – that I discovered out in the no-man’s land that is Santa Monica Boulevard east of Normandie.  It is all car parts & body shops & little huts that look like places to buy all the bits required for a Santeria ritual.  It is as run-down & vacant-seeming as Santa Monica Boulevard gets and hardly the place one might find amazing & authentic Italian pizza.  Miles & I were greeted by the owner in his thick & charming Italian accent.  What a delight!  No hipsters in too-tight baby T’s or facial hair from the cast of a Wild Bill Hickok biopic.  Just a regular person peddling pizza that is anything but regular.

Now – know that this place was suggested to us by our bartender, Stephanie, from one of our favorite watering holes & she sold this place so hard – that Miles suggested we have dinner there even though – EGADS! – they have no liquor license!  Know that Miles drinks beer with his eggs & bacon in the morning so – his agreeing to a booze-free dinner is epic.  We did inquire about the liquor license, however, as I, too, am wont to guzzle some (lots of!) vino with my meals & we were informed that they expected it soon.  Whew!

So – once parked in the ample parking lot, we entered through the door here –

Image

and entered this room –

Image

and then sort of wandered over to this open kitchen area –

Image

where we were informed that we had missed the real entrance entirely.  We were led to the place where one orders & we saw these crazy cannoli & the gelato bar.

Image

Image

Image

We were directed to order from a menu that reflected these selections –

Image

Miles got the Desano (I believe) and I got the Verdura.  We grabbed our beverages –

Image

and waited eagerly for our pizzas.  They arrived very quickly – maybe 5-10 minutes & they were glorious!
There is a little condiment bar with the expected pizza toppings – if you want to customize a bit.

Image

I made the mistake of getting a bit heavy-handed with that salt there – as it turned out to be THE saltiest salt on Earth but it did not dampen my pleasure much.  The pizzas were incredible & bizarrely filling.  Despite only being about 12″ personal pizzas – neither Miles nor I could eat more than half of one.  So we got boxes & had some for the next night.

People – this place is GREAT!  Run – do not walk – to East Hollywood & commence the gorging!

Desano PIzza Bakery!

Image

Image

Image