Pimai It’s Thai – Hollywood, California

Leave a comment

All Photos © Christine Elise McCarthy 2013

To see images of my past posts & get links to the recipes – look on my Pinterest board – HERE.

~

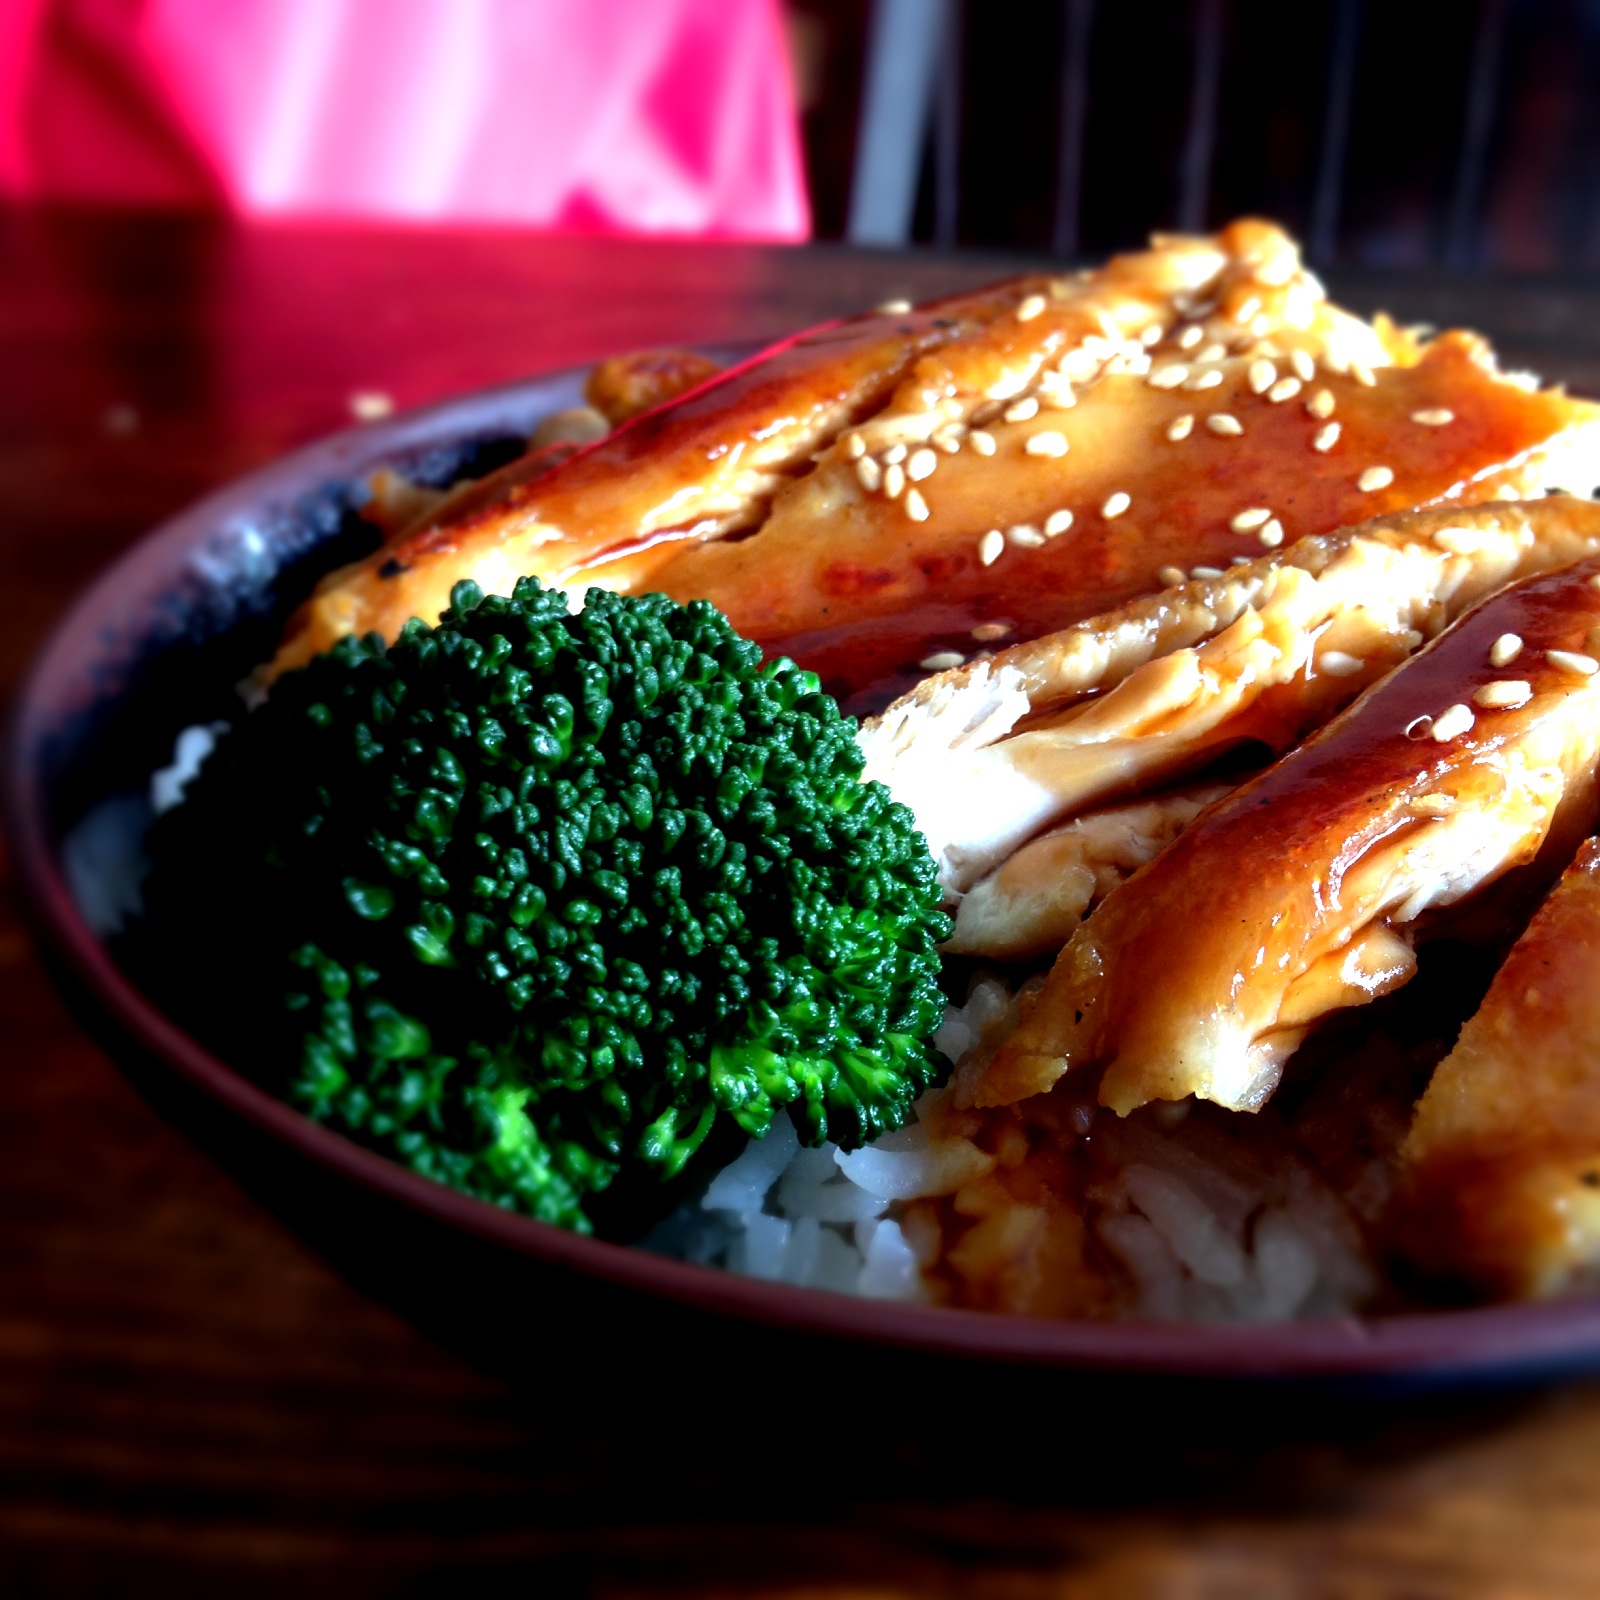
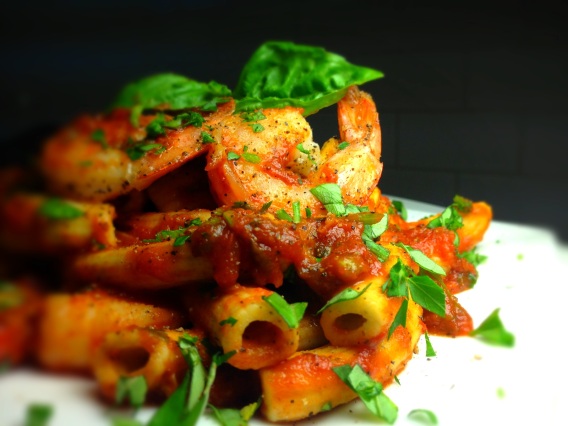
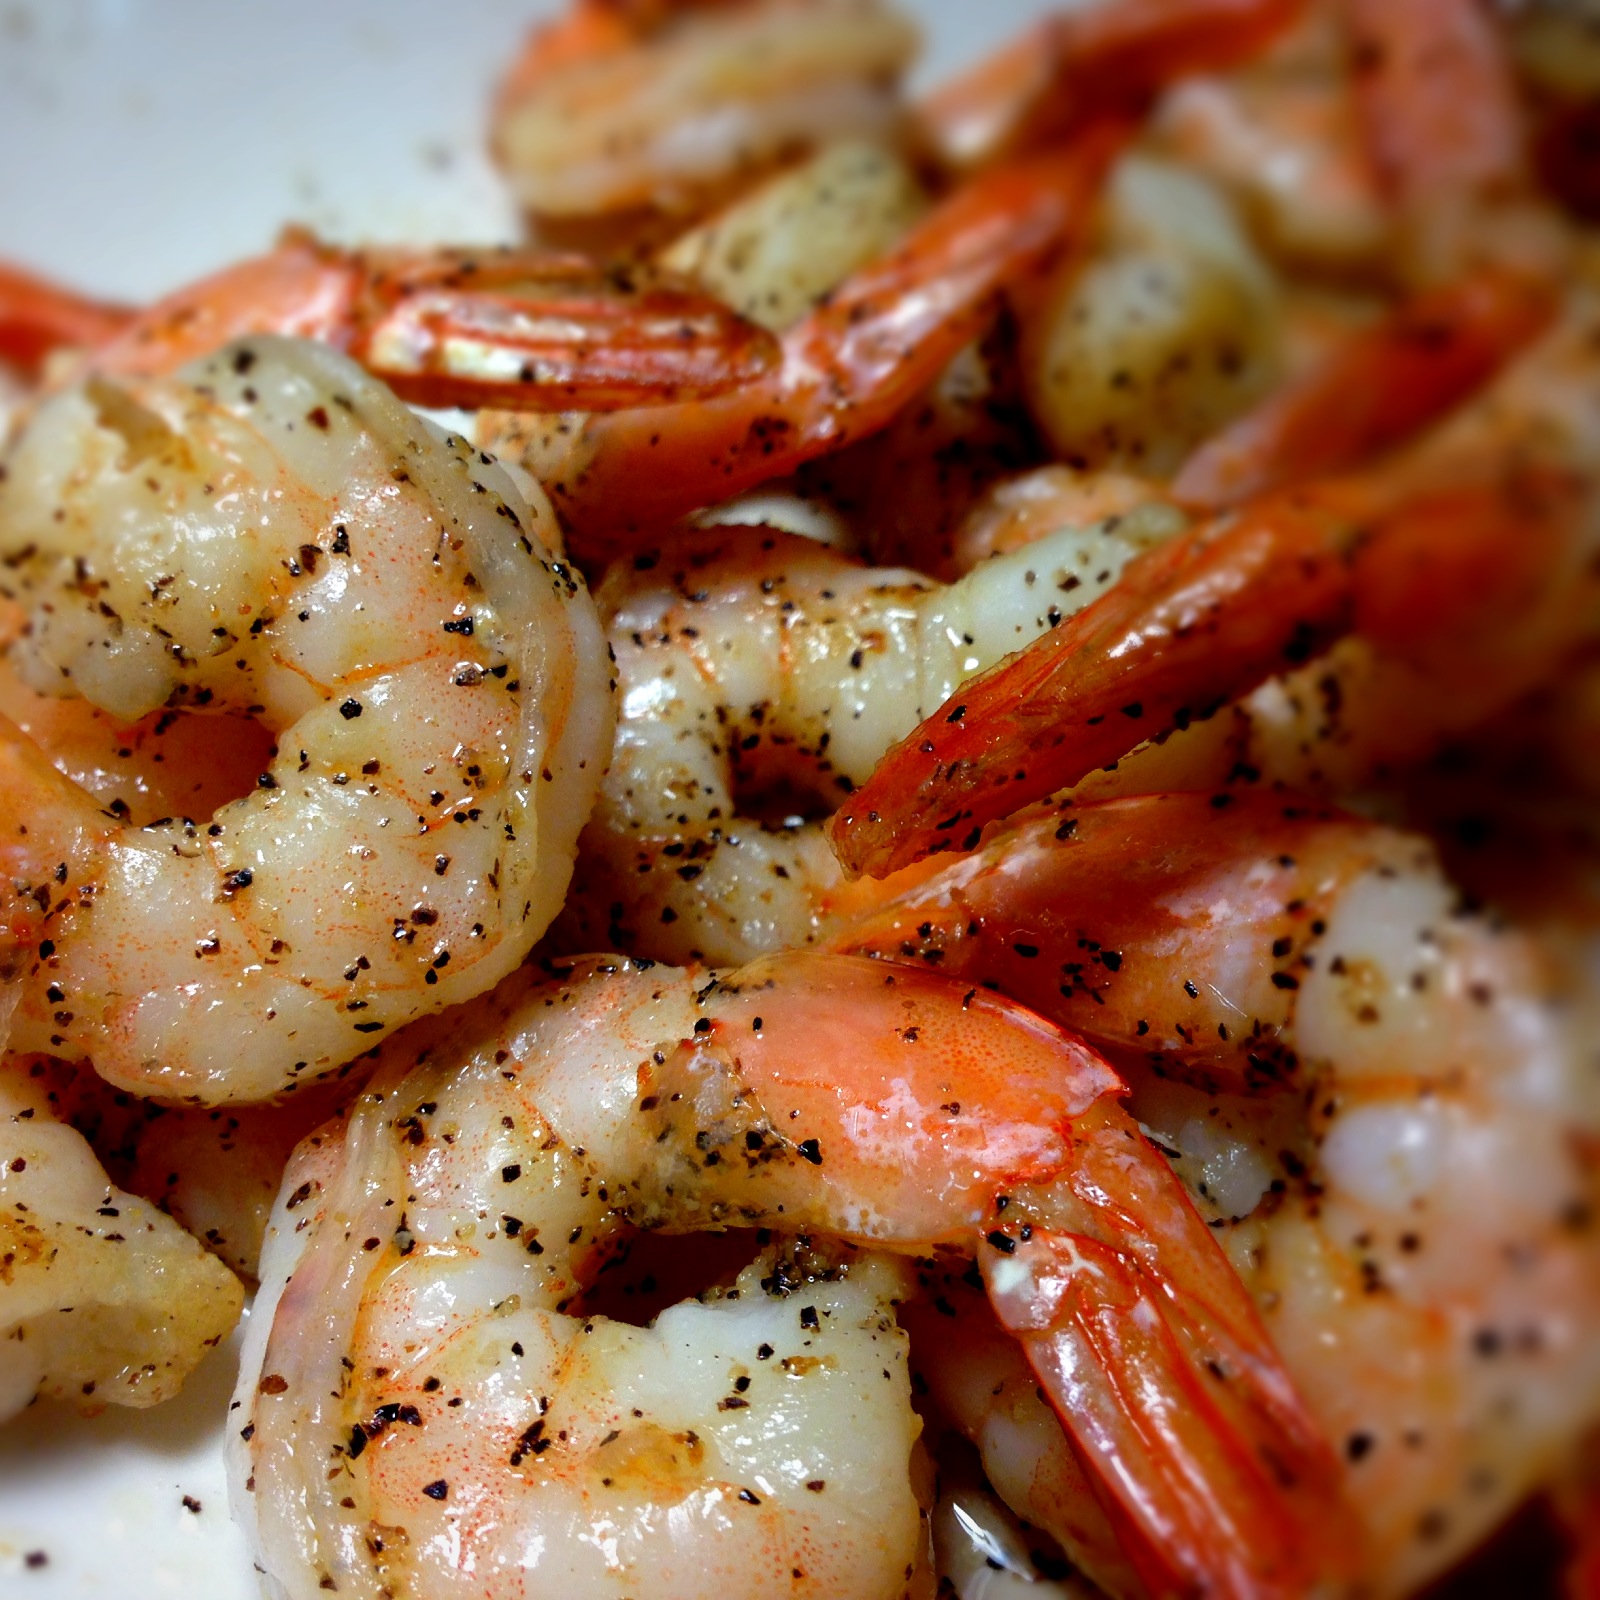
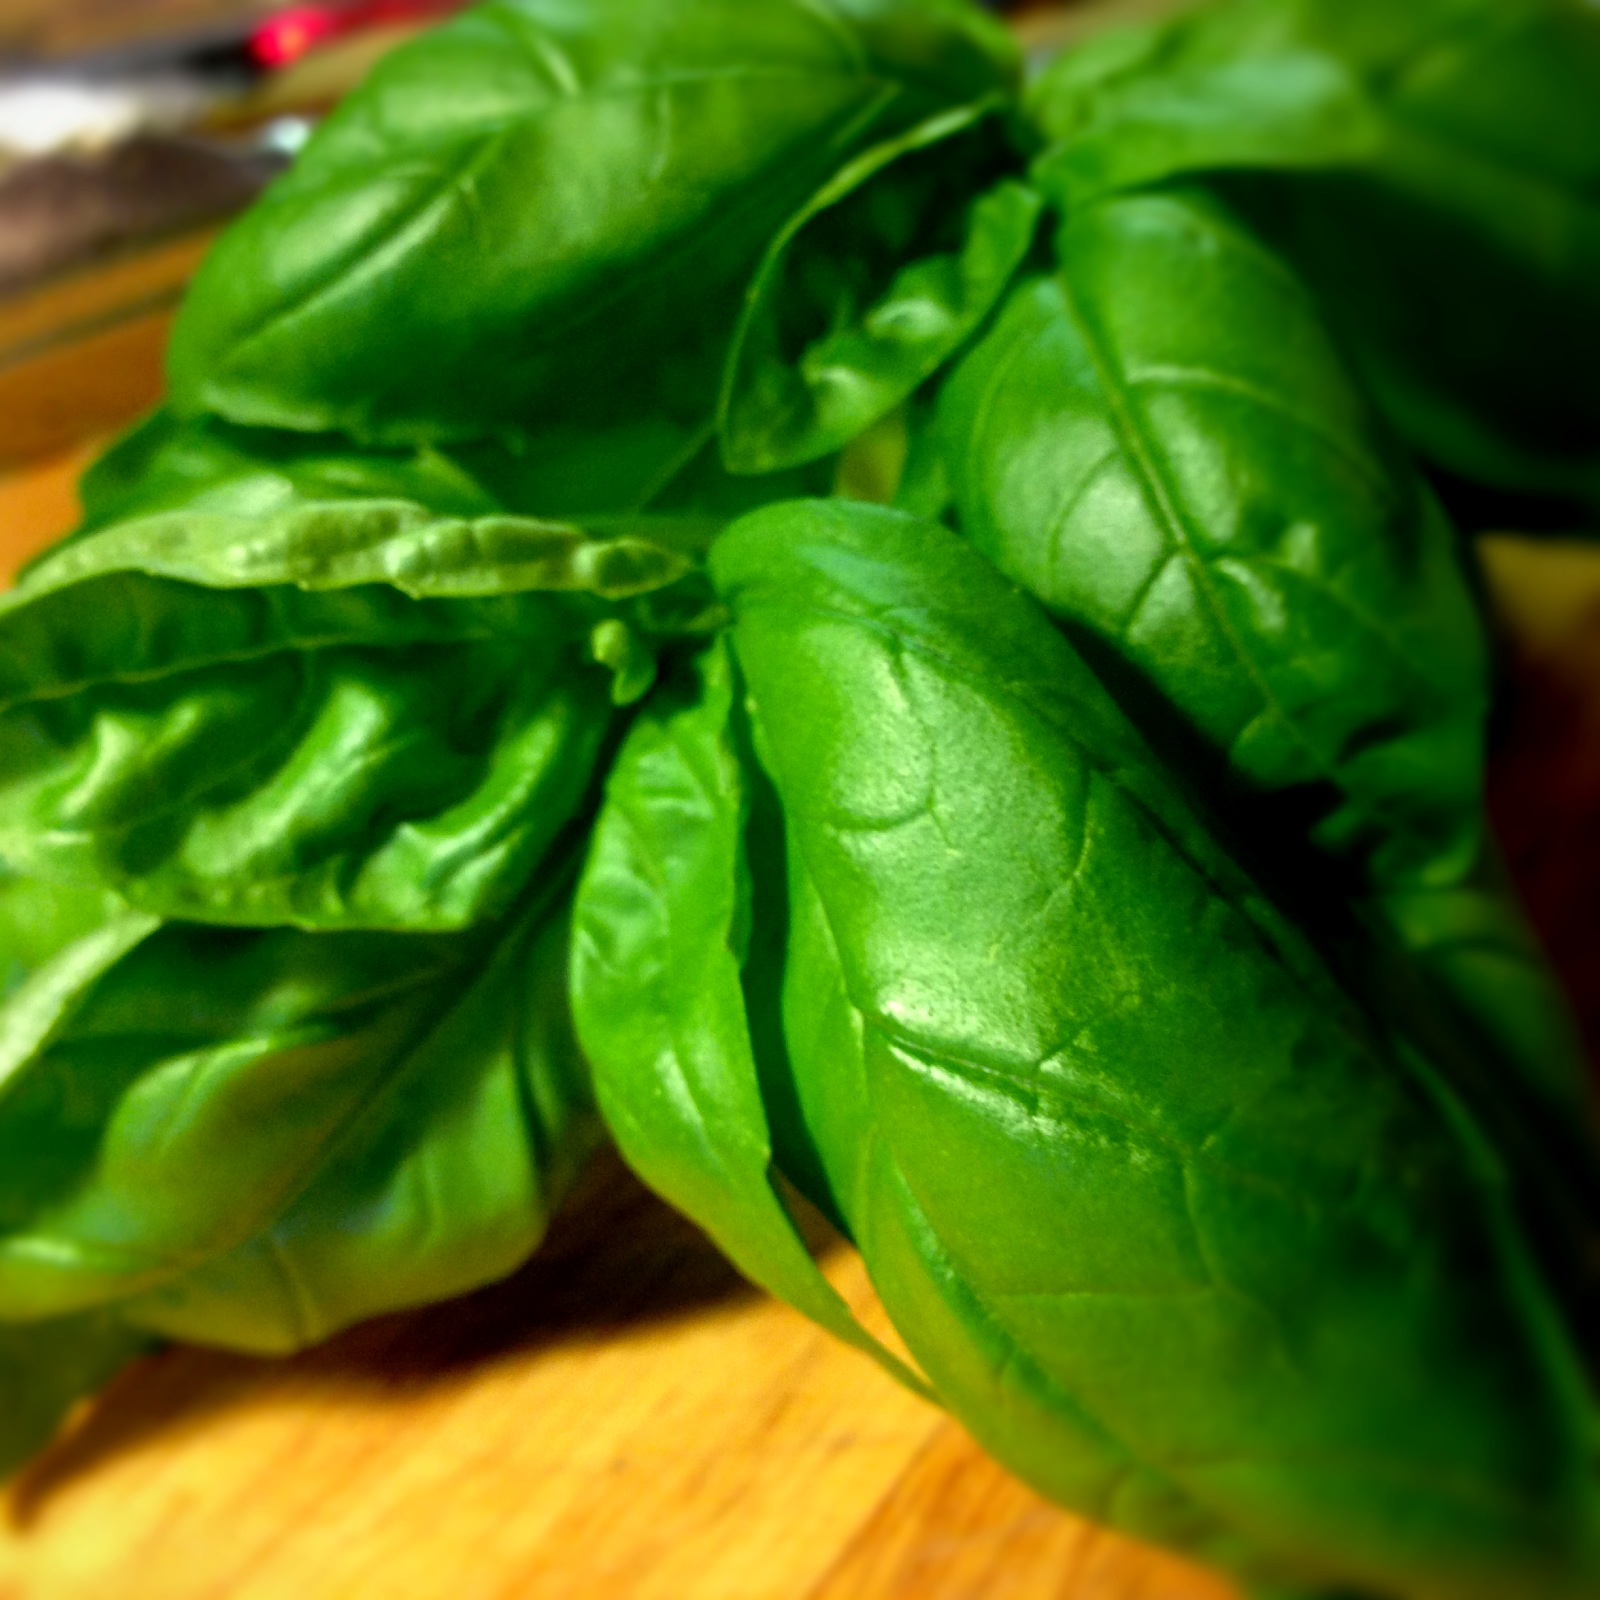
Pimai.  It’s Thai!!  That name cracks me up.  It is hard for me to ever venture into any Thai restaurant other than my luhvah – Torung – but Torung doesn’t open until 5pm & I wanted lunch so I went to the Thai place nearest to where I live – Pimai It’s Thai.  I have eaten here before & have enjoyed it a great deal.  Their brown rice is actually a shade of purple & has a nuttiness that is really nice.  I forgot to ask for that rice yesterday – and maybe the lunch special doesn’t even offer that but the food we got yesterday was pretty great.  I had the Basil & Chili Shrimp Stir Fry (pictured above) & Miles had the same but with beef.

Image

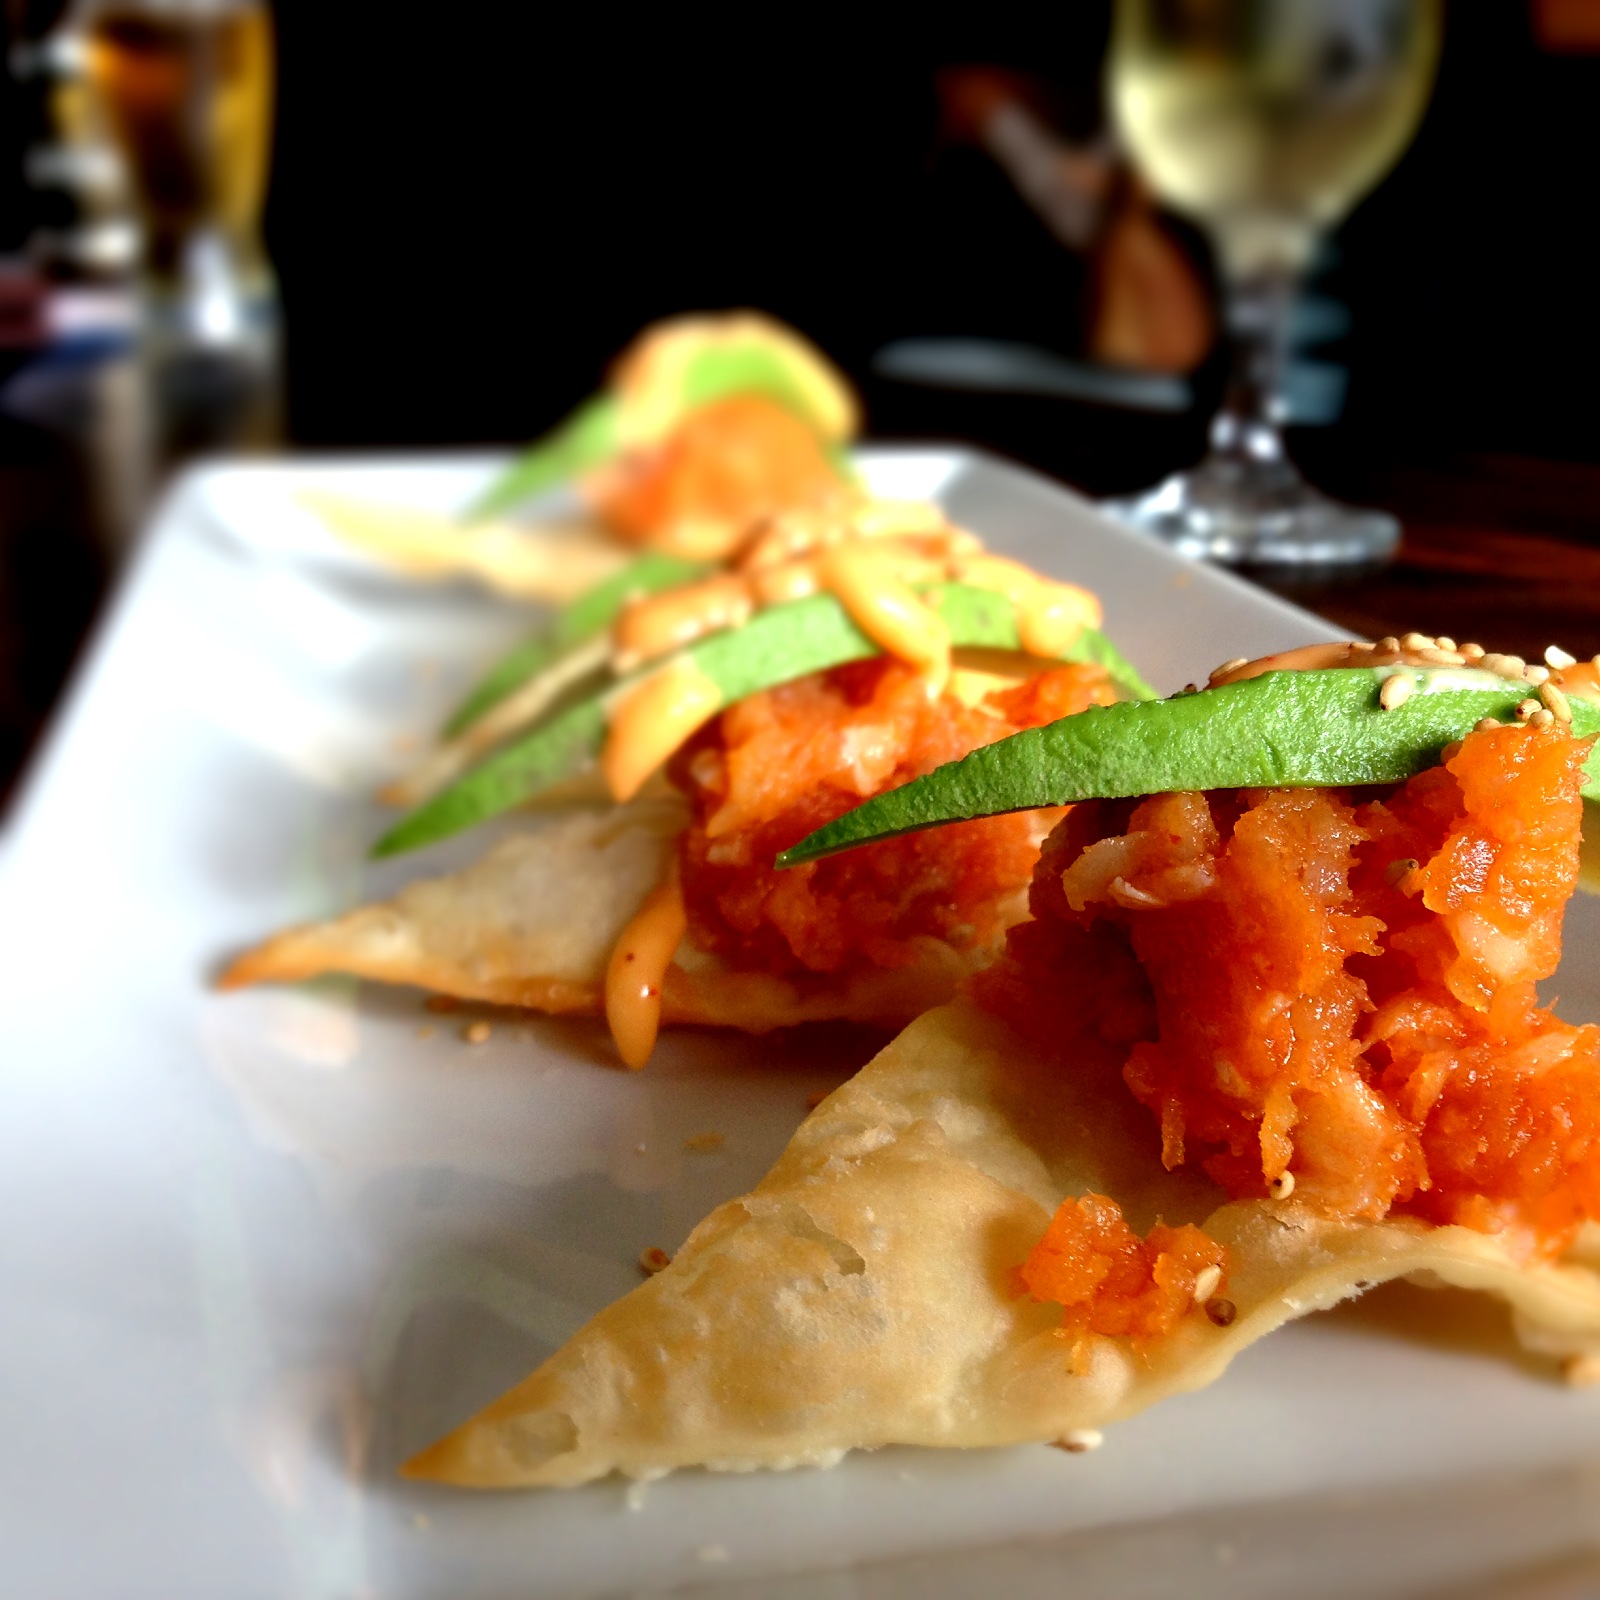
I actually ordered scallops – but they were out.  The specials at lunch are $6.50 for veggie or tofu items, $7.50 for chicken or beef & $8.50 for shrimp or scallops.  The special includes rice, a little salad with a honey mustard dressing, a bowl of a consomme-like soup with spinach & some mystery (but tasty) bits in it:

Image

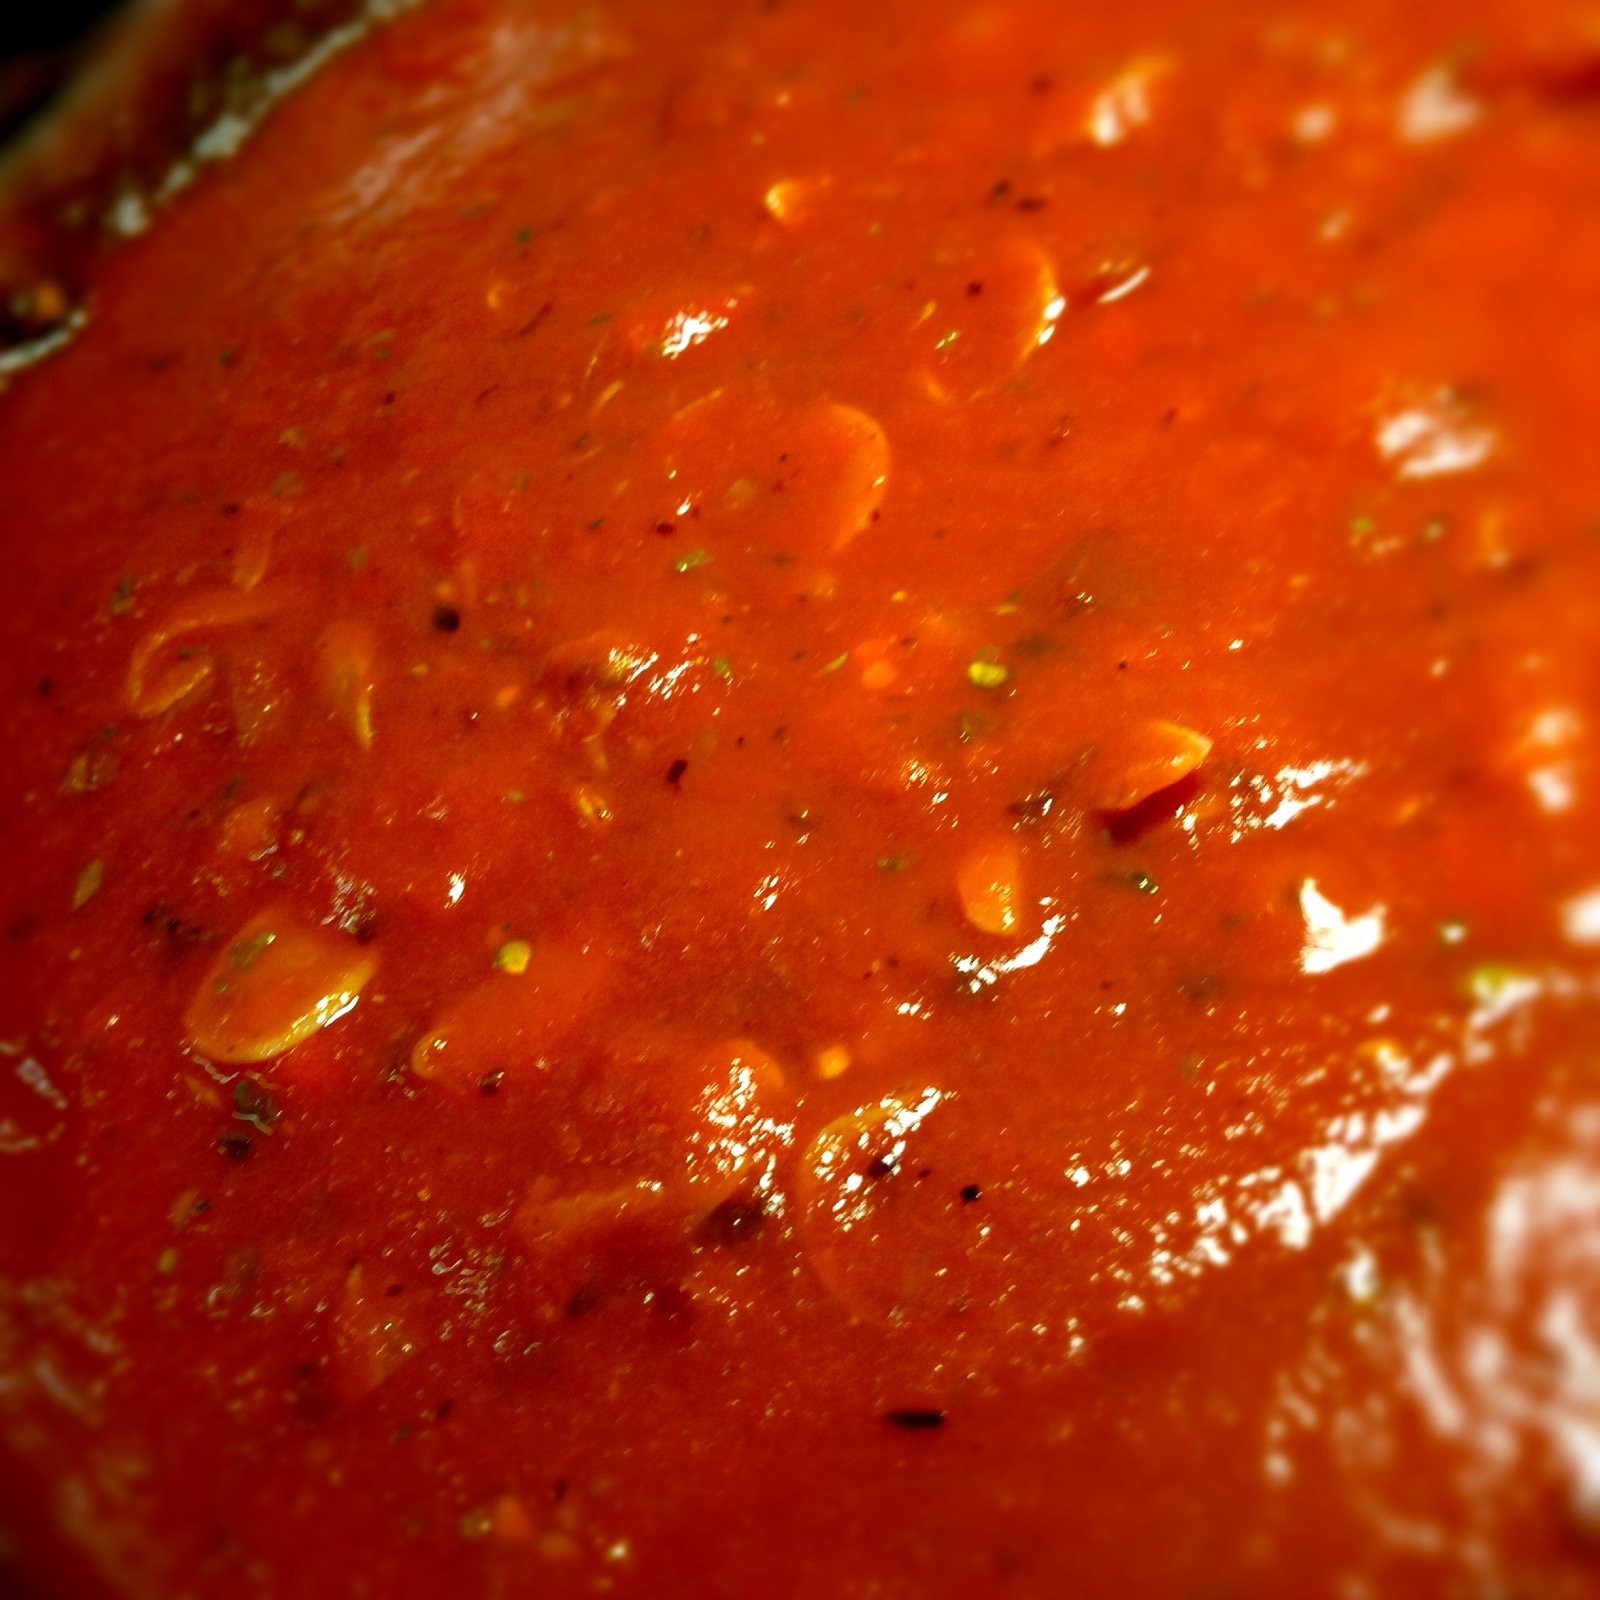
and a fried dumpling that I did not try because Miles believed it was pork-filled.   Both of us were impressed with how clean and how genuinely spicy the dishes were.  And the perfect amount of food for a good lunch.

There is outdoor seating – which is nice – and bizarrely uncommon in city that has nice weather 99% of the year.  Boston & NY offer far more outdoor dining options, I find.  Perhaps because everyone wants to enjoy the far less frequent fair weather there while they can.

Anyway – we sat outside & I neglected to photograph the interior.  Sorry.  HERE is their website, though, so take a peek.

And for your amusement – here are a few images of the ever Mercurial Miles B. Miller, my beer-drinking BF – and a picture of his frosty beer!

ImageImageImage


3-29a-13 (1)

And here are some pretty flowers that were nearby.

Image

Pimai It’s Thai (please ALWAYS use the full name when referring to this establishment) is located across from the Gelson’s on Franklin in the same strip mall with my new morning haunt – Tang Donuts.  I happen to be the FourSquare mayor of Tang Donuts – FYI – as I am (and will now likely always be) mayor of my now defunkt donut spot – Alex Donut.  At any rate – the strip mall isn’t especially appealing but the food at Pimai It’s Thai is & I highly recommend their exceedingly affordable lunch special.  Here is our bill:

Image

Much like at Sushi Stop – it is the inclusion of cocktails that ratchets the bill up.  If you have a handle on your day drinking – you can do much better than Miles & I do. At keeping the bill down, that is.  Without alcohol – we could have gotten out of there for about $20, including tip.

So – yeah.  Give Pimai It’s Thai a chance.  I don’t think you will regret it.

Image

NO CARB Cauliflower Risotto with Caramelized Carrots, Saffron & Toasted Anchovy Bread Crumbs

3 Comments

All Photos © Christine Elise McCarthy 2013

To see images of my past posts & get links to the recipes – look on my Pinterest board – HERE.

~

Let me apologize up front for the scant photography with this recipe.  My phone completely died early in the process of making this & I had no way to document the various steps.  Sorry!

Also – let me say that this dish could be made the traditional way – with Arborio rice – or the no carb way, using just grated cauliflower or it can be made the way I did it here – with about 2/3 of the recipe comprised of cauliflower but with a cup of Arborio for added texture.  I would have skipped the rice entirely but my boyfriend is a finicky eater & textures, in particular, can put him completely off things.  Having never tried a cauliflower-based risotto, I was unsure of the sturdiness of the final result, so, I added the cup of risotto rice.  As it turned out, I could have skipped it because 1) I think the cauliflower holds up well and 2) he wouldn’t eat it anyway.

In the future, I will experiment with an all cauliflower risotto & I will better document the process.  Do not be alarmed by the lack of photos here and, therefore, intimidated to try this.  It is a very easy & delicious dish!  The anchovy bread crumbs are very optional but add a nice hint of salty flavor the the sweetness of the carrots.  I used some leftover homemade artisan bread but any bread crumbs would likely work.  I just liked how chunky the homemade breadcrumbs were.

Image

PRINT THIS RECIPE

NO CARB Cauliflower Risotto with Caramelized Carrots, Saffron & Toasted Anchovy Bread Crumbs

INGREDIENTS
1 large head cauliflower (2 heads if not using Arborio rice in the dish)

1 lb carrots

3 TBS olive oil – divided

3 TBS butter – divided

1 small onion – diced

1 cup Arborio rice (optional)

1/2 cup dry vermouth (or other dry white wine)

1 cup heavy cream

1/2 cup freshly grated Parmesan

5+ cups vegetable (or other) stock

1 tsp saffron threads

1/2 tsp white pepper

Salt to taste

1 tsp sugar

1 large tomato – diced for garnish

Fresh parsley – chopped for garnish

Parmesan (or other hard cheese) – grated for garnish

For the Toasted Anchovy Bread Crumbs

1 cup fresh breadcrumbs

1 TBS olive oil

1 TBS butter

1 TBS anchovy paste (or minced anchovies)

DIRECTIONS

For the toasted anchovy breadcrumbs

If using stale bread – pulse the cubed bread in a food processor until crumbly.

Heat 1 TBS each of olive oil & butter & dissolve the anchovy in it.  Add the breadcrumbs & stir until they begin to get browned & toasty.  I drained mine on paper towels to remove excess oil & set aside.

ImageImage

For the Cauliflower Risotto with Caramelized Carrots & Saffron

Heat the stock to boiling & then reduce heat to low & simmer – covered.

Meanwhile, with the grating blade of your food processor, grate the cauliflower into rice-like shards.  Set aside.

Image

With the regular blade in your food processor, pulse the carrots into a near puree.

Image

In a large stock pot, heat 1 TBS each of olive oil & butter on medium heat & add the minced carrots.  Coat the carrots with the oil & butter then add 1/2 cup of water, 1/2 tsp salt & the sugar.  Cook, covered, for about five minutes.  Uncover and cook, stirring constantly (adding a tiny bit more olive oil if it gets too dry) until the carrots begin to brown.  Remove from heat.  Puree half of the browned carrots in a blender with 1 cup warm water.  Set both carrot elements aside.

Using the same pot you cooked the carrots in, add 2 TBS each butter & olive oil & cook the onion until translucent.  Add Arborio rice (if using) & cook, stirring constantly, for about a minute.   Whether or not you are using Arborio, add the cauliflower now and, stirring constantly, add the cup of wine & let the alcohol cooks off over high heat.  Add the carrot puree (not the browned carrot – but the puree with water added) and cook, stirring constantly, until it thickens a bit – maybe a minute.

Add 1/2 cup of hot vegetable stock and stir it often – until the liquid is absorbed.  Repeat this process until all but about 1 cup of broth is incorporated.

Mix in the remaining browned carrots (reserving a small amount for garnish – if desired), the saffron threads, white pepper, the Parmesan & the heavy cream.  Add small amounts of the remaining broth to thin the risotto to the consistency you like.

Serve immediately topped with the remaining carrots (if you reserved some), diced tomatoes, fresh parsley & more grated cheese & the toasted anchovy breadcrumbs.

PRINT THIS RECIPE

Image

Sushi Stop in Hollywood, California

2 Comments

All Photos © Christine Elise McCarthy 2013

To see images of my past posts & get links to the recipes – look on my Pinterest board – HERE.

~

Apparently, there are five locations for this restaurant – the one in Hollywood, 2 on Sawtelle on the west side, one on Santa Monica & one in Encino.  I ate at the Hollywood location twice in the last week & happened upon one of the Sawtelle ones yesterday while in a driving NIGHTMARE FROM HELL trying to get back east from an aborted lunch attempt on Washington by the pier.

ImageImage

I dragged my boyfriend Miles out there as we had to drop a friend off at a car rental place at Pico & Centinela anyway & the beach seemed too close to ignore.  My thinking was that 1) I live in LA & see the ocean less than once a year which is retarded and 2) Miles has come to see me 5 times in 8 months & he has not been taken west of LaBrea in all that time.  Seriously.  I think the Roosevelt hotel is as far as we have ever ventured.

So – I thought, “Hey – it’s a random Tuesday in March. How bad could it be out there?”  The answer, as it turned out, was BAD.  Fucking giant families of marauding tourists maneuvering poorly on oversized beach cruisers & dumpy people without shame wearing far less clothing than the 65 degree day demanded.  I have a tolerance level below zero for beach bars that have those plastic beer advertising banners flapping outside & way too loud music inside & thatched anything.   If there is a sign outside outlining a dress code that says “No baggy clothes, no bandanas, no harassing patrons about sports team favorites, no screaming” etc etc – I know I need to move on.  We attempted to get a seat on the upper deck at The Whaler here (stock photo)

Image

but timed our arrival EXACTLY wrong resulting in a half dozen people arriving after us getting choice people-watching seats facing out to the ocean while we sat inside the bar with blaring horrible music & no service.  I was made inconsolably infuriated by this injustice – I mean really really stupid mad – and just could not shake it off.  I apologized to Miles but just couldn’t stop throwing hate looks over my shoulder at these late arriving interlopers & I couldn’t stop saying, “I am so sorry.  I know this is dumb but I am inexplicably & disproportionately enraged by our situation here.”  Despite my embarrassment at my own reaction, I just couldn’t recover.  “Do you just wanna leave,” Miles asked, completely over my pouty complaints.  And I did so we did & it was a smart decision.

Here’s Miles.  See?  He always LOOKS cranky but seldom is.

Image

At any rate – we got the Hell outta Dodge & spent three days trying to navigate our way back east – absolutely curing Miles of EVER agreeing to go west of Hollywood proper again.  It took three days, just to explain, because I made the mistake of also trying to stop into Wertz Brothers on Santa Monica & shop for a new kitchen table.  They had nothing so we left there & the next thing you know – I found myself in that web of streets over there including Motor & Federal & whateverthefuck – all of which are on a skewed grid heading in directions my car calls SE or NW.  To make it worse – I was trying to find entry ramps for the 10 right at the point that it intersects with the 405 – which is a clusterfuck and my stupid car navigation thing decided to be completely unable to understand the fucking questions I asked her – namely – get me HOME!   “Please say street address including the address number and city.”   I did – four times & finally turned it off before my rage overwhelmed me & I just drove us into a fiery death by intentional high speed crash into a construction zone.

Anyway – three days later – we got off the 101, safely back in Hollywood.  And we went to Sushi Stop – for our second visit.

The door at Sushi Stop has a box painted on it that says $2.75 in it – and the explanation for that is that most two-piece sushi dishes are $2.75.  Insanely cheap.  Look at the menu:

ImageImage

Four-piece rolls are $4.  And Miles ordered the “Mini Teriyaki Bowl” (which was a full-sized bowl in my opinion) of chicken & rice – enough for a lunch meal all by itself – and that was only $2.75.

Image

The fact is – I can’t afford NOT to eat here!  Here is the rest of the menu:

ImageImage

ImageImage

Miles’ initial fears that the sushi would suck ($2.75 does seem too good to be true) were quickly dispelled by our first visit.  I noticed that, on Yelp, there is a fair amount of complaining about this place but I find it delightful.  I’m not sure what people expect at this price point & some folks don’t seem to realize that a person doesn’t have to LOVE every Goddamn thing on a menu to make the restaurant a good one.  For example – Miles didn’t like the seared albacore & crispy onions for $8 (pictured at the top) but I did.   And look at this crazy tower of raw tuna ($5):

Image

On our second visit – I intentionally ordered a few things that seemed the most risky – namely the baked green mussels ($2.75)

Image

which Miles seemed to love (and he is very, very finicky) but I found the mayo on it a tad sweet.  Plus hot mayo is kind of icky.  But for $2.75 – fuck it.

I also ordered a spicy scallop roll ($2.75) seen here with some seared albacore sushi ($2.75):

Image

The scallops were really fresh & and did not have too much mayonnaise.  Yellowtail sushi is $4 but great:

Image

We also tried the $2.75 stuffed jalapeno

Image

which was good but the spicy tuna inside gets cooked when they fry the jalapeno & it comes out looking more like ground pork or chicken.  It actually freaked me out when I took the first bite & had to review the menu to make sure I hadn’t overlooked a meat ingredient.   I also ordered & enjoyed the Crispy Rice appetizer ($2.75) but neglected to photograph it.  Sorry!

Here is the spicy albacore tartare ($4)

ImageImage

which I loved.  And here is the room:

Image

And here is the bill from one of our visits – including two glasses of wine & a beer:

Image

Without alcohol – we could have stuffed ourselves for $20.  I don’t know how you can really gripe about that, unless you end up with food poisoning – which we did not.  Either time.

So – I say, ignore the haters.  If you want the option of trying a bunch of stuff with very little financial risk or if, like me, you like to give the finger to the aesthetic of culinary decency & stuff yourself sick with sushi like a competitive eater – horrifying chefs & staff alike – Sushi Stop is the place for you.  The fact that there are TWO (at 2222 & 2053) on Sawtelle (in the cutest little hidden corridor of Asian restaurants) says a bit about its popularity.  So – cast caution to the wind, wear loose pants & grab your nearly maxed out credit card & run to Sushi Stop.  And definitely try that Spicy Tuna Tartare for $5.  It is the deal of the century!

Carrot & Celery Root Soup with Lavender & Herbs de Provence

3 Comments


All Photos © Christine Elise McCarthy 2013

To see images of my past posts & get links to the recipes – look on my Pinterest board – HERE.

~

This soup isn’t enormously different from my Carrot & Pumpkin Lavender Soup except that it uses celery root rather than pumpkin.   The celery root adds a creaminess to the soup that makes the cup of heavy cream I included very optional – without which (the cream) this soup is vegan & very light!   The culinary lavender I included is also probably optional but I do recommend buying some & experimenting with it.  It adds an olfactory sensation that is as soothing as the warm soup itself is.

Image

PRINT THIS RECIPE

Carrot & Celery Root Soup with Lavender & Herbs de Provence

INGREDIENTS

2 lbs carrots – sliced

2 celery roots – peeled & cubed

1 large onion – diced

1 leek – sliced (white part only)

4 garlic cloves – chopped

5 TBS lavender

3 TBS olive oil

2 TBS herbs de Provence

1 cup dry white wine

1 cup heavy cream (optional)

2 TBS butter (or vegan option)

1 tsp nutmeg

1 tsp dry ginger

4 TBS sugar

Creme fraiche (as garnish) – optional

S&P to taste

Cheesecloth or other fine straining device

Image

Image

DIRECTIONS

Boil 4 cups of water & add the lavender.  Remove from heat & allow to steep for at least 10 minutes.  Using cheesecloth – strain the lavender out & reserve the water.

ImageImageImage

Heat the olive oil in a large stock pot.  Saute the garlic, onion, leek & herbs de Provence a few minutes or until the onion is translucent.  Try not to brown them.  Add the white wine & bring to a boil.  Add the carrots & celery root & the lavender water.  Bring to a boil & reduce heat to medium & simmer until the carrots & celery root are soft (20 minutes or so – depending on the size of the cubes) – adding water if needed to keep the vegetables covered.  Add butter (if using) and the nutmeg, ginger & sugar.  Stir to dissolve the sugar & distribute the spices.

Image

The soup is ready to be pureed.  You might want to let it cool a bit to avoid scalding yourself.   You can use an immersion blender or a traditional blender & puree the soup in batches.  Once it is creamy, return it to heat & add heavy cream (if using) and salt & pepper to taste.  Garnish with fresh cracked pepper or a dollop of creme fraiche.  Serve!

PRINT THIS RECIPE

Image

Decadent No Carb Shirataki Fettuccine Alfredo with Asparagus & Lemon

1 Comment

All Photos © Christine Elise McCarthy 2013

To see images of my past posts & get links to the recipes – look on my Pinterest board – HERE.

~

These friggin’ shirataki noodles are the greatest.  These ones here have 80 calories – and that is for a huge bowl of pasta (two packages being one serving) – then the calories of whatever you add to them.

Image

As I stated before in other posts about these noodles, there actually is a measurable amount of carbohydrates in these but it is so negligible as to not be worth mentioning.  With noodles this light & guilt-free, you can add anything on top of them & still have a much lighter meal than you would with real pasta.  These noodles do not mimic the texture of pasta as well as they do the visual but the texture isn’t off-putting & you get used to it quickly.  In case this is your first time trying them, do not get freaked out by the fishy smell they have when you open the package.  Just boil them or zap them in some fresh water in the microwave & the smell goes away completely.  There is nothing funky about their taste.  They are a very neutral base for whatever you use to top them.

My boyfriend likes fettuccine alfredo a lot.  I have always found it too rich and, until yesterday, never made it myself.   Yesterday, I decided to spoil him & make him a decadent, cheesy sauce.  This recipe makes enough sauce to feed six easily.  I made one serving with the shirataki & 6 servings with a homemade pepper penne.   I did not photograph the penne version but I added some fresh, diced tomato to it & it broke up the monochrome of the dish nicely.  I recommend you try that, too.

Image

PRINT THIS RECIPE

Decadent No Carb Shirataki Fettuccine Alfredo with Asparagus & Lemon

INGREDIENTS

Pasta of your choice (shirataki or homemade or boxed)

1 bunch asparagus

2 tomatoes – diced

8 TBS butter

4 cloves garlic – sliced thin

3 cups heavy cream

2 cups grated Parmesan

1 cup Pecorino Romano

3 oz cream cheese

zest of one lemon

Parsley – chopped for garnish

S&P to taste

Extra Parmesan or Pecorino Romano or grating

DIRECTIONS

Trim the ends of the asparagus as outlined HERE.  Basically, you grasp the spear on each end & bend it until it breaks.  The bottom part will be the tough, inedible part.  Then, cut into 1 inch pieces.  Wrap in a wet paper town & zap in a microwave for a minute or two.  (Alternatively – you could add the raw asparagus to your boiling pasta for the final four minutes.)

Melt the butter in a large pan.  Saute the garlic being careful not to brown it.  Add the heavy cream, 3 cheeses & the lemon zest & heat through until all the cheeses melt & the sauce is creamy.  Add salt & pepper.

Cook your pasta & drain it.  Add the asparagus to the sauce & warm it through.  Add the pasta to the sauce or mix them in a large serving bowl.  Garnish with diced tomatoes, parsley & lemon wedges & extra cheese for grating.

PRINT THIS RECIPE

Image

Nick’s Cafe – Downtown Los Angeles

1 Comment

All Photos © Christine Elise McCarthy 2013

To see images of my past posts & get links to the recipes – look on my Pinterest board – HERE.

~

Nick’s Cafe is as close to a real diner as anything else Los Angeles has to offer since the tragic demise of Phil’s Diner.  For my money, to call yourself a diner, you have to be an actual train dining car, otherwise, you are a coffee shop or, as Nick’s refers to themselves – a cafe.   Still, there are a few joynts around that get that diner vibe down while still being a brick & mortar facility – like Millie’s, for example.  Nick’s is another.  Located on the north side of downtown (north of Chinatown) & east of Elysian Park, it is in an area that feels sorta desolate & industrial.

Image

It is really easy to miss so definitely have the address in hand when you go to find it.  There is a small parking lot in the rear & a huge, dirt lot across the street.  Nick’s is only open for breakfast & lunch and accepts cash only.  HERE is a peek at the menu.

ImageImage

Nick’s is patronized primarily by cops so, despite the sketchy neighborhood, this is one safe place to dine.  There is outdoor seating but the setting out there is pretty unimpressive so I recommend eating at the counter.

ImageImage

Image

Those are my parents sitting to the right of the woman in the orange.   While the interior is pretty standard cafe fare, if you sit there, you have the opportunity to interact with Nick’s feisty hostess.  Look at her practically photo bombing my efforts to document the interior:

Image

Again, those are my parents behind her.  She is awesome but let me give you one word of warning – do not ask her for hot sauce!  At least, do not ask for it if you have not yet sampled their house-made salsa that is on the counter in large carafes.

Image

She will tirelessly bust your balls if she sees you using any other hot sauce and, in fairness, their salsa is damned good!

And the food?  Great diner fare.  I haven’t tried too many things on the menu but what I have tried – I enjoyed.  Like this tuna melt:

Image

And the Scrambled SoCal:

Image

And here is a peek at a bacon cheeseburger:

Image

And while I haven’t had these Chilaquiles – but they looked so good – I am definitely getting them next time!

Image

I love this place.  Solid food, obscure location, great look, a hostess that makes you feel welcome while giving you a hard time (and it isn’t that bullshit kitschy schtick some restaurants have their waitresses employ) & great prices!   You should definitely check Nick’s Cafe out!

Image

Vegan Pumpkin, Peanut Butter & Rolled Oats Dog Treats

2 Comments

All Photos © Christine Elise McCarthy 2013

To see images of my past posts & get links to the recipes – look on my Pinterest board – HERE.

~

These are easy.  The only thing is that the dough can be really sticky.  I only used as much flour as I need to make the dough manageable without using so much it lost all tackiness.  I didn’t want flour to overwhelm the other ingredients.

These were not initially as popular as the ones I made HERE

ImageImage

that used egg & chicken hot dogs – but they all got devoured eventually. These ones in this recipe have a rougher, more rustic appearance than the smoother & more professional looking ones using egg – mainly because of the rolled oats.  Either way – dogs eat these things up & you can feel good about what you are feeding them.

Here are the three babies I cook these for:

ImageImageImage

ImageImage

Image

PRINT THIS RECIPE

Vegan Pumpkin, Peanut Butter & Rolled Oats Dog Treats

INGREDIENTS

1 cup rice flour

2 cups rolled oats

1 heaping cup peanut butter

2 cups canned pure pumpkin

1/4 – 1/2 cup water

2 cups flour

Image

ImageImage


3-5-2013 (21)

DIRECTIONS

Blend the ingredients until you have a dough that is workable – adding water or flour as needed.  Roll it out to a desired thickness – I go about 1/3 – 1/2 inch thick & cut it up into treats.  You can cut with a knife or cookie cutter.  Bake them on a greased cookie sheet at 350 degrees for about 15-20 minutes on each side.

Cool & serve to lucky doggies!  If you don’t – your dogs might look at you like THIS!

Image

Image

PRINT THIS RECIPE

Easy Vegetarian (Vegan) Irish Stew for a Slow Cooker

5 Comments

All Photos © Christine Elise McCarthy 2013

To see images of my past posts & get links to the recipes – look on my Pinterest board – HERE.

~

3-28-16 (82)

UPDATE March 28, 2016 – the Hearty Vegan Beef & Vegetable Stew for the Slow Cooker (just above) is – I think – a superior recipe to this one so please consider it.

_________________________________________________________________

Lots of ingredients yet not lots of effort.  This stew – like any stew – is very forgiving & many ingredients could be omitted or substituted with no negative impact on the result.  I read that Guinness beer is not vegan, so note that.  Also, I used some flame-broiled garden burgers for a faux ground beef effect and, in the future, will not as they have a stronger presence in the stew than I expected & their flavor is one that benefits more from the standard accoutrements one typically associates with a traditional hamburger – namely ketchup & mustard & pickles etc – than stew ingredients.  I also used soyrizo for the same reason but might try something else in the future simply due to the amount of a fiery red oil it released to float on the surface of my stew.  Still, despite fearing I might toss the whole effort, after scooping some of the oil off the top & reducing the overwhelming quantity of veggie burger I’d dumped in – I set up a huge bowl to photograph.  Then I tasted it so I could begin trying to salvage it and, to my great surprise, I loved it!  Not perfect, of course but damned edible!!   If you try this dish – feel free to experiment.  I think it can withstand tweaking of all sorts.  For example – I wanted to add Worcestershire sauce but had none.   You might want to lose the Guinness or the faux meats or add different vegetables or use a different grain than pearl barley.  Your call.  Make the recipe your own.

My crock pot is huge!  It makes tons of food so this recipe is for a very large quantity – St. Patrick’s Day party quantity – of stew.  I am certain it will freeze well, so don’t be intimidated.

I made this in a slow cooker but this could easily be made stove top.  I had this in my crock pot for 24 hours – but you could get this done in 2 hours in a large stock pot over medium heat.

Image

Image

PRINT THIS RECIPE

Easy Vegetarian (Vegan) Irish Stew for a Slow Cooker

1 lb mushrooms – sliced

2 TBS olive oil

6 garlic cloves – quartered

1 large onion – diced

8 celery stalks – sliced

1 14.9 can Guinness beer (or vegan alternative)

3 turnips – cubed

6 red potatoes – cubed

1 15.25 oz can corn

8 carrots – sliced

2 cups peas

8 cups stock

5 TBS your favorite BBQ sauce

2 TBS A-1 Steak Sauce

2 veggie patties (optional)

12 oz soyrizo (optional)

10 sprigs fresh thyme – left on stems

1 TBS fresh rosemary – chopped

1 TBS dry sage

3 bay leaves

1 cup heavy cream (or soy-based cream)

1/4 cup soy sauce

1 cup pearl barley (or other grain)

1 TBS corn starch dissolved into 1 cup water

S&P to taste

ImageImageImage

DIRECTIONS

Heat the 2 TBS of olive oil in a frying pan.  Saute the garlic & mushrooms & onions until the mushrooms just begin to brown.  Add the celery & saute a few more minutes.

Then simply combine the rest of the ingredients.  In a slow cooker on high – this should be done in 4-5 hours but can sit on warm overnight.  Add more water if it begins to get too thick.  Generously season with salt & pepper.

Stove top in a large stock pot – bring everything to a boil & then simmer on medium heat & it should be done in two hours.  Generously season with salt & pepper.

PRINT THIS RECIPE

Image

Image

ImageImage

Brie Pizza Two Ways ~ With Mushrooms, Thyme & Pistachios or with Honey, Apple & Red Onion

Leave a comment

All Photos © Christine Elise McCarthy 2013

To see images of my past posts & get links to the recipes – look on my Pinterest board – HERE.

~

These were inventions born of items on hand.  I was uncertain about the use of brie & how rich the resulting pizza might be.  Not a huge fan of honey, I was also concerned that the flavor of the honey pizza would grow old quickly and may be better suited to an appetizer than a dinner recipe.  So – I made a single pizza two ways.  The result was pretty delightful.  The brie was not overpowering – even though I used a cheap brie.  The real secret, I think, to success with the apple-brie pizza is ultra thin slices of both apple & the red onion – as in – papery thin.  With the mushroom pizza – searing the mushrooms & garlic into a nearly caramelized submission before using them on the pizza.  I am not going to give any real measurements in these recipes as the ratio of ingredients is really a matter of taste.  Both of these pizzas were delicious & both would work wonderfully as appetizers.

Image

Pizza with Brie, Mushrooms, Thyme & Pistachios

INGREDIENTS

Pizza dough

Brie – chilled & sliced into thin squares

Mushrooms & garlic – sauteed in olive oil & salt until browned

Fresh thyme – chopped

pistachio nuts

Arugula

Pizza with Brie, Honey, Apple & Red Onion

INGREDIENTS

Pizza Dough

Brie – chilled & sliced into thin squares

crushed red pepper

honey

green apple (or other tart apple) – sliced very thin

red onion – sliced very thin

ASSEMBLY

Roll out the dough.

For the mushroom pizza – simply layer brie then thyme then mushrooms & pistachios.  Bake in an oven pre-heated to 450 for about 10 minutes or until done.  When done – top with fresh arugula leaves.

Image

Image

For the honey-apple pizza – spread a thin layer of honey, sprinkle crushed red pepper & then layer apple & red onions.  Bake in an oven pre-heated to 450 for about 10 minutes or until done.

ImageImageImageImage

ImageBrie, pizza, thymImage

No Carb & 120 Calorie – Shirataki Pasta Alla Checca

4 Comments

All Photos © Christine Elise McCarthy 2013

To see images of my past posts & get links to the recipes – look on my Pinterest board – HERE.

~

Untitled vromans back

These frigging noodles are amazing!!!  I do want to say, though, that these noodles are to pasta what veggie dogs are to hotdogs – a really effective & healthy substitute for something not that healthy – but no blindfolded person would ever mistake the substitute for the real thing.  We learn to make these adjustments in our expectations, suspend our disbelief, we make these culinary compromises, all the time – with diet sodas & veggie burgers & low fat mayo & vegan cheeses.

There are two kinds of these Shirataki – the ones made from yam flour with a clear, glass noodle result and zero calories & these tofu ones that cook up with a Cup-O-Noodle appearance with 40 calories a package. There are some carbs – a total of 6 grams in the package of these tofu ones.  I used two packages – so I had 12 grams of carbohydrates & 80 calories.  That is nothing for what seems like a large bowl of angel hair pasta.  These noodles are not as doughy as real pasta.  These, too, (as with the yam version I used in my Zero Calorie Faux Pho) have a sort of rice noodle snap to them but it isn’t off-putting.  And – these also have the icky fish smell when you open them but boiling the noodles eliminates that completely.  And, at $2.19 per package – these are an economical as well as a very waist-friendly option for those of us hoping to lose a few extra pounds we’ve picked up along the way.

Image

PRINT THIS RECIPE

No Carb & 120 Calorie – Shirataki Pasta Alla Checca

INGREDIENTS

2 packages of Tofu Shirataki Angel Hair Noodles

2 cloves garlic – sliced very thin

1 tsp olive oil

1 small tomato – diced

Fresh basil – shredded

S&P to taste

Parmesan – optional (if you feel like a calorie splurge!)

ImageImageImage

DIRECTIONS

Open the noodles, drain & rinse them and boil them.

In a small pan, heat the olive oil.  Add the garlic & saute until fragrant – maybe a minute or two – being careful not to burn it.  Add the diced tomatoes & saute until heated through.

Drain the noodles & toss in with the tomatoes & garlic & stir.  Add salt & lots of fresh cracked pepper.  Serve with fresh basil & Parmesan.

PRINT THIS RECIPE

Image

Dill & Lemon & Almond Pesto

2 Comments


All Photos © Christine Elise McCarthy 2013

To see images of my past posts & get links to the recipes – look on my Pinterest board – HERE.

~

Image

I made this up because I couldn’t pass up this huge bunch of fresh dill for $1.49.  It is easy to make & not nearly as overpoweringly dilly as you might guess.  It has a fresh, summery flavor that I think would go very well with seafood.

I used raw almonds because pine nuts can result in pine mouth & because they are almost always from China.  I think pine nuts are sorta icky too rich, anyway – and they have reached the same over-saturation rate as the 80’s trend king – sundried tomatoes & the more recent victim of foody overkill – balsamic vinegar.

These measurements are ball park, at best.  Never worry – pesto is very forgiving & you can adjust the flavors as you make it.

Dill & Lemon & Almond Pesto

1-2 cups fresh dill

1/2 cup raw almonds (I used almonds but walnuts or pecans or regular peanuts would work – or even macadamia.  Your call.)

1/4-1/2 cup olive oil

juice of half a lemon

4 garlic cloves

1/4 cup grated Parmesan

S&P to taste

Water to thin it – if you desire

DIRECTIONS

Blend all ingredients in a food processor.  Adjust flavors.

ImageImage

Buffalo Cauliflower

8 Comments

All Photos © Christine Elise McCarthy 2013

To see images of my past posts & get links to the recipes – look on my Pinterest board – HERE.

~

Hey!  Have you heard?  I wrote a really funny & dirty novel!  www.BathingBook.com.   Check out the reviews on Amazon!  Why not buy a copy?

vromans front

vromans back

1614386_10151931347107475_69431546_o

~

This baby is pretty easy.  I love buffalo sauce but I do not eat chicken so I am always scouting for other ways to eat it – whether on pizza or with shrimp or to dip French fries in – anything.  This recipe uses cauliflower & is virtually calorie-free.   I used Egg Beaters egg whites in it but you could use buttermilk or soy milk or whatever to moisten the florets before dredging them in flour.   I used regular flour but gluten free flour or a chick pea (besan) flour – even panko or breadcrumbs could also work.  Most recipes I’ve seen add butter to the buffalo sauce but I see no reason to add those calories.

PRINT THIS RECIPE

Buffalo Cauliflower

INGREDIENTS

1 head cauliflower

Egg beaters

1 cup flour

1 TBS garlic powder

1 TBS onion powder

1 tsp each S&P

Buffalo sauce (I used Frank’s)

Celery stalks

Blue cheese (or Ranch) dressing for dipping

ImageImageImage

DIRECTIONS

Pre-heat the oven to 425.

Pour egg beaters in one bowl.  Mix flour with the spices in another.

Cut the cauliflower into florets.  Dip each into the egg & then the flour mix.  Spray a cooking sheet with cooking oil.  Place the cauliflower on the sheet & bake at 425 for about 15 minutes.  Take them out & coat them with buffalo sauce & bake another 15 minutes.  Put them on a plate & drizzle more buffalo sauce on them.

ImageImage

Image

Serve with celery & blue cheese (or Ranch) dressing.

PRINT THIS RECIPE

Image

Image

Shrimp Fra Diavolo with Homemade Pepper Penne

Leave a comment

All Photos © Christine Elise McCarthy 2013

To see images of my past posts & get links to the recipes – look on my Pinterest board – HERE.

~

The penne here require THIS amazing Kitchenaid pasta press and the stand mixer.  If you do not have these things, dry pasta is fine or make a homemade pasta of a different shape.

I sliced the garlic for this recipe with this handy dandy garlic slicer.  They are inexpensive & great for paper thin garlic slices.

ImageImage

PRINT THIS RECIPE

Shrimp Fra Diavolo with Homemade Pepper Penne

INGREDIENTS

For the pasta

400 grams (or 1 3/4 cups) flour

4 eggs

1 TBS pepper

1 tsp salt

OR – 1 lb dry pasta of your choice

Image

For the Shrimp Diavolo

3 TBS olive oil

20 shrimp – peeled & cleaned

8 cloves garlic – sliced thin

1 TBS (or less – to taste) crushed red pepper

1 29 oz can of either crushed tomatoes or tomato sauce

2 tomatoes – diced

1/2 cup dry vermouth (or dry white wine) – optional

1 TBS oregano

20 basil leaves – some chopped – some for garnish

Parsley – chopped

S&P to taste

Additional olive oil to drizzle as garnish – (optional)

Additional crushed red pepper – as garnish (optional)

Image

DIRECTIONS

For the pasta

Homemade pasta directions HERE

Or use dry pasta & the package directions.

Image

For the shrimp diavolo

Salt & pepper the shrimp & let sit for 15 minutes or so.

Image

Image

Heat 1 TBS olive oil in a large frying pan & saute the shrimp until just pink – until almost done.  Try not to overcook.  Put them on a plate & set aside.

ImageImageImage

Add 2 more TBS olive oil to the pan & add the garlic & crushed red pepper.  Saute about a minute then add the canned tomatoes – being careful not to get burned when it splatters (and it will).   Add the diced tomatoes, oregano, vermouth, 1 tsp salt & a handful each of the chopped basil & parsley (reserving some of both for garnish).  Simmer on medium heat about 15 minutes or until it thickens to your taste.

Image

Just before serving, add the cooked shrimp just long enough to heat through.  You might want to save a few to top each serving as garnish.

Mix your pasta with the sauce & then garnish with additional shrimp, parsley & basil.  Drizzle each serving with olive oil (if desired) and additional crushed red pepper to taste.

PRINT THIS RECIPE

Image

Homemade Fusilli Pasta with Faux Chicken (Albacore Tuna) and Cauliflower in a Mustard Sauce

Leave a comment

All Photos © Christine Elise McCarthy 2013

To see images of my past posts & get links to the recipes – look on my Pinterest board – HERE.

~

The fusilli require THIS amazing Kitchenaid pasta press and the stand mixer.  If you do not have these things, dry pasta is fine or make a homemade pasta of a different shape.

The sauce is a lighter take on one of my favorite sauces that really consists of little more than a nice Dijon & lots of heavy cream heated in a pan.  This one is made without the cream but with yogurt, instead.  It is naturally tangier than it would be with cream and, honestly, I prefer the heavy cream but I also prefer fitting into my pants, so – we do what we have to.

The faux chicken is really just frozen albacore that I buy at Trader Joe’s.  It looks like this raw

Image

These two pieces weighed .85 pounds and cost $5.35.  I am not a huge fan of this inexpensive fish cooked the way albacore should be cooked (nor am I a fan of most of Trader Joe’s frozen seafood as I find it tends to cook up fishy) but when this fish is overcooked it replicates chicken breast pretty incredibly with no fishy element whatsoever.  This dish could be made with actual chicken or shrimp or with only the cauliflower – if you do not eat meat or seafood.

I added a ton of cauliflower, too, because 1) I like cauliflower and 2) it is a guiltless filler in a pasta dish that might get sorta rich (especially if you use heavy cream).

Finally, I used a store brand Dijon & was woefully aware it wasn’t Grey Poupon (or other higher end mustard).  In a mustard based sauce – it is kind of important to start with a quality mustard.

PRINT THIS RECIPE

Homemade Fusilli Pasta with Faux Chicken (Albacore) and Cauliflower in a Mustard Sauce

INGREDIENTS

For the pasta

400 grams (or 1 3/4 cups) flour

4 eggs

pinch nutmeg

1 tsp salt

OR – 1 lb dry pasta of your choice

For the mustard sauce

2 albacore steaks (or chicken breast or 1 lb shrimp)

1 small head cauliflower – leaves removed & cut in half

1 medium onion – diced

2 cloves of garlic – diced

1 TBS olive oil

1 TBS fresh thyme – chopped

1 cup stock (or water)

10 TBS high quality Dijon mustard

1 1/3 cups plain yogurt

S&P to taste

Fresh parsley – chopped for garnish

Tomatoes – diced for garnish

Parmesan for garnish

DIRECTIONS

For the pasta

Homemade pasta directions HERE

Or use dry pasta.

3-8a-13 (5)

3-8a-13 (4) 3-8a-13 (6) 3-8a-13 (8)

For the faux chicken & cauliflower in mustard sauce

Heat the olive oil in a large pan.  Cook the albacore several minutes on each side until cooked through.  Or – do the same for your real chicken or shrimp.

When cooked, remove from pan & cube it up.  You cannot really overcook this albacore & if you undercook it – it will cook through when you heat it in the sauce.  Chicken & shrimp CAN be overcooked – so be more careful with those – if you are using them.

3-9-13 (26) 3-9-13 (28) 3-9-13 (32)

Add onions & garlic to the pan (add more oil if you need to) & saute until the onions begin to brown.  Add the stock, mustard, yogurt & thyme and stir until smooth.  Add the cooked “meat” and S&P to taste.   Heat through.  Simmer it to thicken or add more water to thin it out.

3-9-13 (30)

3-9-13 (34)

Boil the water to cook the pasta.  Add the halved cauliflower & boil until tender.   Remove with a slotted spoon & cut into bite-sized pieces.

3-9-13 (47)

Cook your dry pasta according to directions adding the cooked cauliflower in the last minute to reheat.  Or – add the cooked cauliflower to the pot with homemade pasta & drain when done.

Top the pasta & cauliflower with the mustard sauce & garnish with diced tomato, parsley & Parmesan ((f using).  Add lots of fresh cracked pepper.

PRINT THIS RECIPE

3-9-13 (49)

Grilled Romaine & Avocado Salad with Green Goddess Dressing

3 Comments

All Photos © Christine Elise McCarthy 2013

To see images of my past posts & get links to the recipes – look on my Pinterest board – HERE.

~

Ok – this dressing is my amalgamation of several recipes I looked at.  I wanted to avoid using avocado in it so I could save that for grilling.  I wanted to lighten it up with yogurt so that it wouldn’t be so rich and I added a huge jalapeno in a final moment of inspiration.  The result? I was literally eating this stuff with a spoon.  It is just ridiculous.  I suspect this recipe is very forgiving & could stand a few ingredient substitutions if something in it doesn’t appeal to you or is hard for you to find.  A vegan mayo could be used for both the mayo & yogurt portions to make this vegan.  Beyond that – this is made simply by blending the ingredients in a food processor.

As to the grilled romaine & avocado – very easy if you have access to a grill.  This salad is delicious & sort of unusual & an easy way to impress your less than culinary guests.  My one issue was that I was starving last night (having only eaten two bowls of my Zero Calorie Pho all day) and I was impatient to eat it.  Therefore – I failed miserably in getting a pretty photo of this salad.  Please, do not be thrown by my poor documentation of the dish.  It really is delicious!

Image

PRINT THIS RECIPE

Grilled Romaine & Avocado Salad with Green Goddess Dressing

INGREDIENTS

For the grilled salad

Romaine lettuce, ends removed & halved

Avocados – peeled & halved

Tomatoes – diced (for garnish)

olive oil for grilling

For the dressing

1/4 cup plain yogurt

1 TBS tahini

1/2 cup mayonnaise

2 garlic clove

10 mint leaves

1 cup fresh cilantro

1/2 cup fresh parsley

1 TBS lemon juice

1 large jalapeno – seeded (optional but delicious!)

1 tsp pepper

1 TBS olive oil

salt to taste

Grated or shaved Parmesan

Image

Image

DIRECTIONS

Blend all the dressing ingredients in a food processor.

Heat your grill to high.  Brush olive oil on the cut side of the lettuce & avocado.  Grill for a minute or two.

Place a wedge of grilled lettuce & half an avocado on each plate.  Drizzle with dressing.  Garnish with chopped tomatoes & Parmesan.

PRINT THIS RECIPE

Image

ZERO CALORIE ZERO CARB Vegan – Vegetarian Shirataki Pho

13 Comments

All Other Photos © Christine Elise McCarthy 2013

To see images of my past posts & get links to the recipes – look on my Pinterest board – HERE.

vromans front vromans back

~

OK – I fibbed a bit in the title of this post.  This soup actually has less than 5 grams of carbohydrates & 85 calories.  Still – it is a huge 3 cup bowl of spicy, awesome soup that is as close to guilt free as a bunch of celery and way more satisfying.  Look at the shirataki packaging:

ImageImage

It is ridiculous to suggest (as the package states) that this is a 2.5 serving package.  I ate two of these in my bowl of soup – so – I guess I had 5 servings, hence the 5 grams of carbs.  Still – zero calories!!

The calories came from a 30 calorie vegetarian bouillon cube, a 5 calorie TBS of sriracha & a 30 calorie TBS of vegetarian hoisin.

These noodles are a kind of miracle but be forewarned – they are packaged in a stinky water that smells very funky & fishy.  I drained my noodles, washed them in water & let them soak in clean water while I went to the gym.  I came back & sniffed & found them still rather distasteful in the olfactory department.  I read that boiling them removes the aroma – so – I made this soup. It was done in the time it took the water to warm just to boiling & there were ZERO funkified elements in the completed pho.  Had there been any lingering fishiness, the sriracha & hoisin would have overpowered it.  But, sincerely, there was nothing yucky about the finished product.  I am going to have to learn to get very creative with these because I just cannot pass up the opportunity of 85 calorie meals that feel like they are pasta-based.

ZERO CALORIE ZERO CARB Vegetarian Shirataki Pho 

INGREDIENTS

2  7 oz packages of shirataki noodles (I prefer the tofu ones to the yam ones)

2 cups stock (I used water & a veggie bouillon cube)

1 TBS hoisin sauce

1 TBS sriracha sauce (or to taste)

fresh chopped cilantro

ImageImage

DIRECTIONS

Drain & rinse the shirataki in hot water.  Put all the ingredients in a pot & bring just to a boil – making sure your bouillon is dissolved.  Add more fresh cilantro.  Shove it in your face like a glutton & imagine your ass shrinking until it looks like this

Image

(image stolen from the internet)

Image