I Panini di Ambra in Hollywood, California

Leave a comment

All Photos © Christine Elise McCarthy 2013

To see images of my past posts & get links to the recipes – look on my Pinterest board – HERE.

~

Sunday, my boyfriend and I decided to try the new taco joynt in my hood, House of Tacos.  Sadly, it was closed.  Stunned by this development, we staggered down the street trying to think of what to do next.  We were on the block of Hollywood Blvd that is home to my favorite Thai restaurant – Torung – but Torung doesn’t open until 5pm.  Then I noticed a little hole in the wall that I had never seen before.

ImageImage

My boyfriend, Miles, can be a very finicky eater & is known to refuse food all day – if the things he is served fall short of his expectations.  I, on the other hand, will eat pretty much anything.  Miles refused to eat this steak from Chan Dara

Image

because he was EXPECTING it to be a tradition Chinese-style green pepper beef sorta thing – with steak strips & green bell pepper.  Mind you – Miles eats steak.  He loves steak.  But on this particular day, he wanted green pepper beef & this steak was not that.  So – it came home & was fed to the dogs & he skipped all food all day until dinner.

That is a lot of pressure for ME.  I like to feed people.  I like people to enjoy their meals in public.  I like to eat WITH someone.  With someone who is also eating.  Finding a place that will live up to Miles’ very specific tastes is sometimes a Herculean task.  <insert deep sigh>

So – I see PIZZA & sandwiches – meat sandwiches.  Miles eats those things.  We stood outside, gazing at the posted menu.  I expected Miles to respond positively quickly – but he did not.  He gets suspicious if he sees things like “speck panini” or if the cheeses listed are unfamiliar.  While I considered whether or not it was safe to pressure him, the two customers sitting inside the door over OUTRAGEOUS looking tiramisu & espressos beckoned to us.   “Come in!  The food is AMAZING!”  I suspected the food would be amazing.  Look at the menu:

ImageImage

but if Miles spots one errant or too exotic ingredient listed on a sandwich – the whole place starts looking hinky.

“Really!  They make their own bread here!   Come in,” the diners insisted.

I wanted to go in.  I peeked inside:

ImageImageImageImage

Such a cutie little spot!  Such a surprise on that very ugly block on Hollywood.  This is exactly the kind of place this area needs more of.  Quaint, cheerful & with imaginative & really fresh food.  While I weighed whether or not I wanted to insist we go in & risk another Miles hunger strike, the proprietress came from behind the counter to the threshold where we continued to conspicuously hover and, in a melodic Italian accent – also beckoned us in.  “They have pizza, Miles.  How dangerous could that be?”

“Best pizza in town,” a voice said.

At that point, I felt like a lame tourist afraid to step into a restaurant that wasn’t an international chain.  I pulled Miles inside.

Image

He does look a little worried, doesn’t he?  But, as it turned out – there was nothing to be nervous about.  My smoked salmon & goat cheese panini (to which I had them add some arugula) and Miles’ ham & mozzarella panini were as delicious as they were pretty – and they each came with a light little side salad for an extra .75 cents.

Image

Image

And Miles got this lemony dessert which put a big grin on his face.  He declared it delightful!

Image

And look at the little coffee planters on the tables:

Image

I Panini di Ambra is owned & run by an Italian husband & wife team.  They were warm & gracious and when our hostess noticed that Miles only ate half his sandwich (because he is a light eater) – she worried that he didn’t like it – and offered him any other sandwich on the menu instead.  Very sweet!

I don’t think you will find a fresher or more delicious panini anywhere in Los Angeles!  I can’t wait to go back & try the pizza!

http://ipaninidiambra.com/

Chipotle Lime Roasted Potatoes

1 Comment

All Photos © Christine Elise McCarthy 2013

To see images of my past posts & get links to the recipes – look on my Pinterest board – HERE.

~

If you can roast potatoes – you can manage this dish.  It is spicy & pretty & delicious!  It would be a nice Cinco de Mayo side dish but it is so yummy – I bet once you try it – you will put this in your regular rotation.

I used russet potatoes because I bought a bag of them the size of a body bag & I am trying to work my way through them.  Any potato would work here, though, even sweet potatoes.

Image

PRINT THIS RECIPE

Chipotle Lime Roasted Potatoes

INGREDIENTS

3 large russet potatoes (or any other potato- including sweet potatoes)

olive oil

S&P

3 chipotle peppers – minced

1 TBS adobo sauce (from the can of chipotles)

2 garlic cloves – minced

1 large lime – juice & zest

2 tsp olive oil

1/4 cup cilantro – chopped

ImageImage

DIRECTIONS

Wash the potatoes.  Peel if you want to.  I did not.  Cut them up into bite sized chunks.  Toss in some olive oil until all the potatoes are thoroughly coated & sprinkle with salt & pepper & roast in a 400 degree oven for about 45 minutes or until they are golden brown.  Mine could have used another 10-15 minutes to increase their color but I got impatient.

Image

While they roast, whisk the remaining ingredients together (chipotle, adobo, garlic, lime juice & zest, olive oil & cilantro).  When the potatoes are done, immediately toss them in the sauce being sure they are well coated & serve!   See?  EASY!

PRINT THIS RECIPE

ImageImage

Grilled Chipotle Chili Lime Shrimp Tostadas

4 Comments

All Photos © Christine Elise McCarthy 2013

To see images of my past posts & get links to the recipes – look on my Pinterest board – HERE.

~

Another Cinco de Mayo dinner option.  I like to plan parties that involve a room temperature or very self-service buffet kinda vibe.  Tacos seemed labor intensive & would require that keep heating up tortillas etc.  So – I thought – hmmmm.  If I make a little tostada bar & cheat by using the pre-made tostada shells (sorta ghetto but fuck it) – all I would need to to is make & chop everything in advance & then just set it all out there.

I’ve never made a tostada before.  Not difficult to make but how the fuck do you eat them?  All of a sudden, I envisioned people milling around a house, eating standing up & trying to put a 6 inch hard disc (piled high with spicy shrimp & veggies) in their mouths whole.  Or worse – trying to cut into the whole affair with no leverage.  On second thought, this might not be the best buffet idea but, for me last night, these guys were easy & delicious.  And messy.

What you put on your tostada is as open to your imagination as the contents of a taco or burrito.  I opted for these chipotle lime shrimp & a little of everything else I had laying around.  That included:

Spinach

Cabbage

Tomato

Avocado

Red onion

Cilantro

Scallions

Cotija cheese

Lime

Chipotle Mexican Crema (1/2 cup crema – or sour cream – blended with 3 chipotle peppers)

ImageImage

You can use pre-made tostadas or fry up some corn tortillas yourself.

The only cooking required here is the shrimp.  Once they have been in the marinade a bit – just grill them up & get ready to make a mess all over the place as you try to eat these sloppy fuckers.

Image

Image

PRINT THIS RECIPE

Grilled Chipotle Chili Lime Shrimp

INGREDIENTS

1 lb shrimp – peeled & cleaned

3 chipotle peppers in adobo – minced

1 TBS sambal oelek (or other chili paste)

1/2 tsp ground cumin

1 TBS brown sugar

1 large lime – juice & zest

1/4 cup cilantro – chopped

1 TBS olive oil

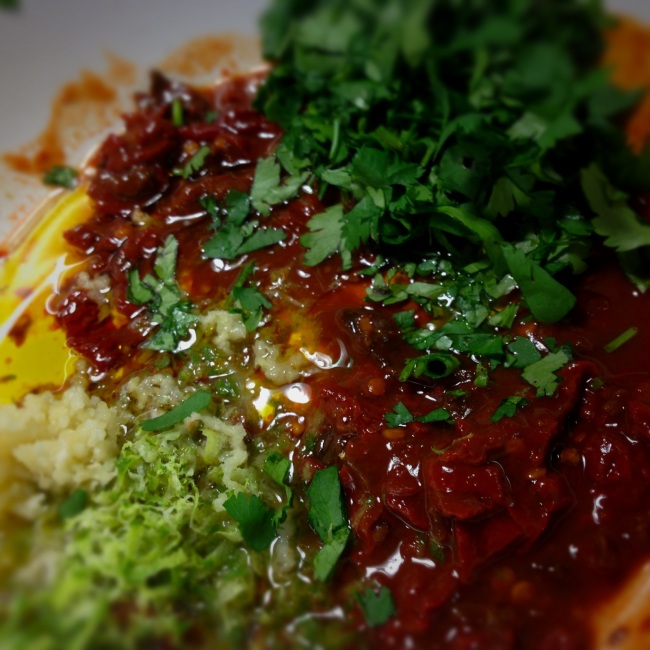
Blend all the non-seafood ingredients in a bowl & add the shrimp & coat them.  I then put this in a zip lock bag in the fridge for a few hours.  And shallow bowl serves this same purpose.

Image

Image

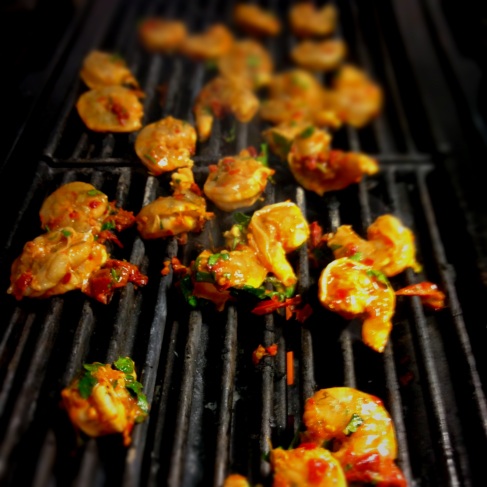
Cook your shrimp (on a grill or in an oiled pan) for 2-3 minutes each side.  Err on the side of a tad under-cooked because they will continue cooking once they are off the heat.

ImageImageImage

Tostadas

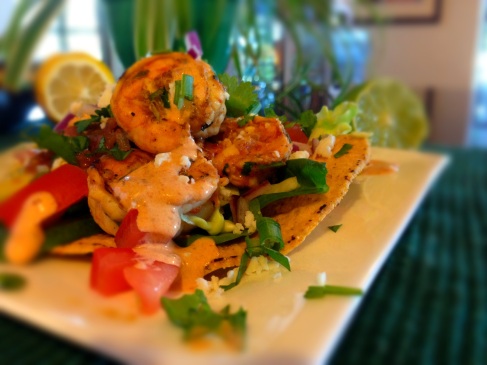
Simply pile your ingredients on top of a fried tostada shell in an sequence you prefer.  I loved my VERY spicy chipotle Mexican crema (1/2 cup crema blended with 3 chipotle peppers) but you can use sour cream.  Squeeze lots of fresh lime on your completed tostada.  And here are some topping ideas:

Spinach

Cabbage

Tomato

Avocado

Red onion

Cilantro

Scallions

Cotija cheese (or other grated cheese)

Lime

Chipotle Mexican Crema (1/2 cup crema – or sour cream – blended with 3 chipotle peppers)

PRINT THIS RECIPE

Image

Homemade Cracked Pepper Spaghetti with Broccoli & Goat Cheese Pesto

5 Comments

All Photos © Christine Elise McCarthy 2013

To see images of my past posts & get links to the recipes – look on my Pinterest board – HERE.

~

This is not a Cinco de Mayo recipe but several will be coming in the next few days.  This is just a yummy broccoli pasta recipe that is really easy – especially if you use dry spaghetti.

I am not going to post a formal recipe here for the spaghetti except to say that the ingredients are: 600 grams flour, six eggs, a tsp salt & 2 TBS fresh cracked pepper.  That works out to what they call 6 servings.  I put all those things in my bread machine & let that thing work its magic.  It produced this tacky ball:

Image

which I then put through this process:

Image

to get this result:

Image

Homemade pasta is a glorious thing!  Comprehensive instructions on making pasta dough is HERE in this post.  It can be done without any tools beyond a rolling pin & a knife – but that seems like a lot of work.

This pesto doesn’t have any nuts.  It is as easy as any pesto & just as yummy.

Also – I bought red basil at the AMAZING store – Super King – that I blogged about yesterday & that is the dark leafy stuff you might make out in the photos.  Regular basil is fine.

PRINT THIS RECIPE

Broccoli & Goat Cheese Pesto

INGREDIENTS

2 small – medium heads broccoli

garlic cloves (I used 10 – but that might be too hardcore for more tender palates)

1/2 cup fresh basil

5 oz goat cheese

1/2 cup olive oil

juice & zest of 1/2 lemon

S&P to taste

Lemon wedges as garnish

Grated Parmesan as garnish

Parsley and/or extra basil, chopped as garnish

ImageImageImage

DIRECTIONS

Cut the florets off of one head of cauliflower & quick steam them for 3-5 minutes in a covered pan with very shallow (1/2 inch) boiling water.  Drain & rinse under cold water.  Set aside.

Take the stems from the first head & all of the second & chop them up.  Blend in a food processor with goat cheese, garlic, basil, lemon juice & zest and S&P – adding the olive oil slowly.  You might not need it all – you might need more – depending on the quantity of broccoli you have.  It also might need to be scraped down the sides of the work bowl a few times.   If it is still too thick and you want to limit the olive oil used – just add a bit of water.

Cook your pasta.  While it cooks, heat a TBS olive oil in a pan & heat up your pesto.  Add the broccoli florets you set aside.  Heat it through but do not cook it too long so that your florets do not get soggy.

When the pasta is done, drain it & toss it with the pesto.  Garnish with grated Parmesan, chopped parsley & a lemon wedge.

PRINT THIS RECIPE

ImageImage

Pink Grapefruit Margarita

Leave a comment

All Photos © Christine Elise McCarthy 2013

To see images of my past posts & get links to the recipes – look on my Pinterest board – HERE.

~

OK, kiddies!  Cinco de Mayo is right around the corner!  I am going to start posting some stuff you might want to consider if you are throwing a party.  This one is eye-catching so I thought I’d start here.

Pretty basic stuff.  You can either use fresh squeezed pink grapefruit juice (preferred) or bottled Ruby Red (easier).  Fresh is way better but sometimes it just isn’t practical.  This can be served blended or over rocks (as I did it) and with either a salt or a sugar rim.  I went sugar.  A sprig of fresh mint would look pretty, too.  I forgot that part.

Pink Grapefruit Margarita

If you are putting salt or sugar on your rim, put the salt/sugar on a plate, wet the rim with a wedge of lime, dredge the rim through the stuff & set aside to dry as you make your cocktail.

INGREDIENTS

2.5 ounces white tequila

1 ounce triple sec

5-6 ounces pink grapefruit juice

Juice of 1/2 lime

Salt & lime for garnish

Salt or Sugar to rim your glass

DIRECTIONS

Shake up the tequila, triple sec, grapefruit juice & lime juice over ice in a shaker or blend it up in a blender with a cup of ice.   Pour into your glass, add a pinch of salt to the cocktail & garnish with lime slices.

Image

Image

Super King Grocery Store in Los Angeles

30 Comments

All Photos © Christine Elise McCarthy 2013

To see images of my past posts & get links to the recipes – look on my Pinterest board – HERE.

~

My friend Bobbe emailed me today & said that there was a grocery store in Glassell Park – a neighborhood on the east side of Los Angeles – that I simply HAD to experience to believe.  She warned that the parking lot would be nuts but promised I would “Die!  I mean DIE!” when I went to this joint.  She mentioned hard to find fresh herbs (red basil) for prices like .69 cents a bunch.  ‘Nuff said.

An hour later – I fucking went!

Image

I navigated the parking lot fairly well (10:30am mid-week) & approached the entrance.  It was like a farmer’s market out front with tons of produce piled up everywhere for crazy low prices!  Check this out.

Image

I was immediately overwhelmed & my heart started racing.  I cannot explain why.  There was just a general sense of frenzy in the air – like at a Filene’s Basement or Fred Segal blow-out sale.  I blew off everything outside so that I could begin the more intimate exploration of the interior of Super King.

Super King, it seems, caters to a lot of Eastern Europian & Middle Eastern folks.  Hispanics, too, but the foods there that they had in conspicuous quantity seemed Mediterranean or Eastern European or Middle Eastern.  Look!  Raw almonds!  REALLY RAW!

Image

And an entire roasted nut bar!

Image

I’ve never seen fresh grape leaves at a supermarket – but Super King had’m!

Image

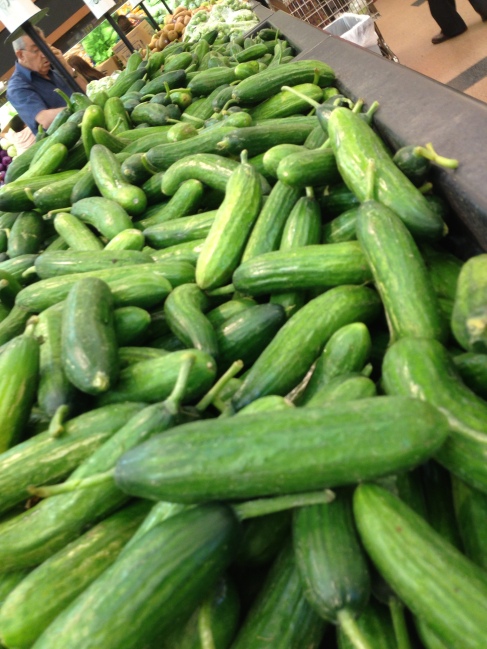
Look at all these pickling cucumbers

Image

The produce section was the most congested of the entire store and that is saying a lot because it is MASSIVE.

Image

I notice it doesn’t look very hectic in that photo but it was.  Once you head in & to the left – people are all zombie walking & leaving carts in the way & grabbing at vegetables.  I was most impressed by the fresh herbs which really were very varied & abundant & CHEAP!

ImageImage

Five bunches of parsley or cilantro?  99 cents.  For FIVE.  Mint – 3 for .99.   I pay $4 for an anemic little bunch at Gelson’s.  And look at the cost of kale.

Image

Several varieties and practically free.

Also impressive was the VAST selection and not just of standards.  They had the sometimes hard to find celery root & kohlrabi & just everything imaginable.  They even had these golden beets (that would cost about $5 each at Gelson’s – if Gelson’s ever had them).

Image

At Super King?  They were .69 cents a pound!  I got three huge ones for $1.81!!!

When I was taking the panoramic shots, this guy stopped me.

Image

In the blue with the vest.  See how suspicious he looks?  He stopped me & asked what I was doing.  I explained that I was amazed at the store & was just taking some photos.

“No photos!” he spat at me, like the Soup Nazi.  No photos?  WTF?  Super King isn’t exactly on the Homeland Security Department’s list of high risk targets.  What did he think I was doing?  Casing the place?

“I have a blog,” I explained.  “I want to do a story about this place.”

“No photos.  Not allowed!” he said, sounding less convinced himself that this was actually a rule.  “The competition…”

Competition?  I thought he meant there was some kind of competition involving blogs & supermarkets.  I looked at him stupidly.

“Our competitors.  We do not want them seeing our prices.”

Competitors?  Prices?  First of all, competitors can just walk in the freakin’ door, just like I did, and see the prices.  And B, their prices are what makes Super King so great.  And they have a fucking web site – HERE – telling everyone about their prices.  But, for some reason, the silver fox Armenian in the sweater vest didn’t like me taking pictures.  So – I said, “Just this ONE, ok?”  And I took the shot that included him in it.  From there on out, I felt like a terrorist every time I took my camera out.  Which I did – many more times – but mostly in the aisles that sold non-perishables.  Those aisles were ghost towns. It was the produce & meat sections that had throngs of pushy, desperate people cockblocking you at every turn.  At any rate – between my accelerated pulse & the furtive nature of my photography – the photos in the blog are scant & lame.  Apologies.

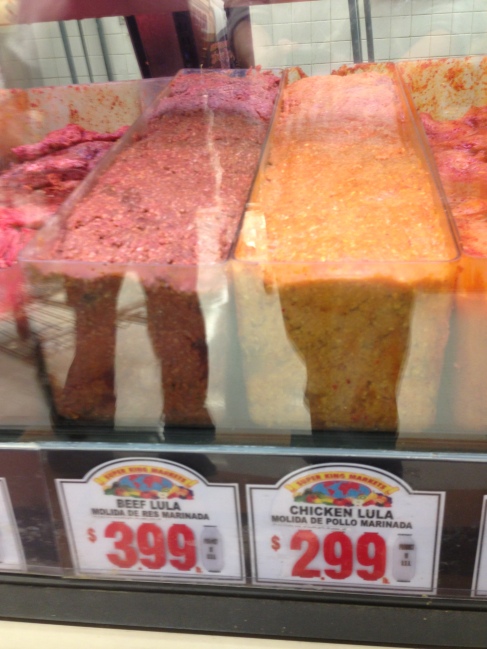
OK – let’s talk about the meat department.  I took a number, number 92, and then looked in the mile of cases.  It seemed every cut of beef was near $4 a pound and pork was closer to $2.  Isn’t that cheap?  I don’t know.  I never buy meat.  They had marinated meats & regular meats & prepared meats like these lulas.

Image

I guess lula is what you use to make kabobs.

ImageImageImageImage

On the shelf beneath the meat cases there were about 76 million brands of lavash.

Seafood was cheap, too, but didn’t look super awesome & didn’t indicate whether or not it was farmed.  Still – I bought a pound of shell-on shrimp for $7.99.  I opted to eschew the head-on variety.  Oof.

Image

Here is another very special thing about Super King.  SPICES.  A wall of spices.  Ethnic groceries are always the best source of cheap spices & Super King did not disappoint.

ImageImageImage

Also – if 40 kinds of rice is too limited of a selection for you – look no further.

Image

Like a big selection of dry pasta, too?

Image

And where else can you spot a SELECTION of ghees??  (Ghee is clarified butter.  I use it making Indian food.)

Image

The olive oil aisle was over the top, too, as was the cheese aisle – especially as regards feta cheese.

ImageImageImage

They also sell liquor at Super King.  I had just come from Costco where I priced a bottle of tequila for May 5.  Unless I am mistaken – the bottle I looked at (in the bright green box) was $69.99 at Costco – but only $36.99 at Super King.  But – sometimes the signs at Costco can get confusing.  Maybe I misread them.

4-25-13 (34)

At any rate – I am absolutely IN LOVE with Super King.  Apparently, there are several locations so go to their site & see if there is one near you.  A little extra drive is worth the effort.  I promise!

Whole Wheat Spaghetti with Garbanzo Garlic Sauce & Tomatoes

Leave a comment

All Photos © Christine Elise McCarthy 2013

To see images of my past posts & get links to the recipes – look on my Pinterest board – HERE.

~

This is so delicious & so easy – I cannot recommend highly enough that you give it a try.  I used a LOT of crushed red pepper & lots of garlic & the dish was genuinely spicy.  You might want to reduce the quantities of these to suit your own taste.  Also – I made this – as usual – from whatever ingredients I had handy which included half a lemon & about a cup of some kind of peppercorn Pecorino or something that looked like this (image pilfered off Google):

Image

It was a bit creamier than a Pecorino and it was really pungent.  It went very well in this recipe but a Parmesan or feta would work, too.  I am just gonna go ahead & list the recipe with Parmesan but you could use a blend & experiment, if you like.

Image

PRINT THIS RECIPE

Whole Wheat Spaghetti with Garbanzo Garlic Sauce & Tomatoes

INGREDIENTS

36 oz vegetable (or other) stock

2 tomatoes – diced

8 garlic cloves – minced & divided (or less – to taste)

1 29oz can Garbanzo beans (chickpeas) – drained

3 TBS olive oil

1 TBS crushed red pepper (or less – to taste)

1 cup grated Parmesan (or feta or other richly flavored cheese)

3 TBS lemon juice

3 TBS parsley – chopped

1 TBS basil – chopped

1 lb whole wheat pasta

S&P to taste

More grated Parmesan for garnish

More chopped parsley and/or basil as garnish

Image

DIRECTIONS

Cook the pasta as per the directions.

Heat the olive oil in a large saute pan.  Add 6 of the minced garlic cloves, crushed red pepper & saute a minute or two.  Set a handful of garbanzos aside for garnish later.  Add the remaining garbanzo beans & the stock.  Bring to a boil & then simmer for about 15 minutes.  Then, CAREFULLY, puree the garbanzos in a blender or deep food processor.

ImageImageImage

When the pasta is done, drain it & return it to the pan you cooked it in.  Add the pureed garbanzos, the remaining two minced garlic cloves, the chopped tomatoes, lemon juice, cheese & parsley to the pasta & stir to blend.  Add S&P to taste.  Serve with extra grated cheese & chopped parsley or basil and a few whole garbanzos.  Devour.

PRINT THIS RECIPE

Image

Grilled Sangria Artichoke with Balsamic Dressing

1 Comment


All Photos © Christine Elise McCarthy 2013

To see images of my past posts & get links to the recipes – look on my Pinterest board – HERE.

~

I have posted a grilled artichoke recipe before HERE but this version was so delicious – it warranted its own post.  I found these beautiful Sangria artichokes at the supermarket & couldn’t resist them.

Image

They are green and maroon & huge.  The sign at the store said they had “more meat & a bigger heart.”  What lady could walk away from that?  🙂

As it turns out, they really do have more meat, a bigger heart & a very tiny choke (the hairy part).  <insert second sexually charged joke here>

So easy to make & delicious & healthy & bizarrely filling.  I had 1 1/2 last night for dinner & I was stuffed.   I went and bought three more today.  These are FAR superior to the run of the mill, every day green artichokes.

Image

PRINT THIS RECIPE

Grilled Sangria Artichoke with Balsamic Dressing

Ingredients

Sangria artichokes

Olive oil

Garlic

Parmesan

Parsley

Easy Homemade Balsamic Vinaigrette Salad Dressing

INGREDIENTS

1/4 cup balsamic vinegar

3/4 cup olive oil

2 garlic cloves – minced

2 TBS honey

1 TBS Dijon mustard

1/2 tsp salt

1/2 tsp freshly ground pepper

DIRECTIONS

Whisk together.

Image

DIRECTIONS

Bring 2-3 inches of water to a boil in a pot fitted with a steamer insert.  Trim the tiny, loose leaves from around the stem.  Place the artichokes in the steamer – stems UP.  If you have no steamer – just place the artichokes in the pan stems down.  Cover the pan & steam for about 30 minutes or until a knife slides easily into the stem.

ImageImageImageImage

Cool & then cut them in half.  Pour a little olive oil on a plate & put some minced garlic in it.  Coat the artichokes in the garlic oil & then simply grill – on a grill or a grill pan or even in a frying pan – for about two minutes.  Flip for another two.  Serve drizzled with balsamic dressing, grated Parmesan & chopped parsley.

PRINT THIS RECIPE

ImageImageImage

Red Kidney Bean Curry or Rajma

Leave a comment

All Photos © Christine Elise McCarthy 2013

To see images of my past posts & get links to the recipes – look on my Pinterest board – HERE.

~

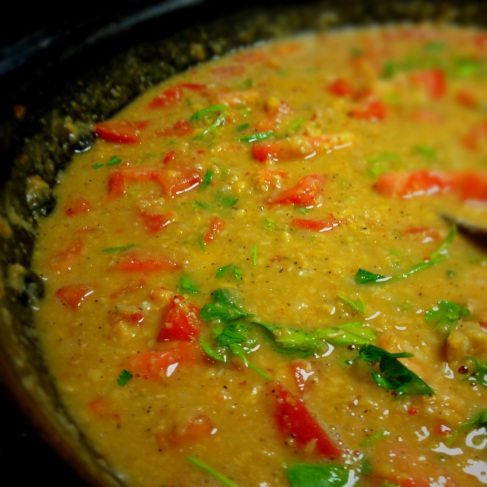
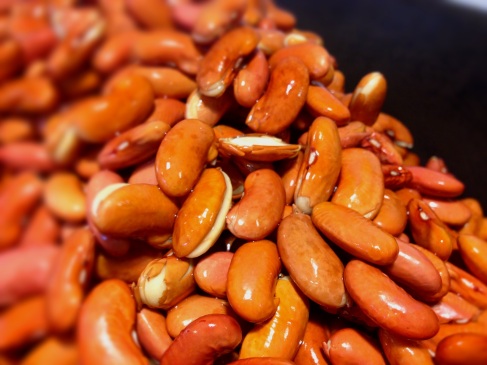
I had a half bag of dry red kidney beans in my cabinet & spontaneously decided to soak them overnight.  It produced 8 cups of soaked beans so this is a large quantity style recipe.  It is simple & delicious & pretty healthy.   And can be vegan.  If you make this giant quantity – freeze some up for future use on a lazy night.  Serve with some fluffy basmati rice & you have an easy Indian dinner.

As an aside – I had my red food dye out for my failed Tandoori Cauliflower and added a few drops to my Rajma – to boost the color.

Please pardon this deluge of Indian recipes.  I recently watched an incredible documentary called Blood Brother & it just got me craving Indian food.  If you get an opportunity – you MUST see this film.  It is devastating & inspiring at the same time.

PRINT THIS RECIPE

Red Kidney Bean Curry or Rajma

INGREDIENTS

8 cups red kidney beans – AFTER pre-soaking or quick soaking (method below) – or canned beans, drained & rinsed

I 6oz can tomato paste

2 tomatoes – diced – divided into two portions

3 jalapeno peppers – seeded

3 serrano peppers – seeded

2 onions

10 garlic cloves

1/2 tsp garam masala

3 TBS ground coriander

2 TBS ground cumin

1 tsp turmeric

3 TBS ginger paste

6 TBS ghee or olive oil

Cilantro – diced fir garnish

Paprika as garnish

Salt to taste

Red food coloring (optional)

ImageImageImage

DIRECTIONS

Soak your beans (probably about 5 cups dry) overnight or quick soak them.

Quick Soak

“Dried beans should be soaked in cold water overnight to ensure even cooking. But what if you didn’t plan ahead? Try this quick-soak method:

 Rinse beans in cold water. Put them in a large pot and cover with about 3 inches of cold water. Bring almost to a boil (small bubbles appear around the edges of the pot), cover, and remove from heat. Let sit for 1 hour. Drain. The beans will be “soaked” and ready to cook.”

Puree ONE tomato & the tomato paste & 1 TBS water in a food processor.  Set aside.

Mince all the seeded peppers in the food processor with the ginger paste & the garlic.  Set aside.

Mince the onions in your food processor.

Image

Heat the ghee or olive oil in a large stock pot.  Add the onions & saute until they soften.

Image

Add the  minced garlic & ginger paste & pepper mix.  Saute a few minutes to blend then add the garam masala, coriander, cumin & turmeric.  Blend & then mix in the tomato paste blend.  Heat to just bubbling & reduce heat to low & saute, stirring often, for about 30 minutes.  Add the other diced tomato & the beans & 6 cups of water if using dried beans.  If using canned – start with two cups of water & see how that goes.  Add more if you need it – or cook it off if the curry is too thin.

ImageImage

I simmered my beans for a good two hours, covered & on low heat.  This isn’t required with canned beans.  Check your beans for your desired done-ness.   Add water if they are too thick. Increase heat & cook off water if they are too thin.  Add salt to taste.  Add red food coloring, if using – and blend.  Serve with rice & chopped cilantro & a sprinkle of paprika.

PRINT THIS RECIPE

Image

Tandoori Cauliflower with Mint Chutney & Cucumber Raita

2 Comments

All Photos © Christine Elise McCarthy 2013

To see images of my past posts & get links to the recipes – look on my Pinterest board – HERE.

~

Ok – I am posting this as a sweeping gesture of honesty.  If you follow this blog, you know I am in the throes of a passionate affair with cauliflower.   I have used it to mock Buffalo Chicken and  mashed potatoes & risotto and many other ways.  Check some out HERE.

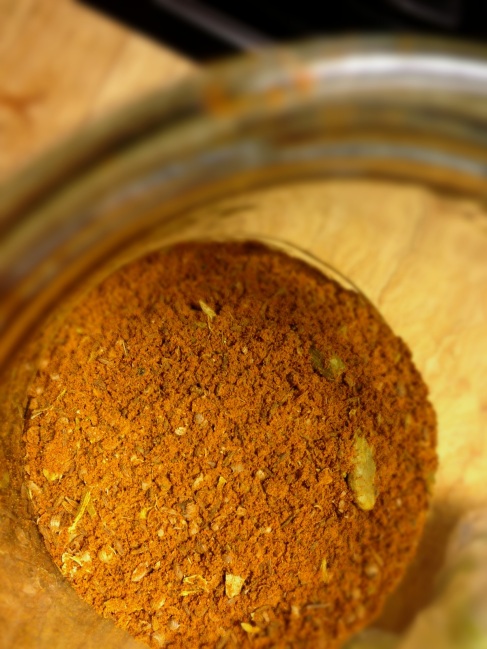
Tandoori was the next frontier of my cauliflower exploration.  I made the tandoori spice from scratch

ImageImageImageImage

I marinated the cauliflower florets for about 6 hours.

ImageImage

I used a lot of red food coloring to mock that brilliant tandoori crimson.  I roasted & then broiled the florets until they had blackened bits.

ImageImage

I also made the mint chutney & cucumber raita from scratch.  The tandoori smelled SO GOOD roasting in my oven, it made me salivate.  Smelled good!  Looked GOOD!  When the cauliflower was done, I sat down with my little bowls of condiments & my tandoori cauliflower & eagerly popped a hot floret into my mouth.  It was then that the first wave of crushing disappointment hit me.  The floret tasted like someone had just poured a tablespoon of cumin into my mouth.  YUCK.  Secondly, the raw cauliflower hadn’t sufficiently tendered during the 25 minutes of roasting & subsequent broiling & was still too crunchy.  I am not sure how it all went so wrong.  Maybe I need to invest in a spice grinder.  Maybe my cardamom & coriander seeds were not properly pulverized by the mortal & pestle treatment I had given them.  The florets were definitely in more than enough moisture (yogurt) but they were still oddly dry & just WAY too heavily spiced.

I am not giving up on this idea, though.  Maybe I will buy a jarred tandoori paste & see what that turns out like.

My raita – on the other hand – turned out pretty good.  The mint chutney was OK, too, but not the best I’ve ever had.  The recipe still needs tweaking.  But – if you are curious – I will post the recipes for the condiments here now.

Image

Mint Chutney

1 cup mint

1 bunch cilantro

2 TBS yogurt

1 tsp ground cumin

4 serrano peppers (this makes a VERY hot chutney – so reduce this if you desire) – seeded

1 TBS ginger paste or 1 inch chunk fresh ginger

Juice of 1/2 lemon

Salt to taste

ImageImage

DIRECTIONS

Puree in a food processor & salt to taste.

Image

Cucumber Raita

1 1/2 cup yogurt

1/2 cup water

1/2 – 1 cucumber – peeled & grated

1/2 sweet onion

1 jalapeno – seeded

2 serrano – seeded

salt to taste

ImageImageImage

DIRECTIONS

Peel & grate the cucumber.  Reserve some of the rated cucumber to the side & then puree the rest with all the other ingredients.  Salt to taste.  Add the reserved grated cucumber.

4-22-13 (47)

Grilled Vegetable Salad with Homemade Balsamic Vinaigrette

Leave a comment

All Photos © Christine Elise McCarthy 2013

To see images of my past posts & get links to the recipes – look on my Pinterest board – HERE.

~

This salad is insanely delicious.  It can get a bit labor intensive to grill all the ingredients so – I recommend that you grill a lot & keep it in the fridge for salads over a few days.  The ingredients are really up to you.  You can add other veggies or lose the ones I used that you do not care for.  I used romaine lettuce.  You can use any lettuce or combo that you prefer.  One thing I suggest it that you be careful not to overdress the salad.  The balsamic outlined here is light & delicious but you can use any other of your favorite dressings.  You could also add grilled shrimp or chicken or salmon or even canned tuna.  Hard boiled eggs or some olives could be nice, too.  Let your imagination carry you away.  I used this Italian dressing to grill my vegetables but you can just use olive oil if you want.

Image

Here are the veggies I grilled:

Image

PRINT THIS RECIPE

Grilled Vegetable Salad

INGREDIENTS

Olive oil (or some oil-based dressing – like Italian)

Lettuce of your choice

Tomatoes – chopped

Avocado – sliced or chopped

Eggplant – sliced

Zucchini – sliced

Yellow squash – sliced

Red, yellow and/or orange bell peppers – halved & seeded

Mushrooms

Carrots

Red onion – sliced

Red potatoes – boiled until tender & halved

Cheese of your choice – I used fresh mozzarella (feta would be very nice, too)

DIRECTIONS

Grill all your ingredients except the lettuce, avocado & tomato & cheese.  Remove corn husk & cut corn off the cob.  Chop the cooled vegetables & assemble your salad & dress lightly with balsamic vinaigrette (recipe below).

ImageImageImageImageImageImageImage

ImageImage

Easy Homemade Balsamic Vinaigrette Salad Dressing

INGREDIENTS

1/4 cup balsamic vinegar

3/4 cup olive oil

2 garlic cloves – minced

2 TBS honey

1 TBS Dijon mustard

1/2 tsp salt

1/2 tsp freshly ground pepper

DIRECTIONS

Whisk together.

PRINT THIS RECIPE

Image

4-20-13 (59)

Easy Homemade Balsamic Vinaigrette Salad Dressing

Leave a comment

All Photos © Christine Elise McCarthy 2013

To see images of my past posts & get links to the recipes – look on my Pinterest board – HERE.

~


I am not a huge fan of balsamic vinegar.  I think it got bizarrely trendy at one point, like sun-dried tomatoes and, like sun-dried tomatoes, it has a potentially really overpowering flavor and, for a while, it seemed folks were dumping it on everything. Balsamic vinaigrette is often too acidic or sharp or thick or just unacceptable.  This dressing is not like that! It is subtle & as easy as can be & is a complement to your salad, not a dominating ingredient.  Key to the success of the dressing is the quality of our olive oil & – obviously – the quality of your balsamic.  Do not use some old, gummy bottle you have had for 5 years.  Try to buy the best you can.

One thing I love about balsamic – it is often bottled & labeled as beautifully as scotches & whiskeys.

Image

See?  Like pretty brown liquor bottles:

Image

Image

Anyway – all you need to do is whisk the ingredients together.  Period.  Give it a try!

Easy Homemade Balsamic Vinaigrette Salad Dressing

INGREDIENTS

1/4 cup balsamic vinegar

3/4 cup olive oil

2 garlic cloves – minced

2 TBS honey

1 TBS Dijon mustard

1/2 tsp salt

1/2 tsp freshly ground pepper

DIRECTIONS

Whisk together.

4-20-13 (32)

Potato Masala with Forbidden Black Rice (part 3 of a 3 curry meal)

Leave a comment

All Photos © Christine Elise McCarthy 2013

To see images of my past posts & get links to the recipes – look on my Pinterest board – HERE.

~

This is the third & final installment in my curry trilogy.  Please read the first one – my

Image

Thai Green Curry Coconut Shrimp

as it boasts both a great recipe and also a funny story about being here:

Image

The second curry is my

Image

Indian Yellow Curry Cauliflower with Coconut Milk

These three curries are all very simple & make a very pretty presentation when plated together.

4-19-13 (81)

PRINT THIS RECIPE

Potato Masala

INGREDIENTS

2 large potatoes (or 3 cups) – peeled & cut into chunks

1 large onion

2 medium tomatoes

1 cup peas

1 TBS red curry (or other curry powder)

2 tsp chili powder

4 garlic cloves

1 TBS prepared ginger paste (or chopped fresh ginger)

1 tsp ground cumin

2 tsp ground coriander

2 TBS garam masala (or make your own – recipe HERE)

6 dry curry leaves (or fresh) – optional (they can be hard to find)

1/2 cup chopped cilantro – plus more for garnish

olive oil

S&P to taste

Image

DIRECTIONS

Put the chopped potatoes in a pot with enough water just to cover them.  Boil until they are almost tender. Remove from heat and set aside – retaining the potato water.

In a food processor, mince the onions with the garlic cloves & ginger paste.  Set aside.  Then mince the tomatoes & set aside.

ImageImage

Heat 1 TBS olive oil in a large saute pan.  Add the onions with the garlic & ginger and the curry leaves (if using) and fry over medium heat until the onions become a light golden color.  Add tomatoes, chili powder, red curry powder, & blend.  Add cumin & coriander, garam masala & saute until all the flavors have a chance to meld.

ImageImage

Add the boiled potatoes & as much potato water as is needed to get the gravy to a consistency you like.  Add the peas.  Add tap water if you think you need it.  Add salt to taste.  Heat through.  Remove the dry curry leaves (if you can see them) as you would do with bay leaves.

Serve with rice & cilantro as garnish.

4-19-13 (70)


Forbidden Black Rice

Just use two parts water to one part rice.  For example, bring 4 cups of water to a boil.  Add 2 cups rice & return to a boil.  Reduce heat, wrap a kitchen towel around the pot lid & cover the pan.  Be CAREFUL that your kitchen towel is nowhere near the flame.  You don’t HAVE to take this step but it is supposed to produce a fluffier rice.  Let the rice sit unmolested on lowest heat for about 45 minutes.  Check the texture.  If it isn’t soft enough yet, let it sit another 15 minutes.

Or just use a rice cooker.

PRINT THIS RECIPE

Image

Indian Yellow Curry Cauliflower with Coconut Milk & Forbidden Black Rice (part 2 of a 3 curry meal)

2 Comments

All Photos © Christine Elise McCarthy 2013

To see images of my past posts & get links to the recipes – look on my Pinterest board – HERE.

vromans front

vromans back


~

This is the second of three curry recipes I will be posting today.  The first is my Thai Green Curry Coconut Shrimp.  Be sure to read that blog post as it also outlines a pretty embarrassing experience here:

Image

Image

PRINT THIS RECIPE

Indian Yellow Curry Cauliflower with Coconut Milk

INGREDIENTS

1 head of cauliflower – cut into florets

6 tbs oil

2 TBS cumin seeds

Spice mix

2 TBS coriander seeds

2 TBS cumin seeds

Ginger, garlic & serrano paste

1 tsp salt

10 cloves garlic

2 inch hunk of fresh ginger – peeled & diced

2 serrano peppers – seeded

Sauce

1 onion – minced

1 cup peas

1 tsp ground turmeric

2 14oz cans (or about 4 cups) coconut milk (lite, if you prefer)

4 ripe tomatoes

1 cup yogurt (optional)

1 lime, juiced

4 tsp salt (or to taste)

1 cup chopped cilantro plus more for garnish

DIRECTIONS

Cut your cauliflower into florets.  Set aside

Image

Dry roast (in a dry frying pan) the 2 TBS each cumin & coriander seeds.  They should become fragrant in a few minutes.  Definitely agitate the pan to avoid burning the spices.  When they are just browning, remove them & transfer to a mortar & pestle & grind them into a fine powder.  Set aside.

Image

In a food processor, puree the salt, garlic, ginger & serranos.  Set aside.

Puree the tomatoes in your food processor.  Set aside.

Image

Mince the onion in your food processor.  Set aside.

Image

In a LARGE saute pan, heat the 6 TBS of olive oil & toss the cauliflower florets n it with 1 TBS of the whole cumin seeds.  Stir occasionally & fry until the florets begin to brown in sections.  Remove from heat & set aside.

4-19-13 (43)

In that same pan,  add a bit more oil & the other TBS of whole cumin seeds.  Once they start popping, add the minced onion.  Fry for about 10 minutes of until they just start to turn golden.

4-19-13 (45)

Add the ginger, garlic & serrano paste & stir.  After a minute or two, add the dry, ground spice mix, coconut milk, tomatoes & cauliflower & peas & stir to combine. Simmer for about 20 minutes or until your cauliflower is tender.  Stir in the yogurt (if using), the juice of the lime and a cup of chopped cilantro.  Taste & add salt if you think it needs it.   Heat through & serve over rice with more cilantro as garnish.

Image

ImageImage

Forbidden Black Rice

Just use two parts water to one part rice.  For example, bring 4 cups of water to a boil.  Add 2 cups rice & return to a boil.  Reduce heat, wrap a kitchen towel around the pot lid & cover the pan.  Be CAREFUL that your kitchen towel is nowhere near the flame.  You don’t HAVE to take this step but it is supposed to produce a fluffier rice.  Let the rice sit unmolested on lowest heat for about 45 minutes.  Check the texture.  If it isn’t soft enough yet, let it sit another 15 minutes.

Or just use a rice cooker.

PRINT THIS RECIPE

Image

Image

Thai Green Curry Coconut Shrimp with Forbidden Black Rice & the GYN (part 1 of 3 a three curry meal)

7 Comments

All Photos © Christine Elise McCarthy 2013

To see images of my past posts & get links to the recipes – look on my Pinterest board – HERE.


vromans front

vromans back

~


Image

Image

I want to vent a little about going to the gynecologist.  Nobody enjoys going to the gyn.  Nobody.  Look at this Cronenberg contraption.

There is something embarrasing about the pot holders on the stirrups.  I don’t know why, especially as they should be the least of my worries as I am asked to “scoot down,” repeatedly, by my impatient doctor – asked to scoot down until I fear I am going to catch my socks on my earrings.  But for some reason, they bother me.

What bothers me more is the fucking paper modesty provisions.  And when I am paying a virtual stranger $220 to fondle my ovaries, manhandle my boobs with her icy hands & sneakily slip a finger up my ass, I’d like the courtesy of some cotton-made products to wrap myself in as she skulks out of the room & I slump, weeping in humiliation, onto the floor.  Look at that blue thing.  It is like a fucking matador vest.  How is a paper SHRUG supposed to make me feel like I am being provided any cover at all?  And the blanket for me to wrap around my fat ass as I sit waiting for this medical rape is also made of paper.  I was so nervous in there waiting for her that I began to sweat.  Yeah – sweat.  Which caused the paper blankie to begin to disintegrate & stick to me in patches – like toilet paper on shaving cuts.  I was so exposed & humiliated &  apparently not even worth the expense of a hospital gown – I felt the need to stage a minor protest and keep my socks on during the exam.

Image

Take THAT, Dr. Mengele!

Before the sweating commenced, I tried to make the best of my paper fashions & initiated a little modeling session.

Image

Don’t judge me for going there without make-up.  She doesn’t deserve the effort.   I get a cotton gown that reaches below my belly button during the ordeal – then we can talk.   Until then, she gets to see my every zit & crack & wrinkle on my face – as well as those on my vulva.

I sent a picture to my mother during my wait & she noted that my earrings matched my paper bippy top.  It inspired me to try to sex it up.

Image

As you can see – I failed.  There is only so far you can take a paper outfit.

Then the doctor came in and what did she say?   “Oh, look!  Your earrings match your top!”

She is lucky I didn’t try to force a silent-but-deadly out on her while she flipped around with the cranks on the stainless steel speculum.   You know, those things come in plastic, too.  Doesn’t plastic seem more humane?   Warmer?  Less noisy?  My paper garments felt even more ridiculous in a room with a woman armed with a metal penetration device.   I then wished  I hadn’t so meticulously wiped the exterior of my pee pee sample cup with the wet nap they provided.

Anyway – after the exam & the lecture about fucking calcium supplements & the third degree about potential symptoms of menopause – they fleeced me for the $220 I mentioned earlier & then added insult to injury by refusing to validate my parking.  $10 later, I sped from the scene of these crimes, secure in my garments of man-made fibers.

So – now to the curries.  I made three last night.  I will post each recipe individually.  They are all delicious & each is quite different from the others.

Image

For this recipe, I used a can of green curry paste that I bought at Bangluck Market.  They cost about .79 cents or something.  If you have no Asian market nearby, you can buy this stuff on Amazon – HERE.  This recipe is as easy as dumping everything into a pan & heating it – so I recommend these curry pastes very highly.

Black rice can also be purchased online – if you cannot find it locally.  Black rice is considered a superfood by some – as you can see HERE.

“Brown rice is good for you, but black rice is even better. That’s because the bran hull contains significantly higher amounts of vitamin E, which bolsters the immune system and protects cells from free radical damage. In fact, black rice contains more anthocyanin antioxidants than blueberries, according to a study from the Louisiana State University Agricultural Center.”

I made mine in a rice maker but it can be made stove top, as well.

ImageImage

PRINT THIS RECIPE

Forbidden Black Rice

Just use two parts water to one part rice.  For example, bring 4 cups of water to a boil.  Add 2 cups rice & return to a boil.  Reduce heat, wrap a kitchen towel around the pot lid & cover the pan.  Be CAREFUL that your kitchen towel is nowhere near the flame.  You don’t HAVE to take this step but it is supposed to produce a fluffier rice.  Let the rice sit unmolested on lowest heat for about 45 minutes.  Check the texture.  If it isn’t soft enough yet, let it sit another 15 minutes.

Or just use a rice cooker.

Image

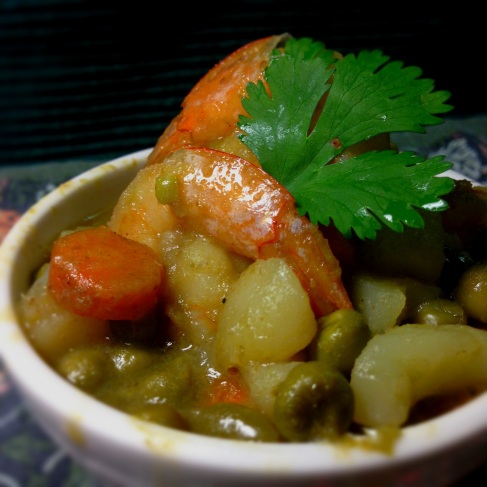
Green Curry Coconut Shrimp

INGREDIENTS

1 4oz can green curry paste

1 14oz can coconut milk (lite or not – your call)

1 potato – peeled & cut into cubes

3 carrots – chopped

1 cup peas

1 lb shrimp – cleaned

1 TBS brown sugar

1 TBS sugar

1/4 cup heavy cream (optional)

Cilantro for garnish

Lime wedges (optional)

DIRECTIONS

Put everything in a pot & simmer until the vegetables are tender.  You can elect to put the shrimp in after the veggies are cooked to avoid overcooking the shrimp.

Serve with rice & garnish with chopped cilantro & lime wedges.

PRINT THIS RECIPE

Image

Cauliflower Piccata with Red Cargo Rice & Roasted Beets

1 Comment


All Photos © Christine Elise McCarthy 2013

To see images of my past posts & get links to the recipes – look on my Pinterest board – HERE.

~

Yesterday, I attended my first acting class with Risa Bramon Garcia.  She has one of the most impressive resumes I have ever seen – casting, directing, producing.  Look at it HERE – and start from the bottom & work up.  Just incredible.   Anyway, it was a terrifying but gratifying afternoon. I only mention this because I wasn’t able to start dinner I got back from class.  This meant starting dinner much later than usual.  This meant I was starving by the time it was done & too impatient to properly photograph it.  So – apologies for the under-documented process & the redundant imagery of the finished product.

Chicken Piccata is one of the dishes I miss most, having given up eating poultry & red meat about 25 years ago.  I like mine very lemony.  Replacing the chicken with cauliflower satisfied me completely.  You could use some sort of seafood option if the cauliflower isn’t substantial enough for you.

The red cargo rice can be replaced by any rice you prefer but here is a little info on the red rice from Wikipedia:

Red Cargo rice is a type of non-glutinous long grain rice, similar to brown rice, in that it is unpolished rice, only the color of the bran is red, purple or maroon. Only the husks of the rice grains are removed during the milling process, retaining all the nutrients, vitamins and minerals intact in the bran layer and in the germ.

Red rice is a good source of thiamin (vitamin B1), riboflavin (vitamin B2), fibreiron and calcium. The flavor of cooked red cargo rice is generally more sweet and nutty, and the rice is more chewy than standard white polished rice. Red rice takes longer to cook than white rice, but not as long as brown rice. Soaking the rice in water for at least 30 minutes before cooking produces a softer texture.

I love beets!  I find that a great many people who think they hate them do not hate them if they try a home roasted one.  It frustrated me immensely when people dig in their heels & refuse to even try them.   I can’t understand their controversial nature.  I think they should be as broadly accepted as carrots – earthy & sweet.  But they are not.  Maybe due to canned ones & watery, bland ones in shreds on low end salad bars.  Anyway – I love them.  They are robust & delicious & gorgeous & good for you.  If you have never had a home roasted beet – I beg you to try them at least once.

Finally – please forgive my obsession with my food ring.  I just love making little food towers.  I know I make them too often & they have lost their impact but fuck it.  I like them!  🙂

Image

Image

Image

PRINT THIS RECIPE

Red Cargo Rice

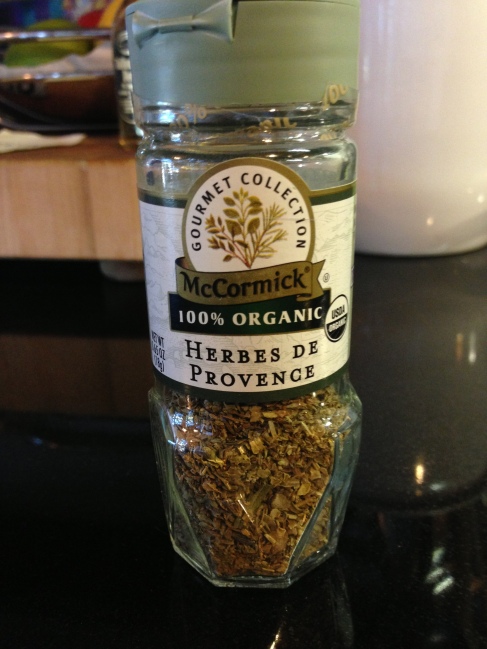
Basically – cook the rice (or whatever rice you select) according to the directions.  I cooked mine in vegetable stock rather than water & I added 1 TBS of Herbes de Provence.

ImageImage

Image

Roasted Beets

Cut the tops & bottoms off the beets.   Place them on a sheet of foil & drizzle with olive oil & salt. I added about a dozen garlic cloves to the beets because I love roasted garlic.  Wrap the beets up & roast at 400 degrees for about 45 minutes or until tender.  Remove & chop the beets into course chunks.

ImageImageImage

Cauliflower Piccata

INGREDIENTS

1 large head cauliflower

2 cups vegetable stock

6 cloves garlic (or less) – chopped

4 TBS butter

2 TBS fresh lemon juice

3 TBS capers

3 TBS flour (I used potato flour)

olive oil

S&P to taste

Chopped parsley as garnish

DIRECTIONS

Heat the oven to 375.

Cut the leaves off the cauliflower & cut the head in half.  Try to cut at least one 1/2 inch steak of the thickest part of each half & continue outward until it is all cut.  Place on a baking sheet & drizzle with olive oil & a little salt.  Roast for 20 minutes or so or until the edges start to brown.

While the cauliflower roasts, heat the butter in a sauce pan.  Add the garlic & saute until it softens.  Add the flour & stir to blend.  Saute over medium-high heat until it begins to brown.  Be careful not to burn the butter.  This flour mixture will thicken pretty quickly.  Add the veggie stock in small increments, allowing the sauce to thicken each time.  When all the stock is incorporated, add the lemon & capers.

Serve your cauliflower with the lemon sauce poured over it & plenty of fresh parsley.  Additional lemon wedges are nice so folks can add more lemon if they desire.  The sauce is nice over the rice, too.

PRINT THIS RECIPE

Image